

I love dramatic play for kids! I love giving them toys or activities where they can be creative in pretend play!
You might have seen my blog post a while back where I shared this lemonade stand I made them.
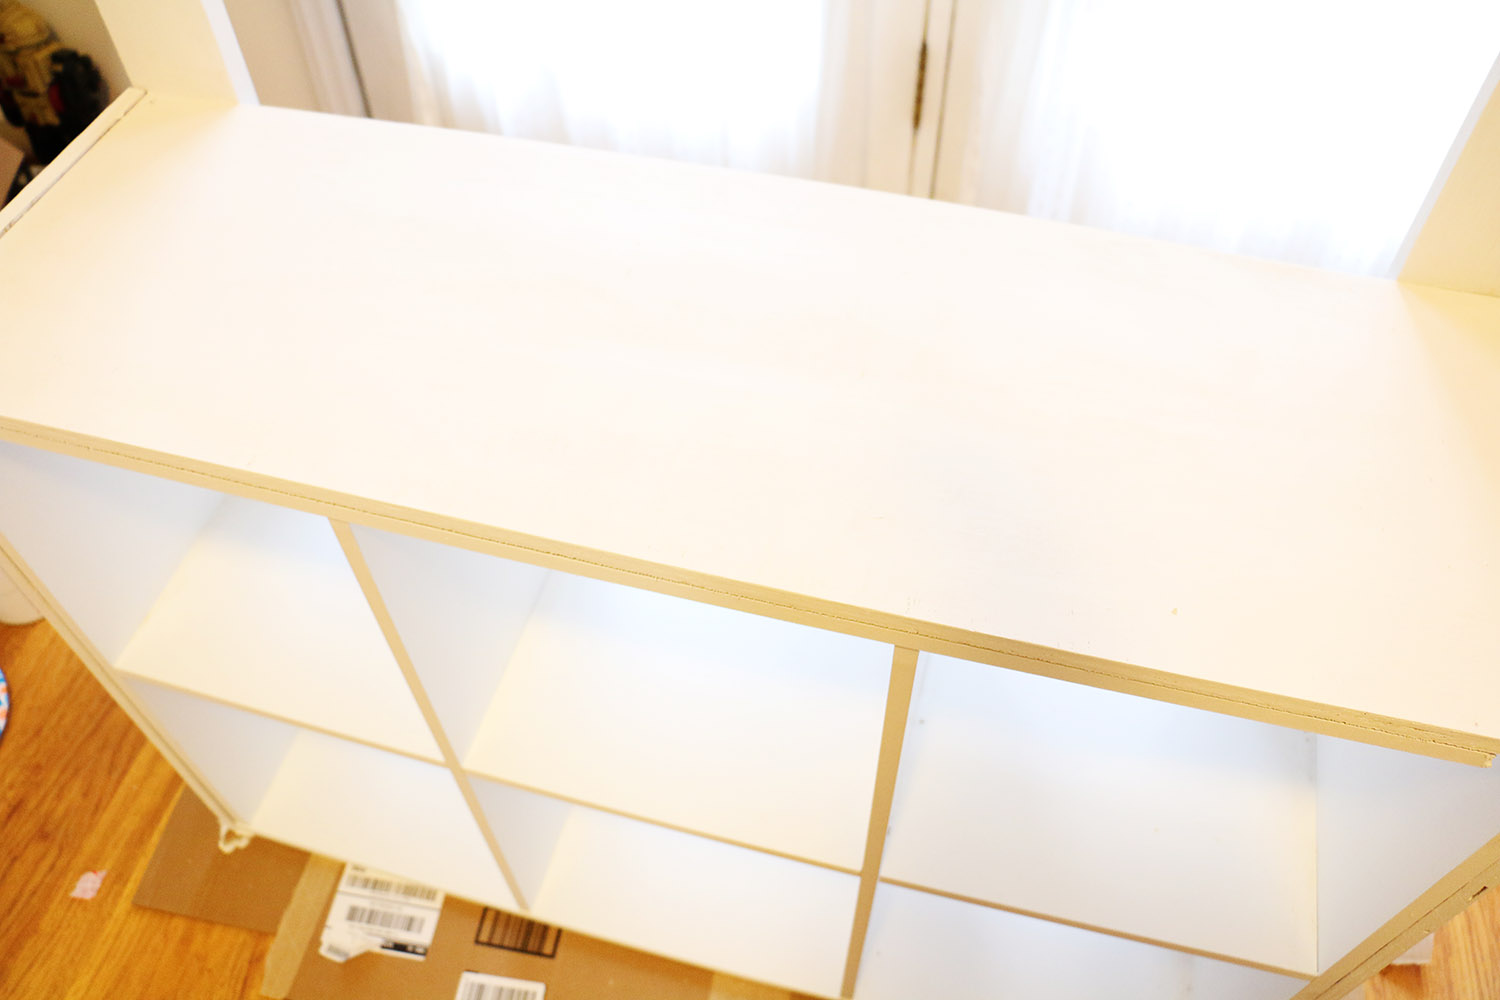
We brought it inside to use for their market/grocery store in their room. Micah Man broke it the other day. He was apparently too strong for his own good. He Hulk Smashed it pretty good. It was a sit down and come to Jesus moment for the little guy. But I realized I needed to make it a little more sturdy when I fixed it.
I’m throwing a Garden themed party this week as one of the featured parties in my Video Party Course!
(eek so excited!! filming and editing all week long! launching in June!)
SOO… I decided to get some wood at the store and create a sturdier version using
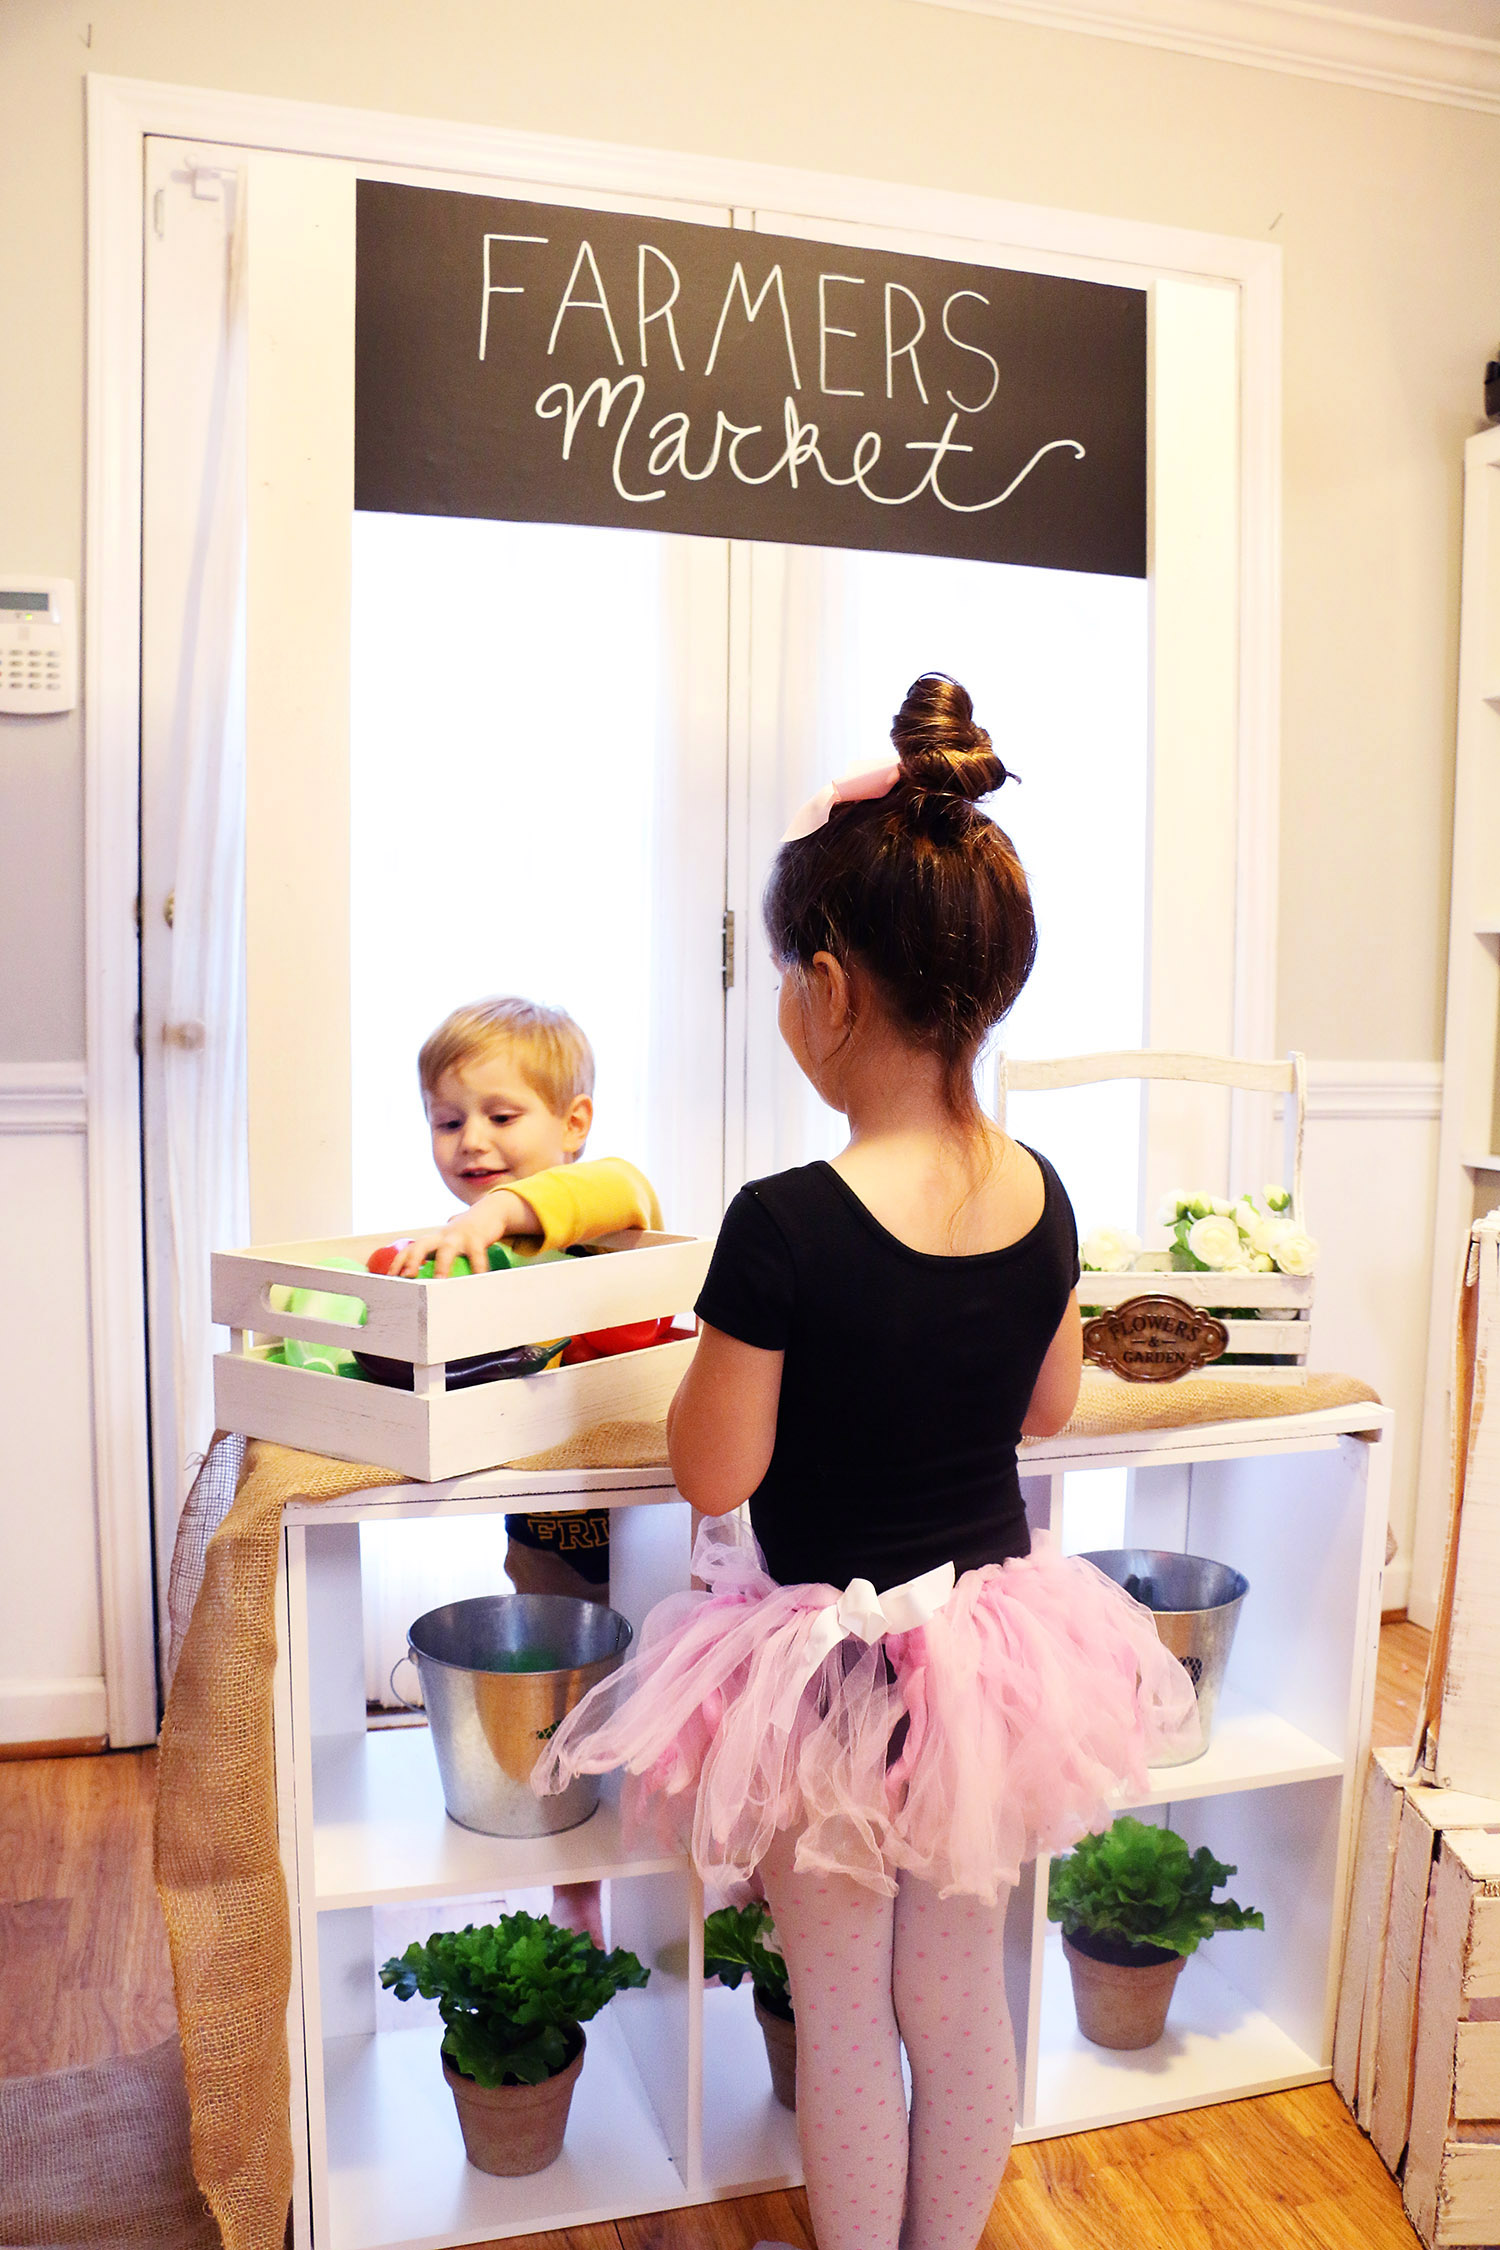
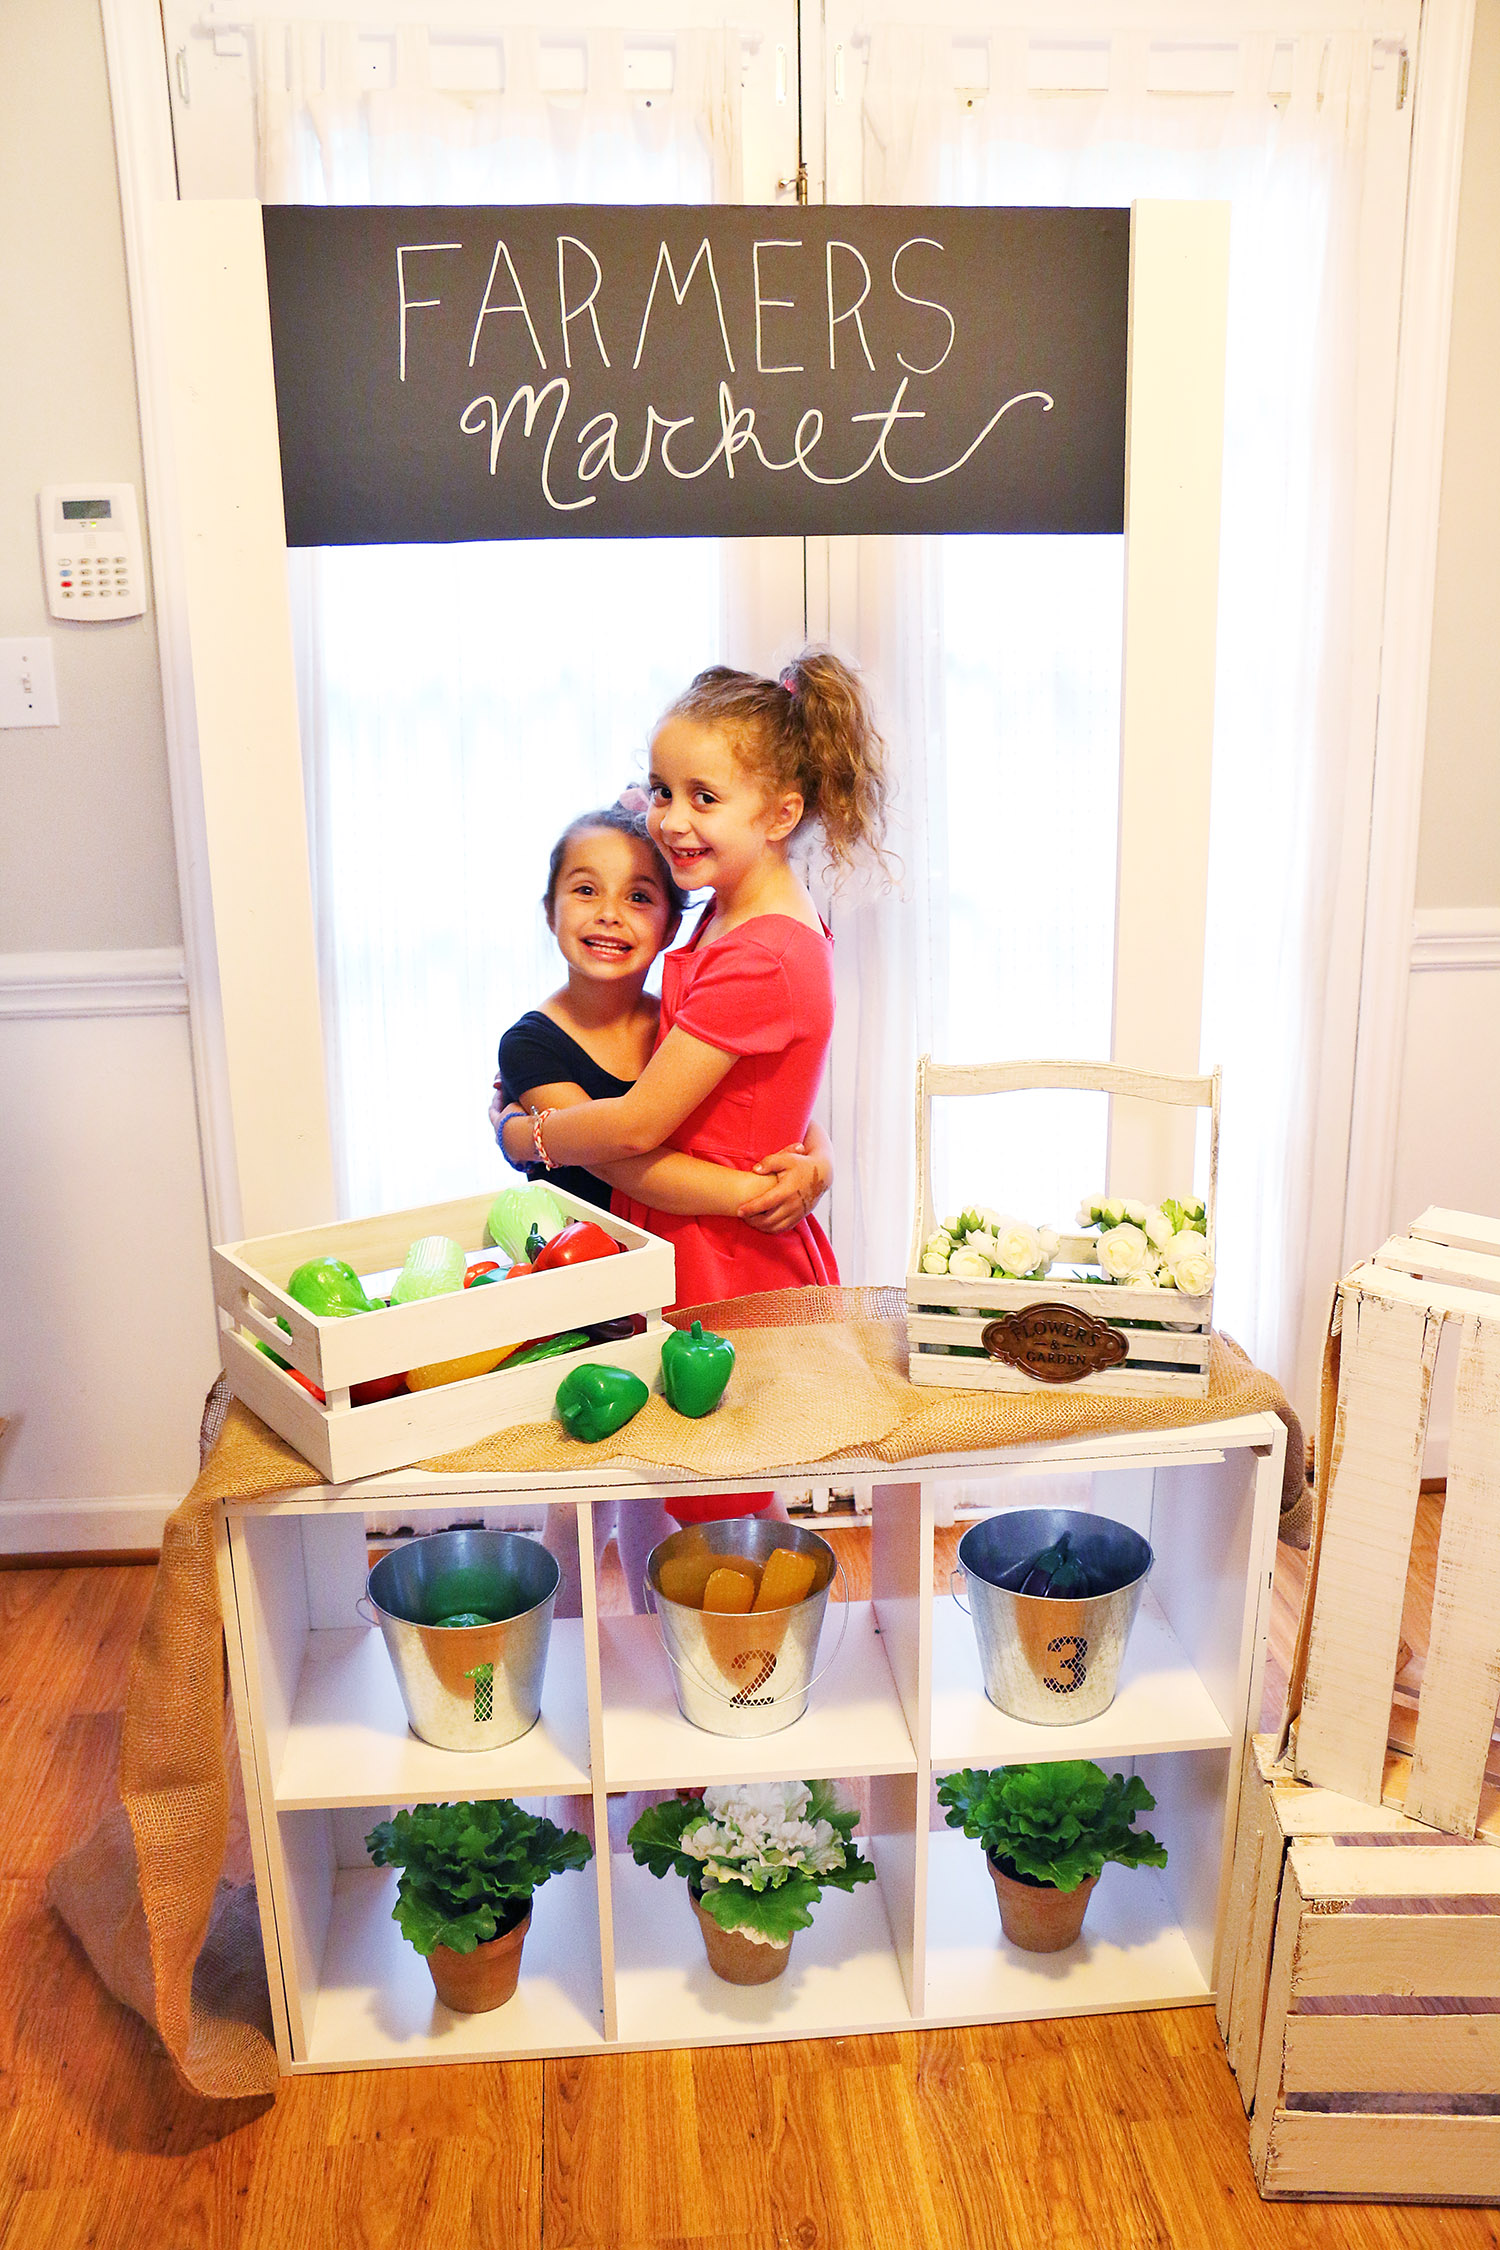
the existing cubbies from the previous project. I love how it turned out!!
You could work up the same idea with your own cubbies and measurements.
More details below.

This was the previous set up… it was awesome but not as sturdy as I
needed and the pvc pipes were too easily taken out and used as swords. lol.
This is real life guys.

A few products made this project come together really easily and finished it off nicely!
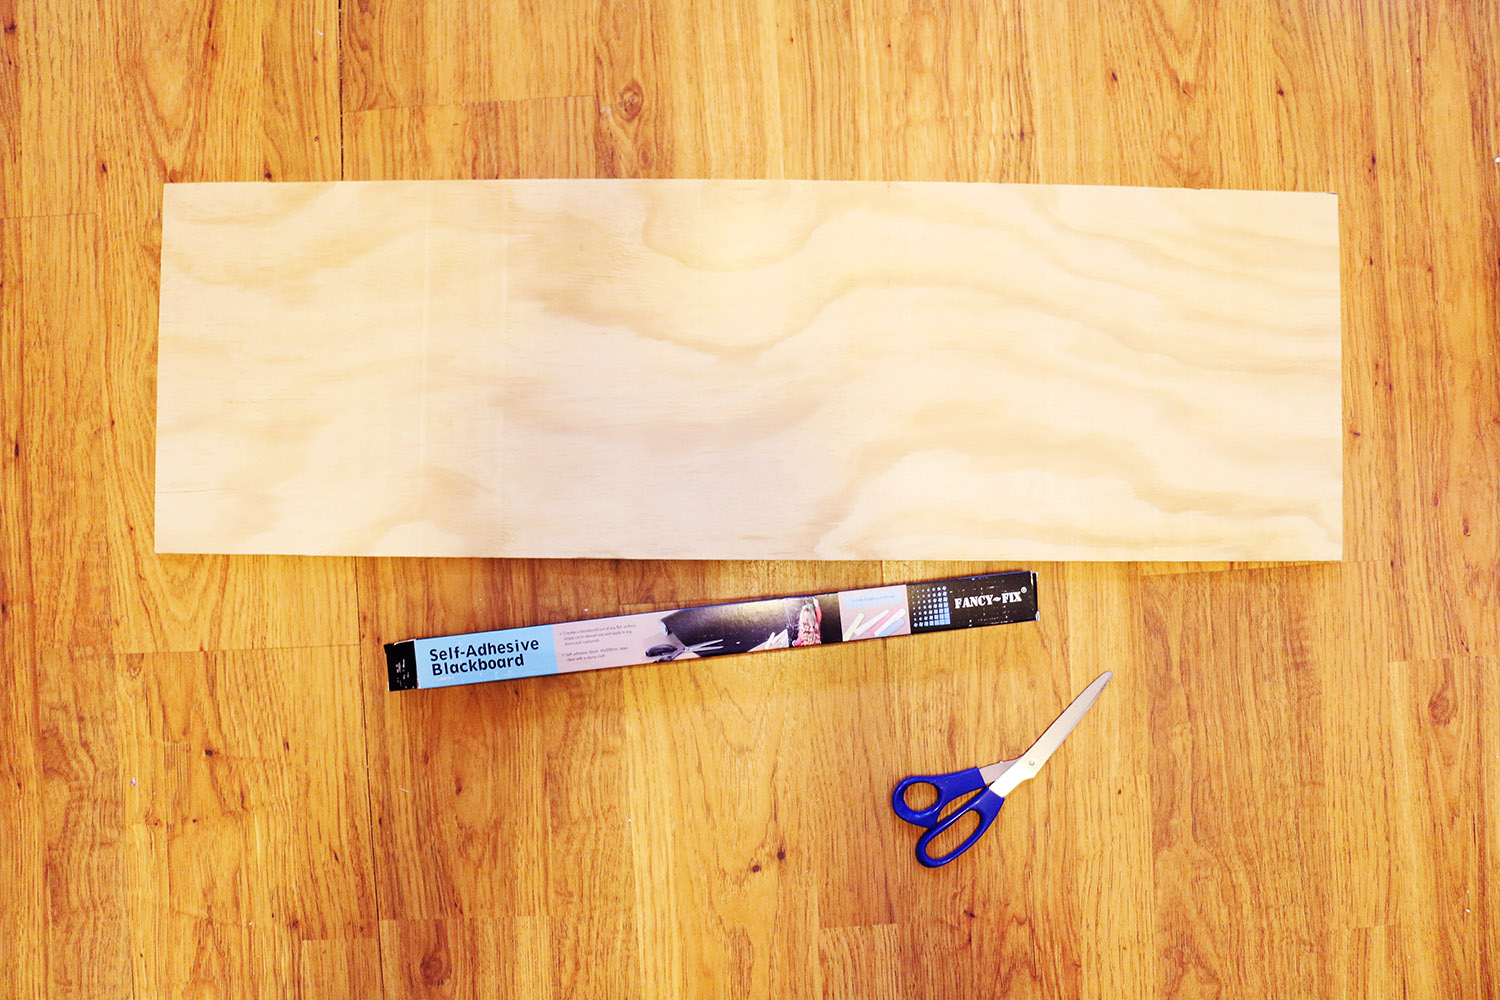
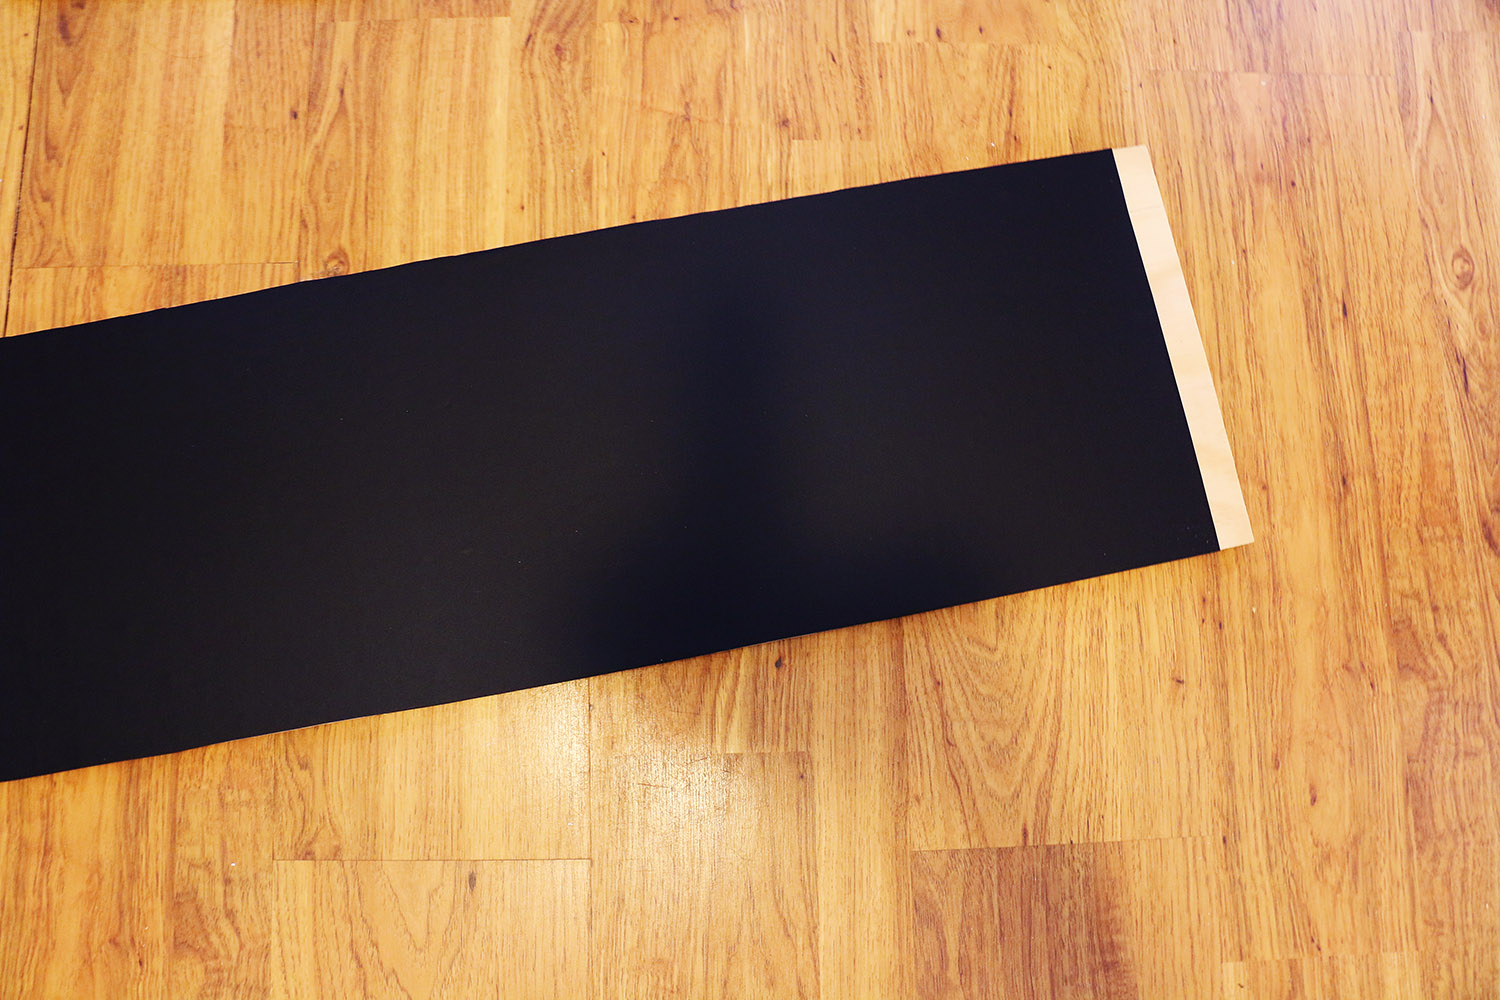
I was originally going to just paint the chalkboard part on…but then Fancy-Fix sent these
amazing Adhesive Chalkboard Rolls and they made it look so much more polished!
They also sent me some chalkboard markers that ACTUALLY wipe off with WATER.
I tested ladies. Because I know so many of you are looking for ones that don’t take all of
your elbow strength and some weird pinterest concoction to wipe it off.
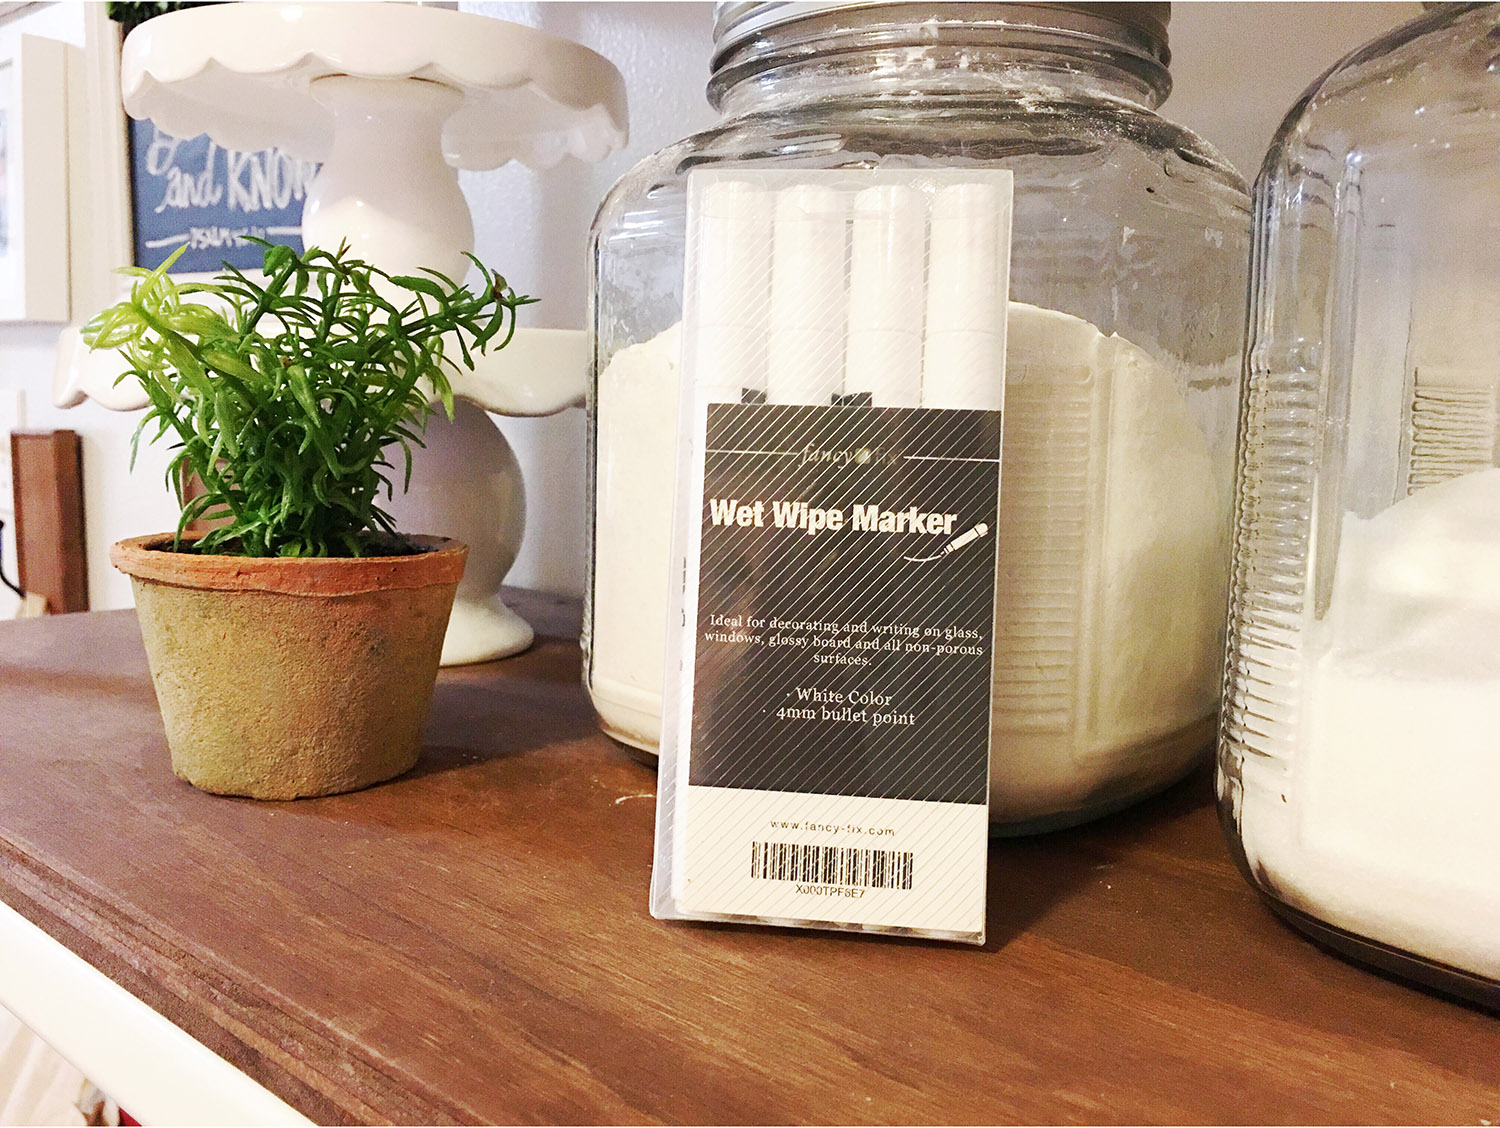
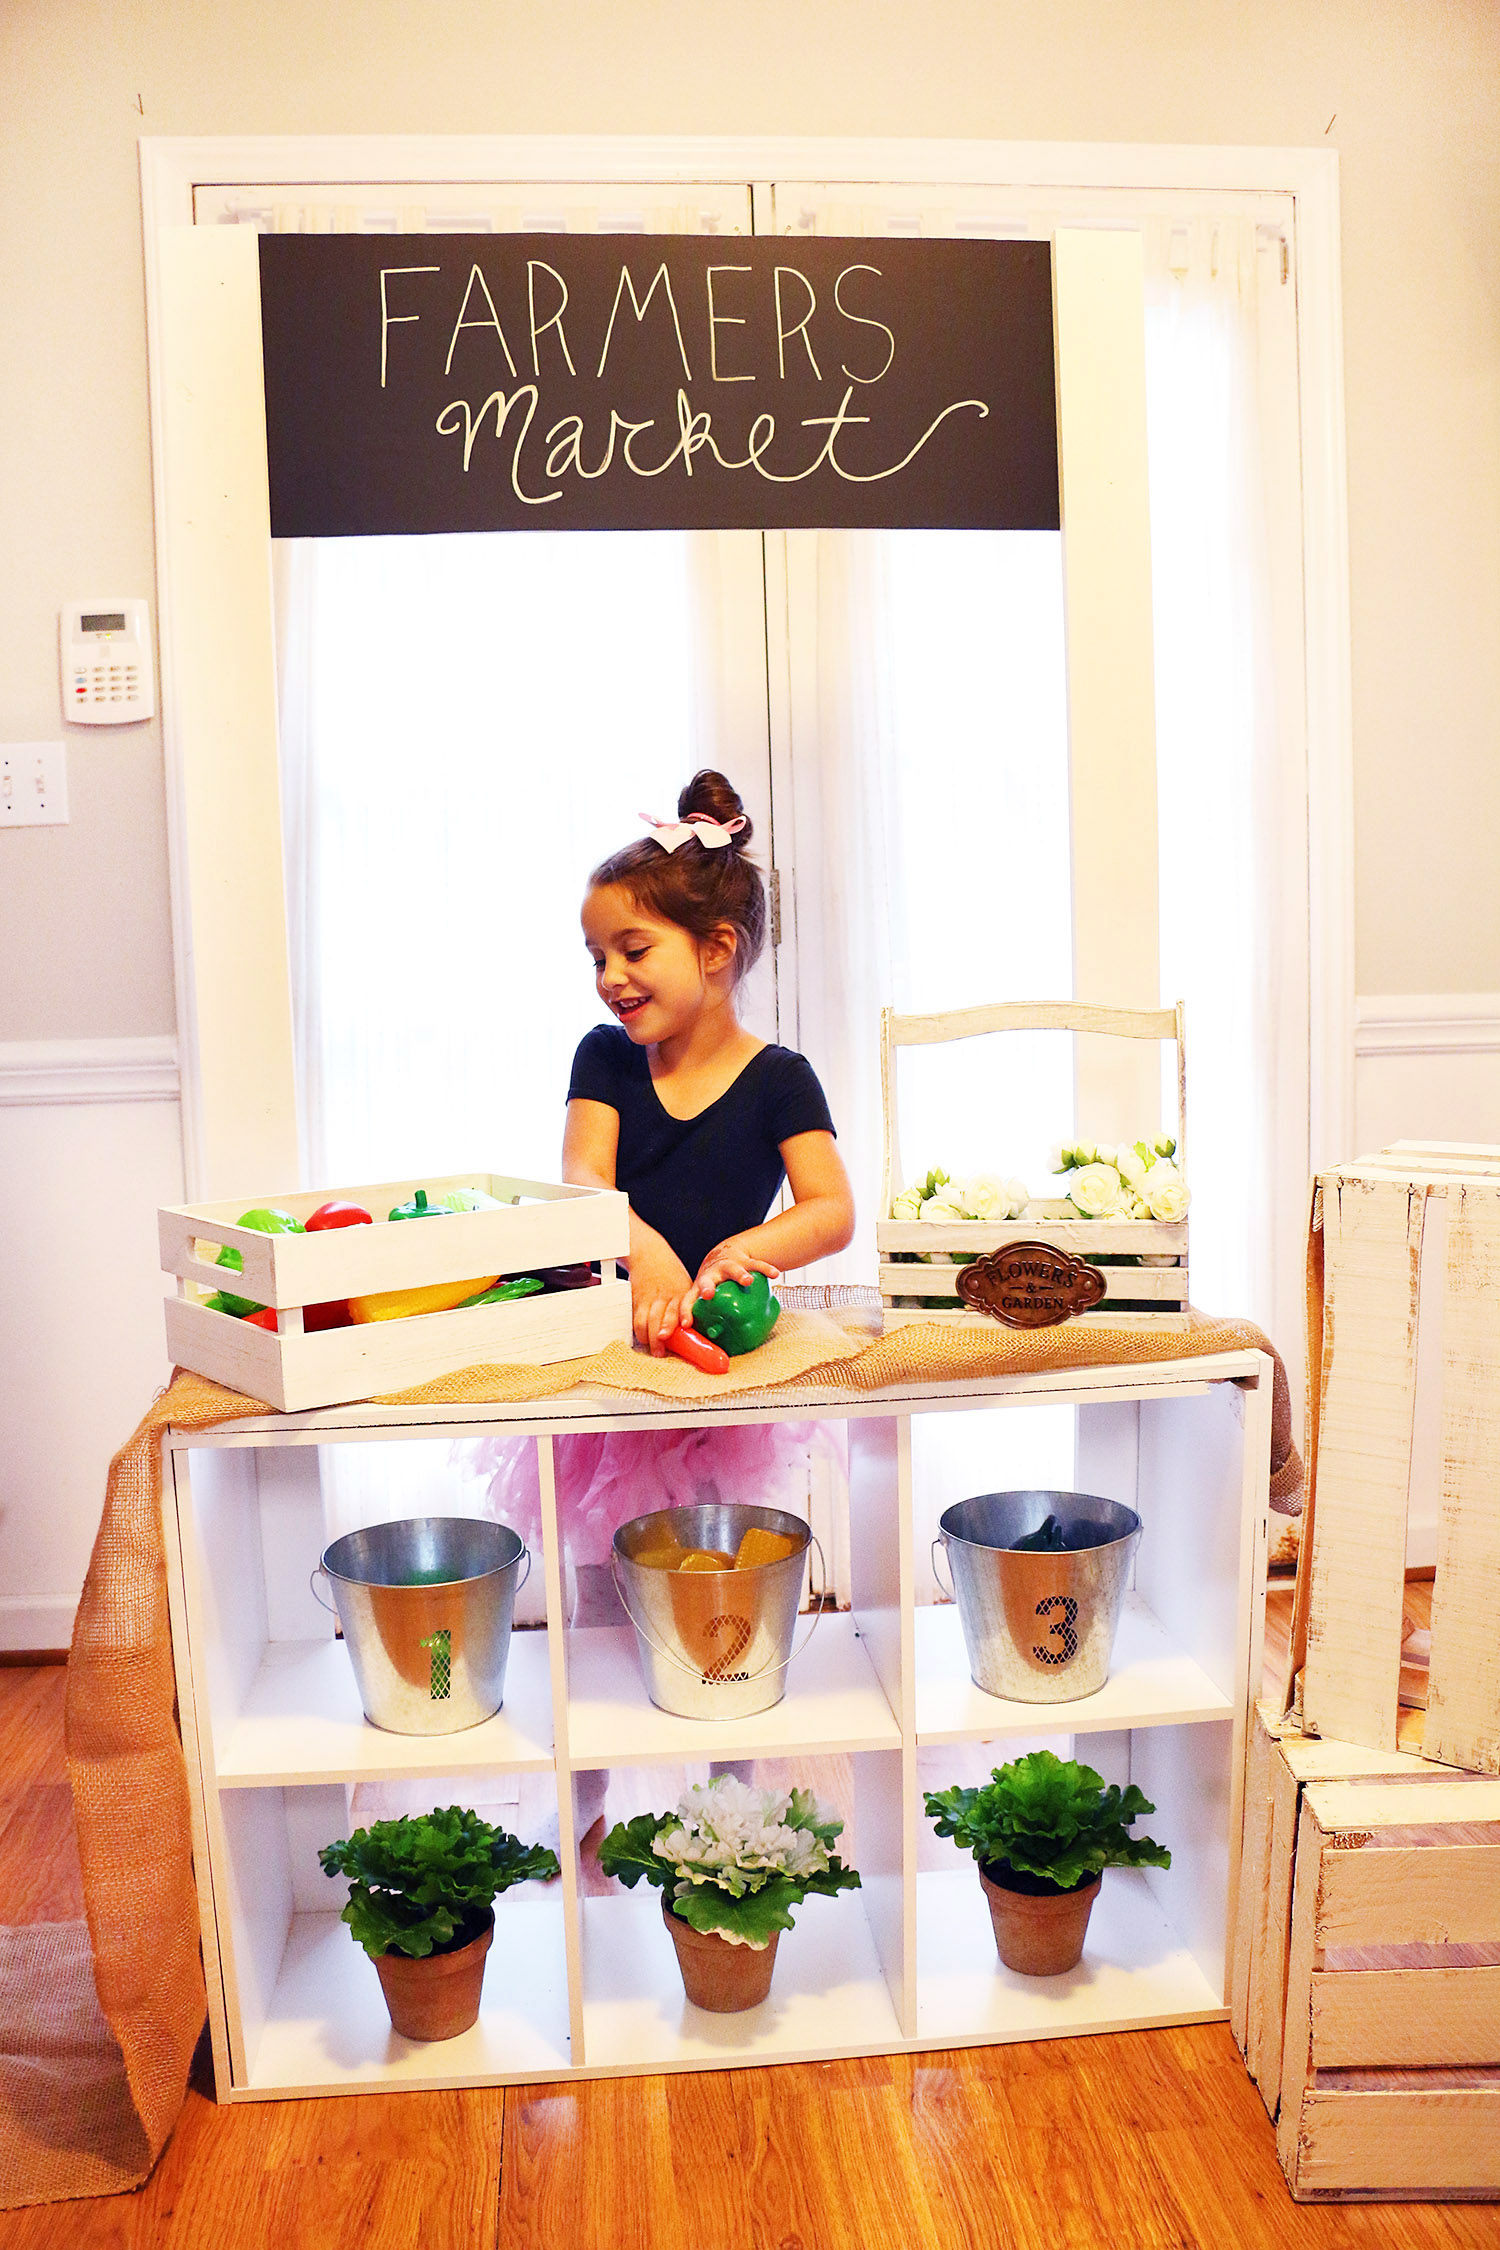
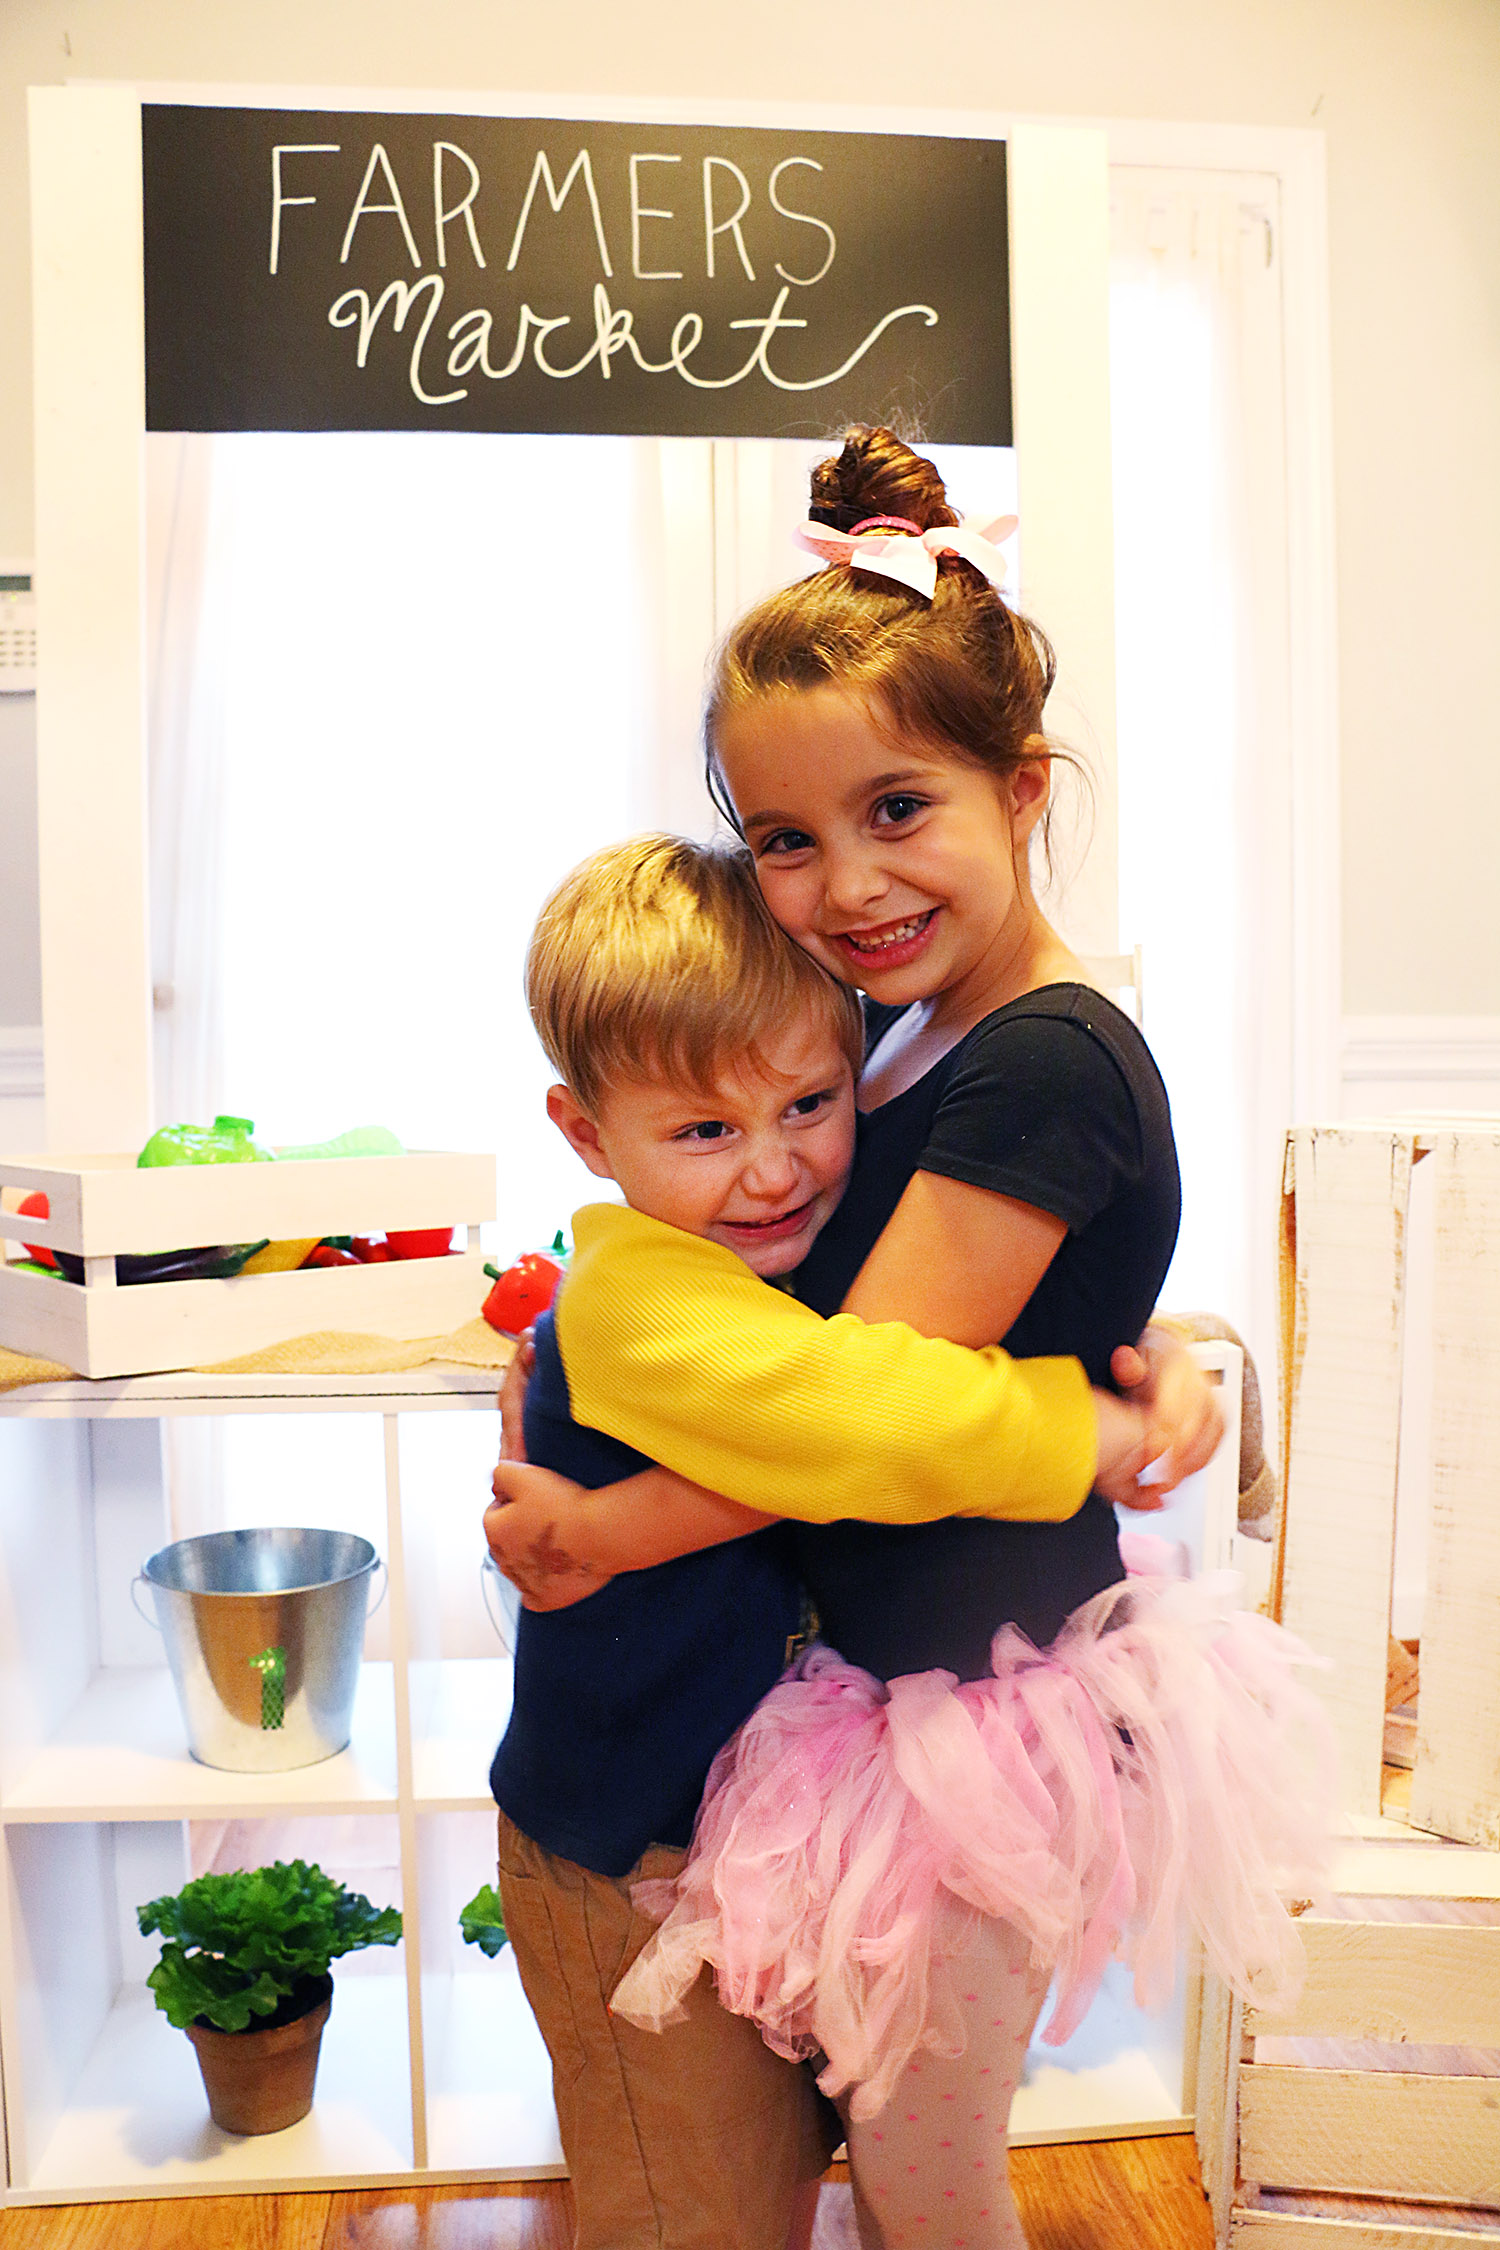
They write like a dream! I’m excited to be able to change it up for whatever the kids are playing.
Farmer Market, Bakery, Workshop, Lemonade stand… Super hero store.
We have lots of ideas for how to use this stand. ;)
HOW I MADE IT.
I’m writing this post giving you the general inspiration!
You can take it away from here!
I used the original cubbies that I already had as the base.
I got ours at Home Depot.
They have similar designs at ALL the stores.
IKEA, Target, Walmart, Kmart etc etc.
Measure the tops and sides of your cubbies.
I got one big panel of plywood. (Over by the smaller panels of wood.)
I was able to use that sheet to make all my cuts at home, but if you don’t have a saw
you can give them your measurements at Home Depot and they can help you out!
I would have made my measurements and cuts a little differently
(let the top be longer and hang over the side pieces)
BUT.. we had four kids hovering around us and it was a-get it done now we have to do
other things like make them dinner-kind of moment.
I was able to use the whole panel for my cuts of wood.
I then used two 6 foot pieces of wood to hold up the sign.
I trimmed four or so inches off of those to get the height I wanted.
Ben screwed the big pieces in and then we found our nail gun battery, and finished off the rest with that.
I gave everything a quick sanding with a sanding block. Didn’t go crazy.
Then I gave a quick coat to the new wood with my Rust-oleum Chalk Paint in Linen.
I had some leftover from a previous project. Doesn’t take much!
Next I took my chalkboard adhesive and just cut out the size I needed and stuck it to the board!
It was pretty forgiving as I was lining it up and laying it onto the piece of wood.
I feel like it looks better than if I would have painted it…just a more polished look.
Then we hung it up behind the two tall pieces and nail gunned it on.
Done! Let the playing begin!
I ordered some toy vegetables on Amazon and they arrived earlier today.
Perfect timing!
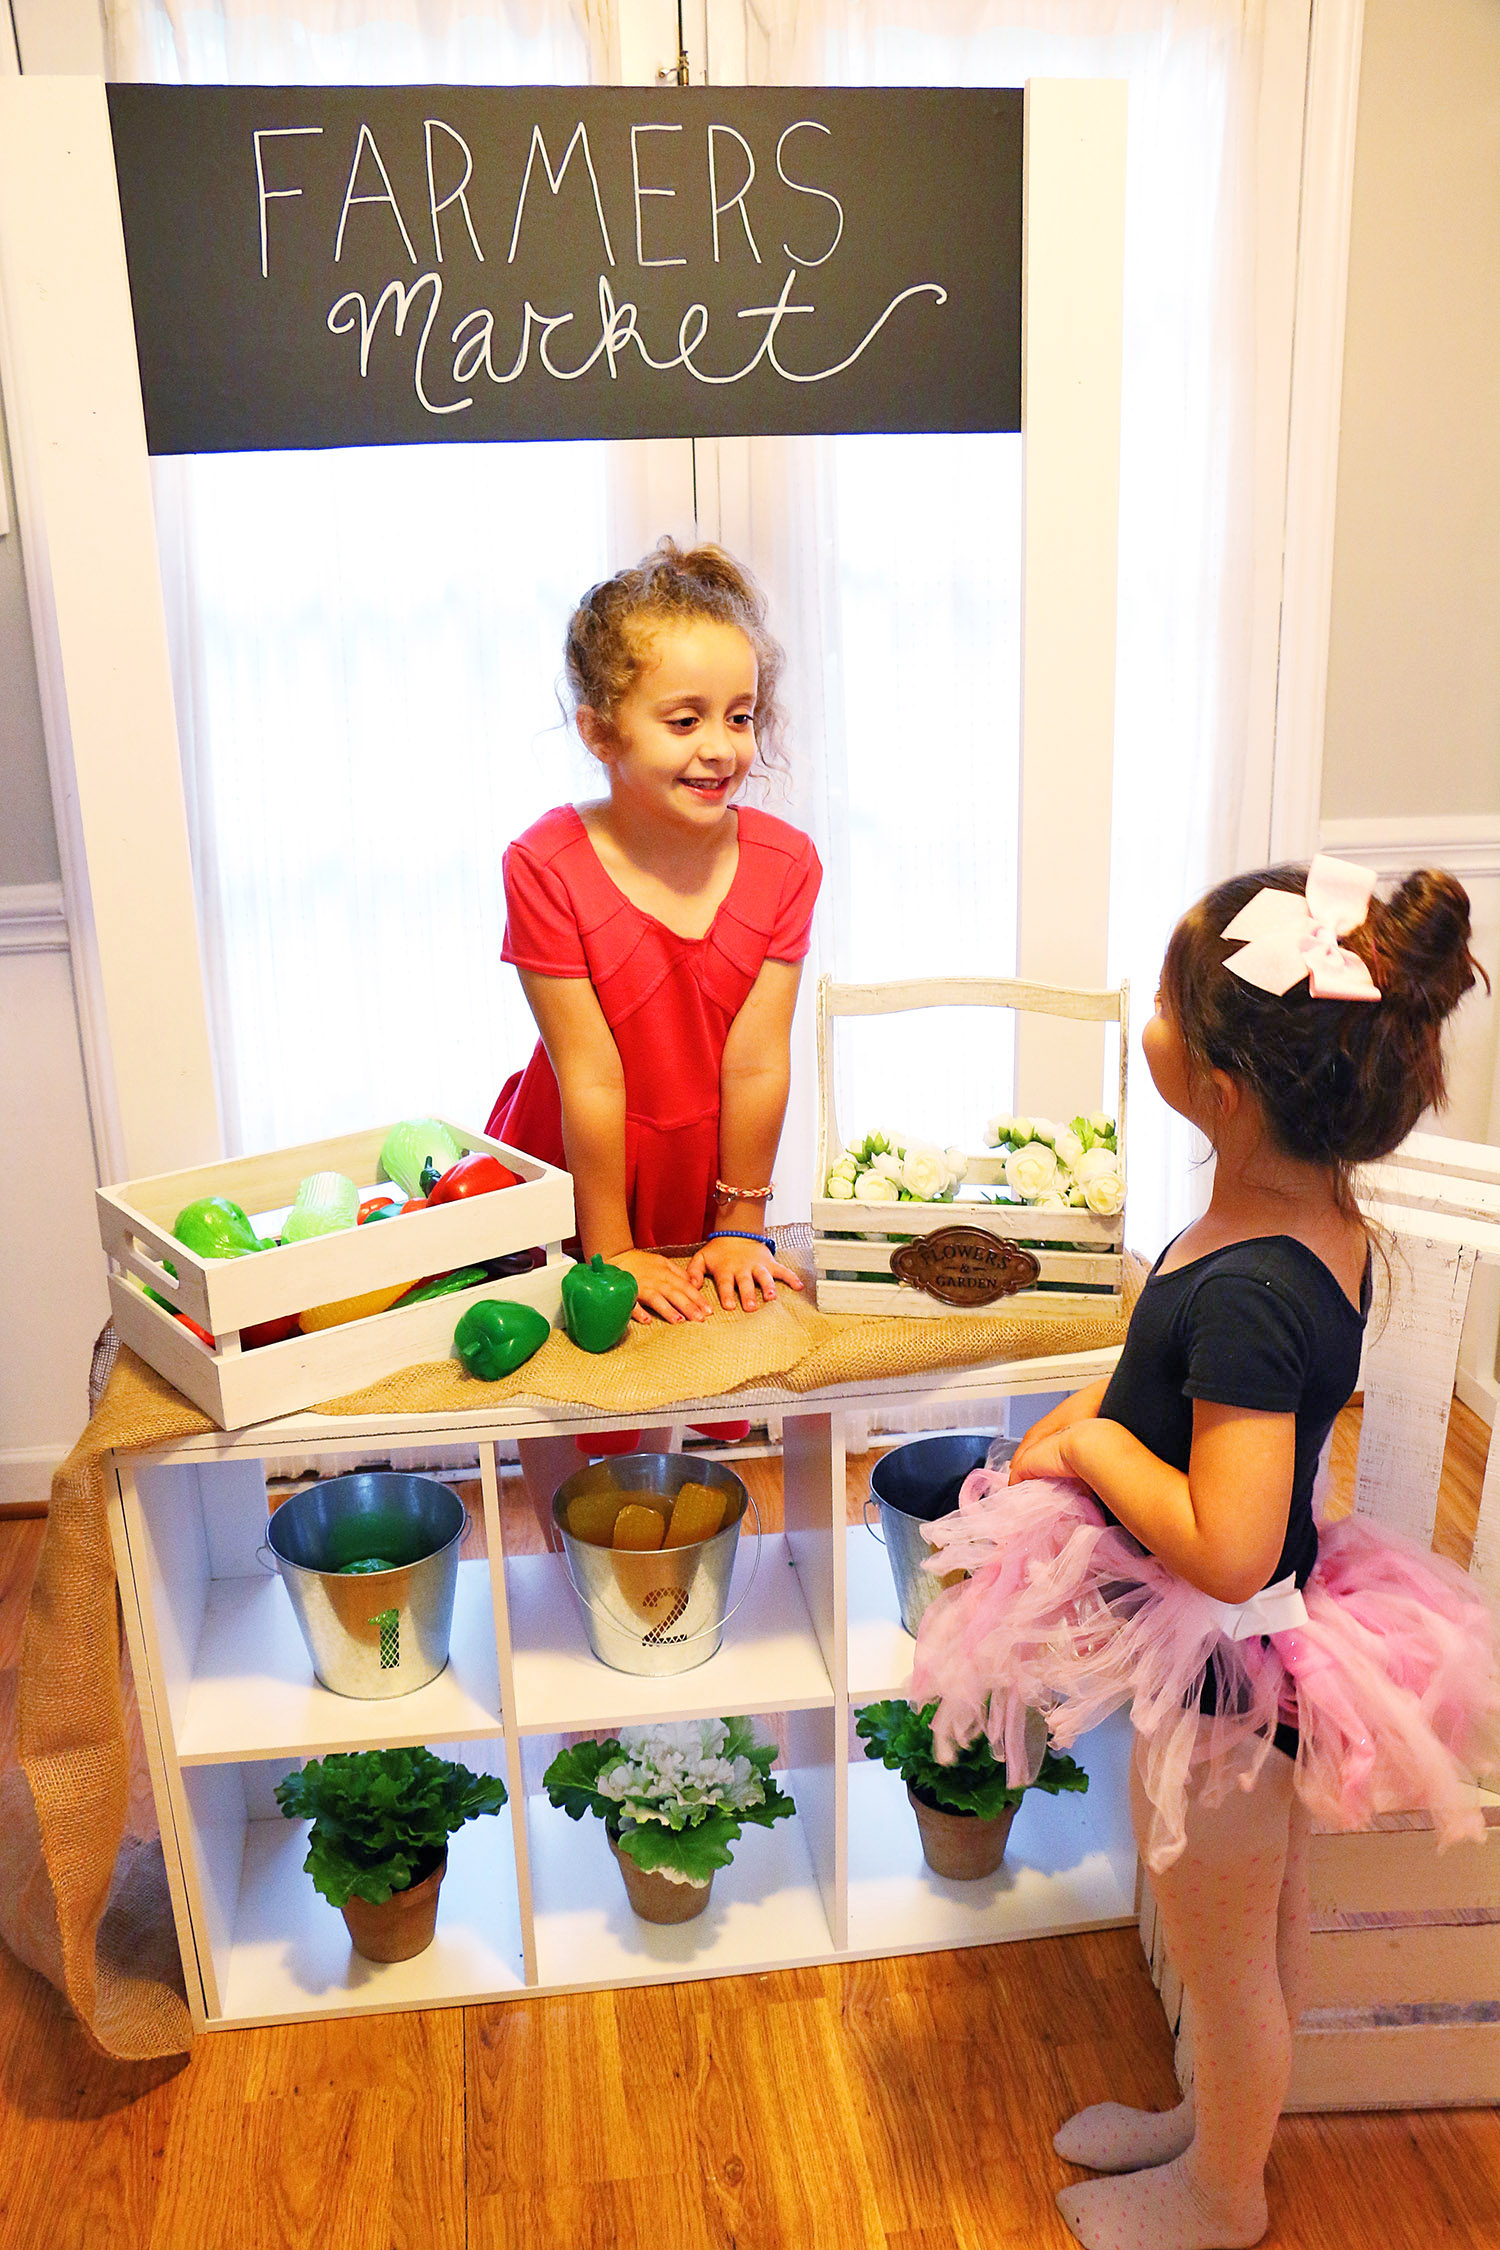
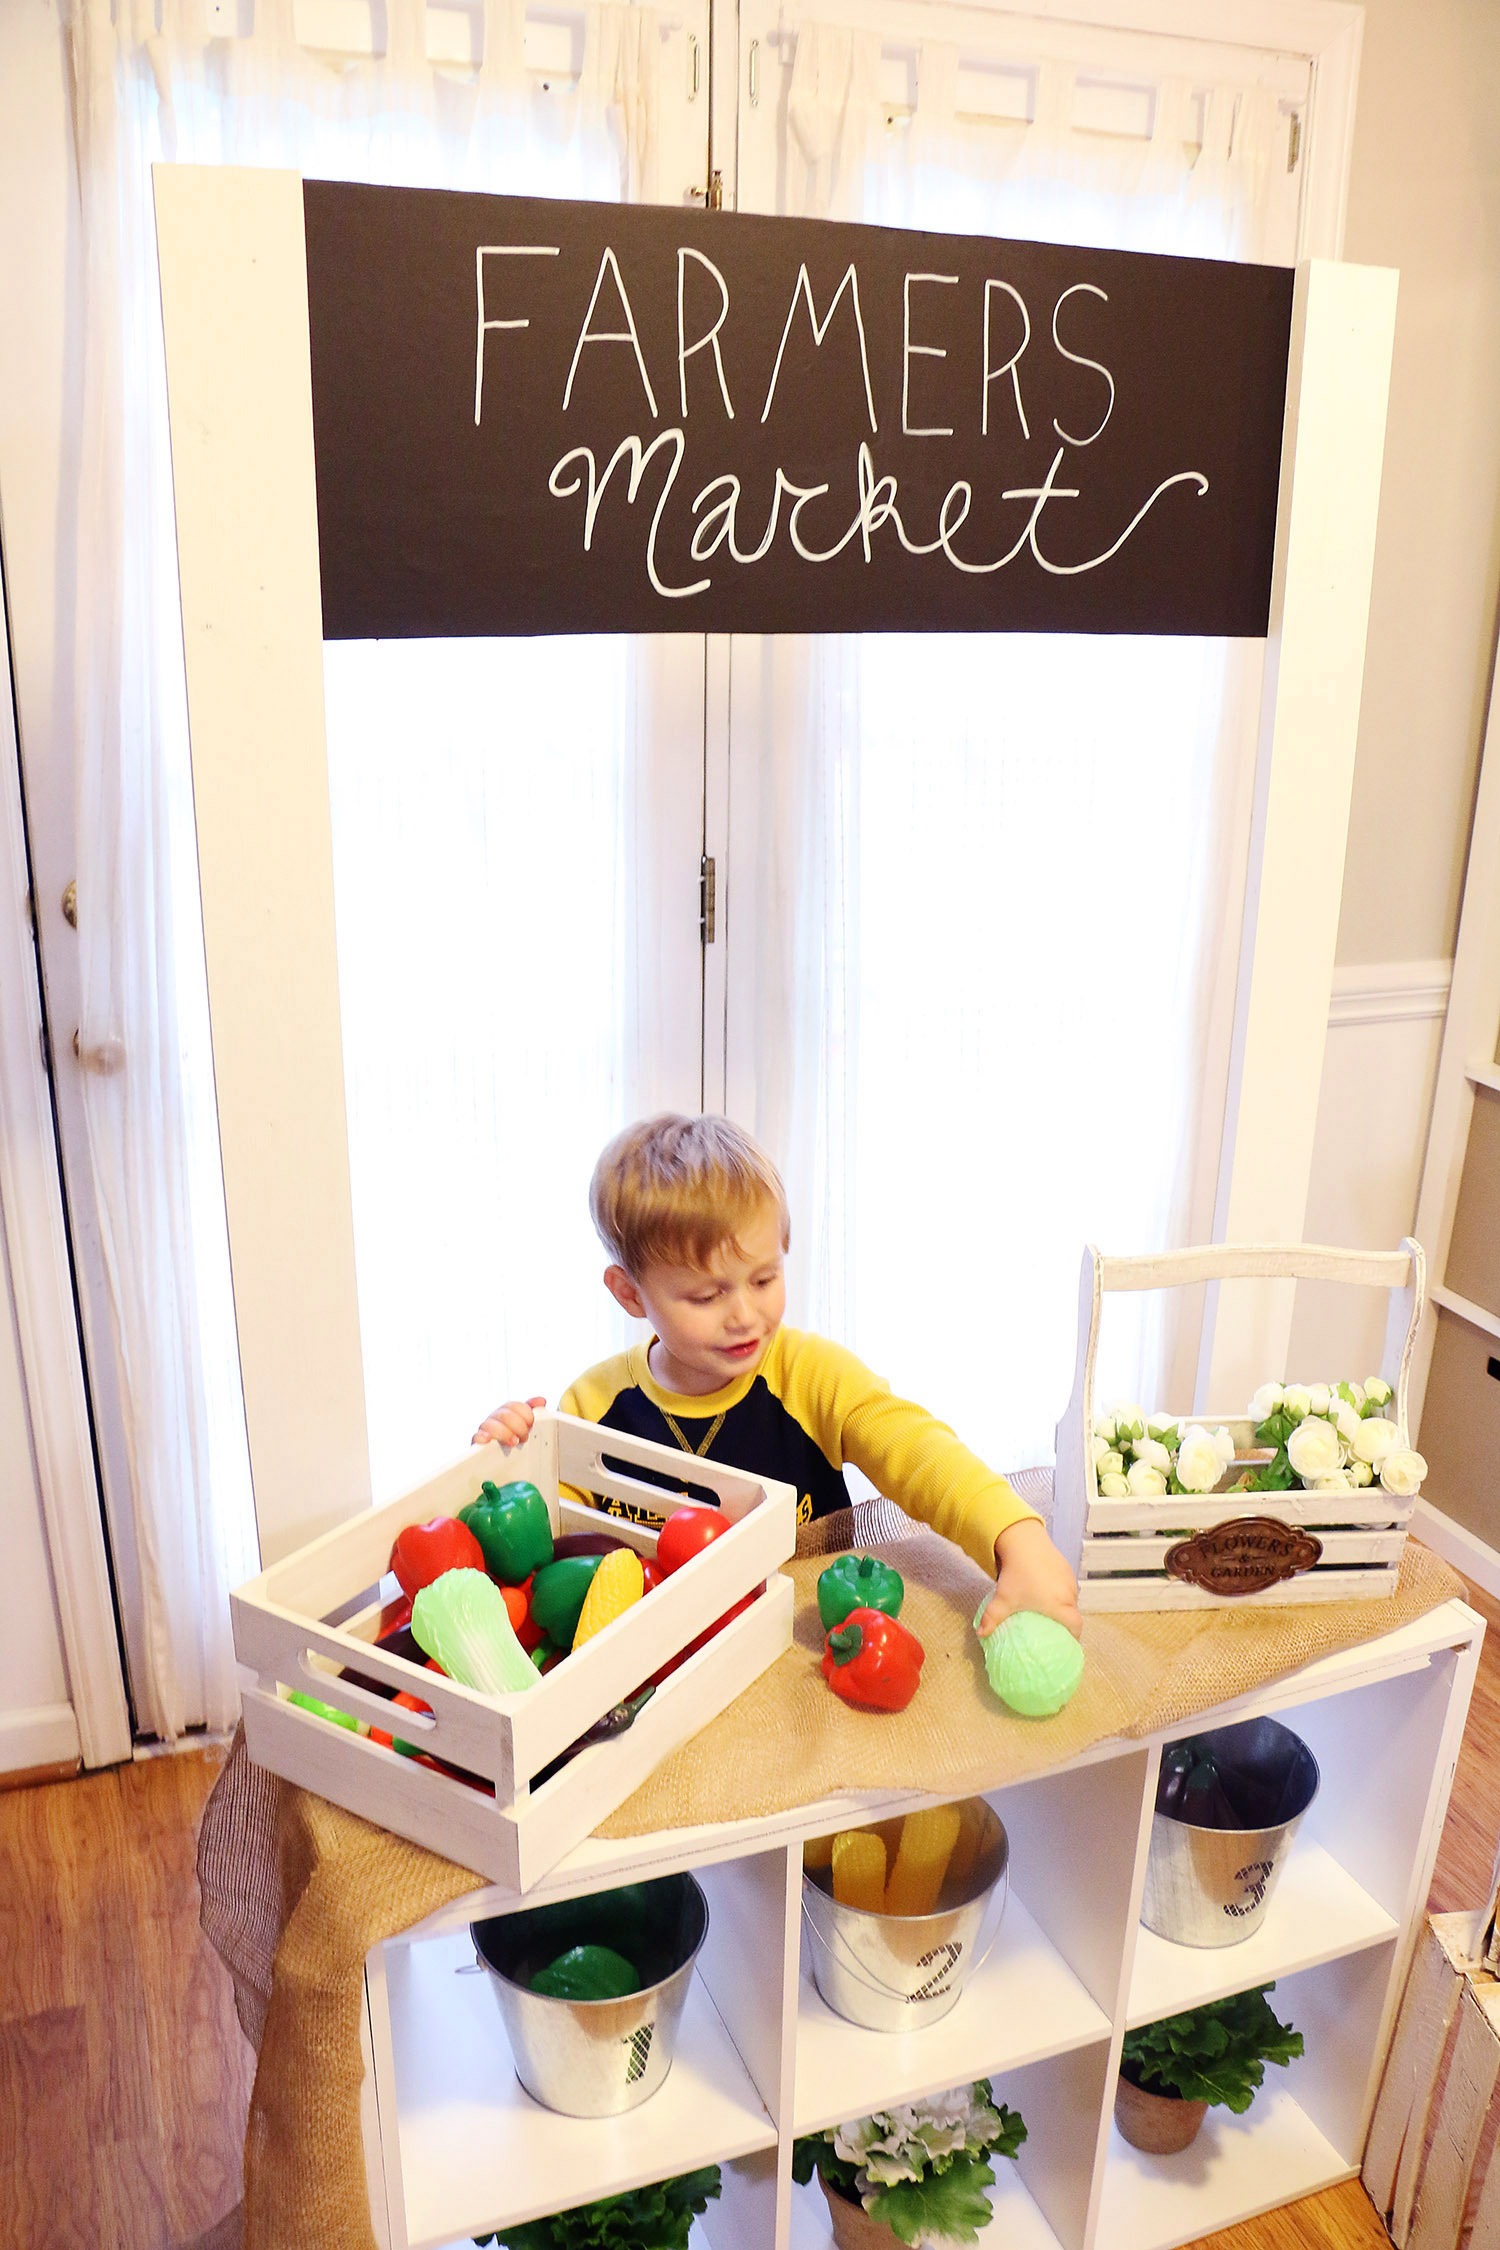

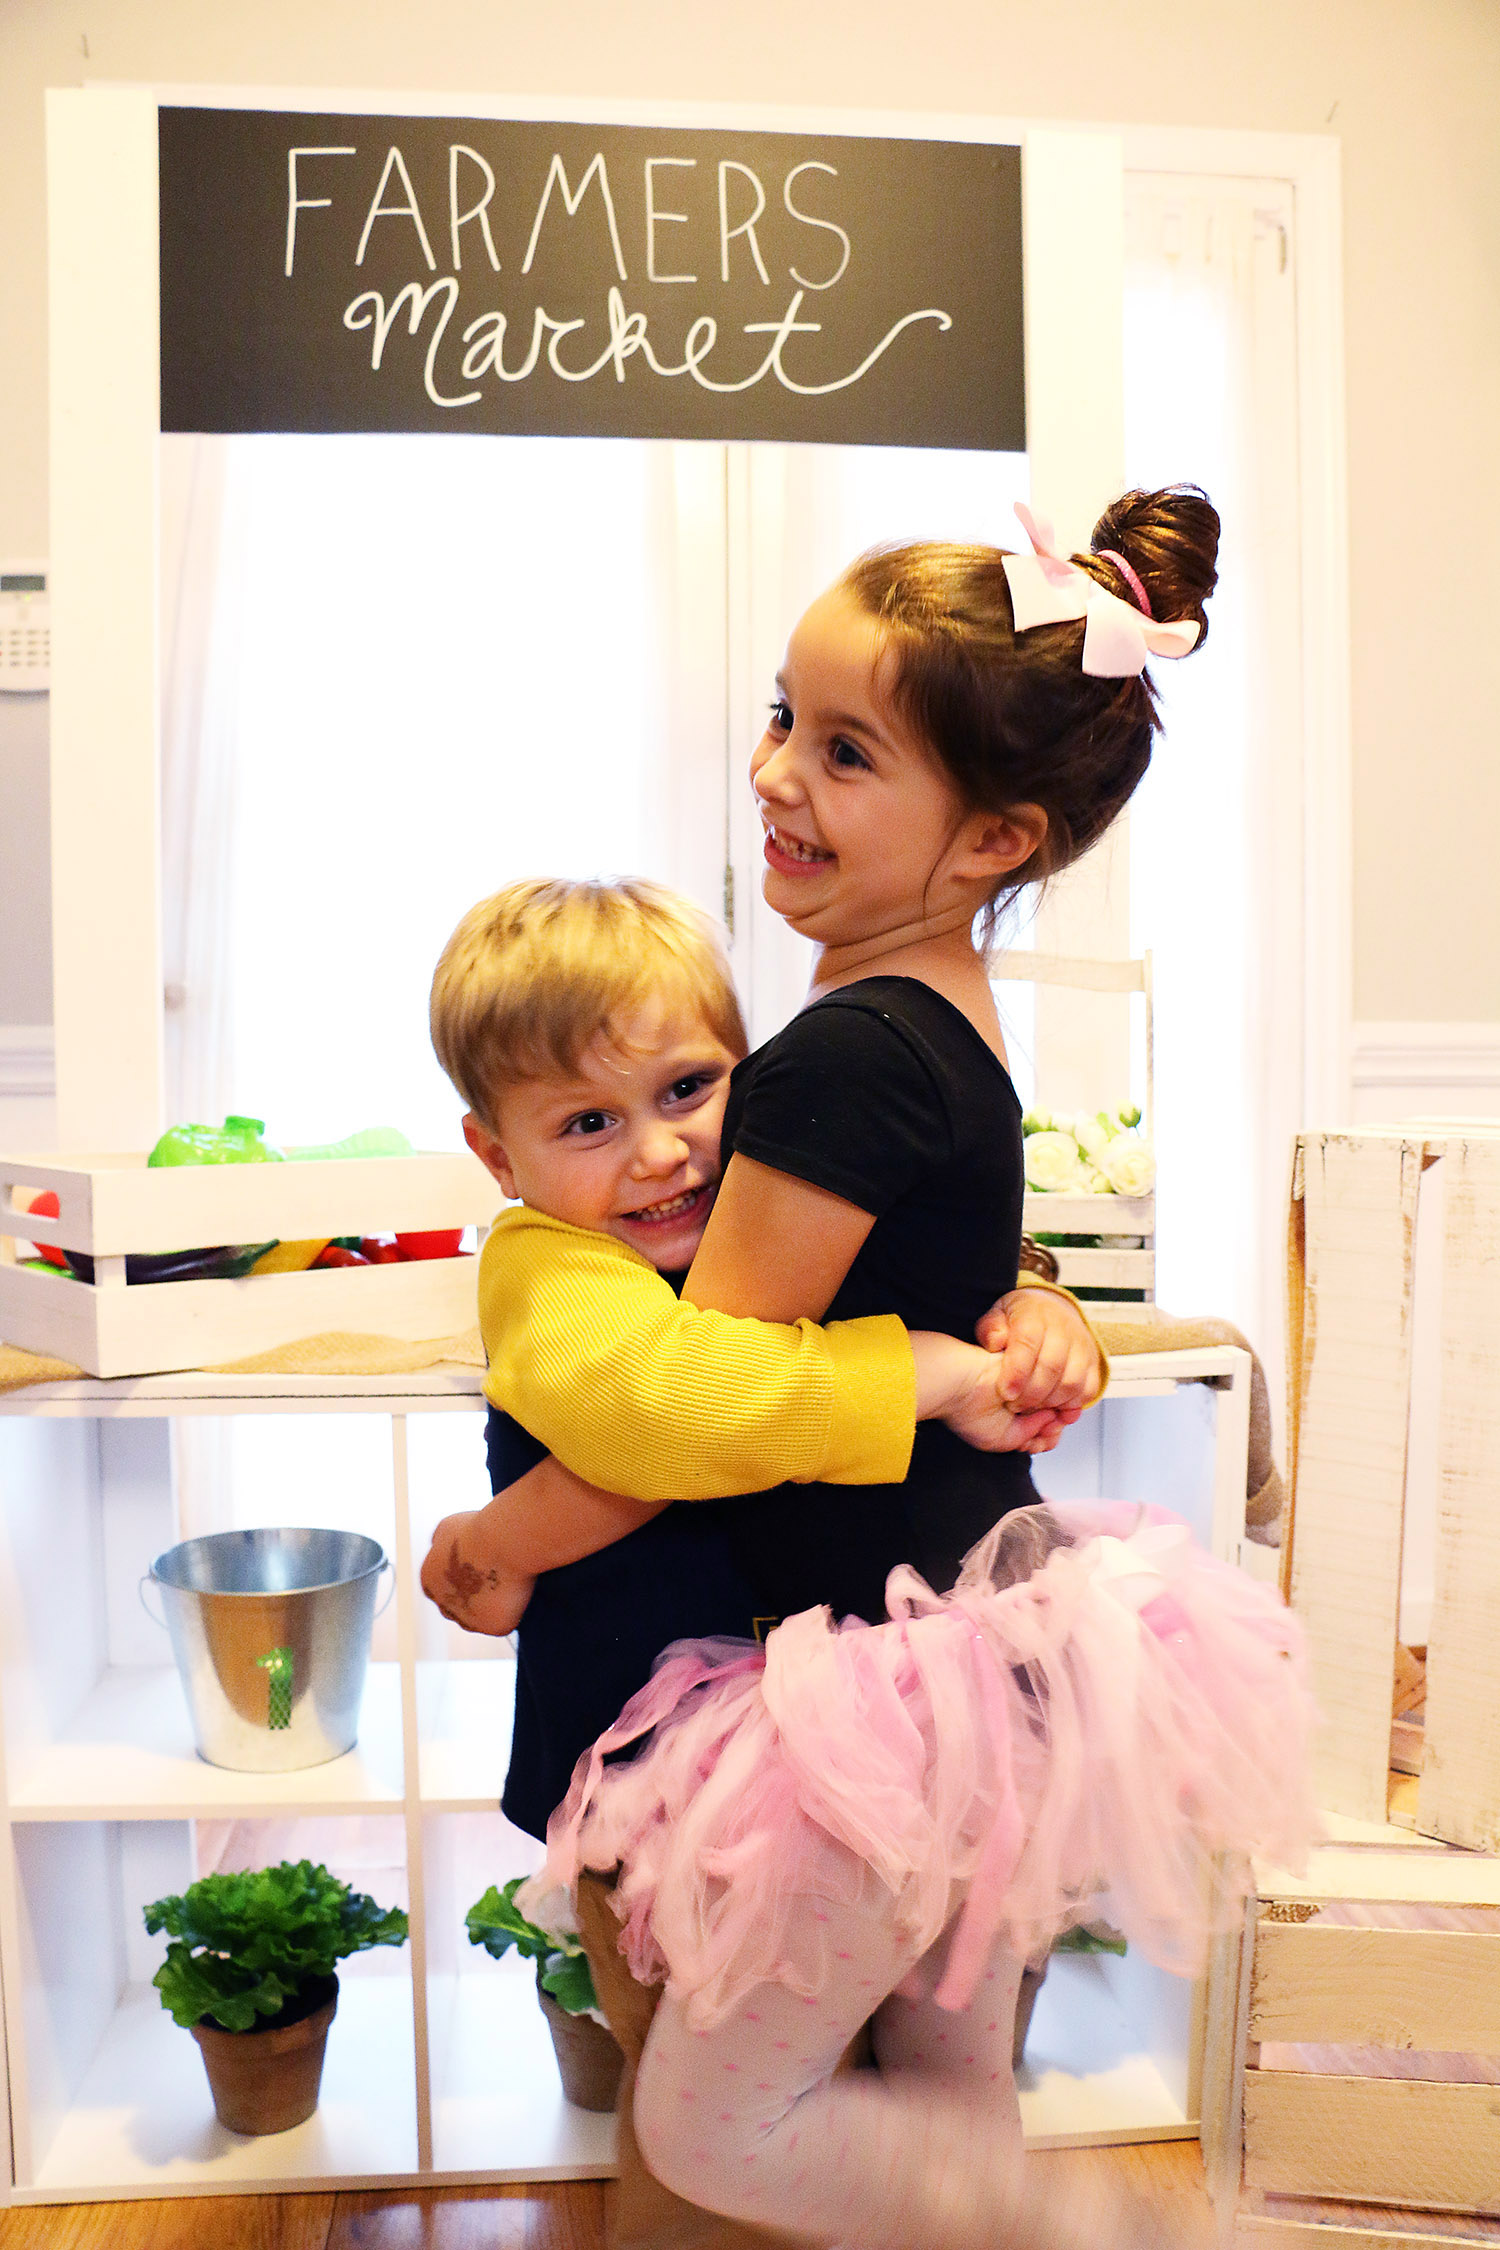
Makes my heart happy seeing how much the kids love playing with it.
They take turns being the customers and worker.
I know it will be put to use often for different things.
Summer is around the corner, so I’m thinking a lemonade stand is in our near future.
Have a great weekend!
Be sure to sign up for my newsletter so you get the info first on my
Party Planning course and can see the garden party set up and fun!
xoxo
Danielle
May 24, 2016 at 10:05 pmOh my word! I love it! I wish I had a big enough house to have something like that in it! Also, your kids are getting so big! They were so little when I first started following you three years ago!
natalie
May 25, 2016 at 8:32 pmI know! they are suddenly big kids. It’s craziness. Thanks for following a long girl!