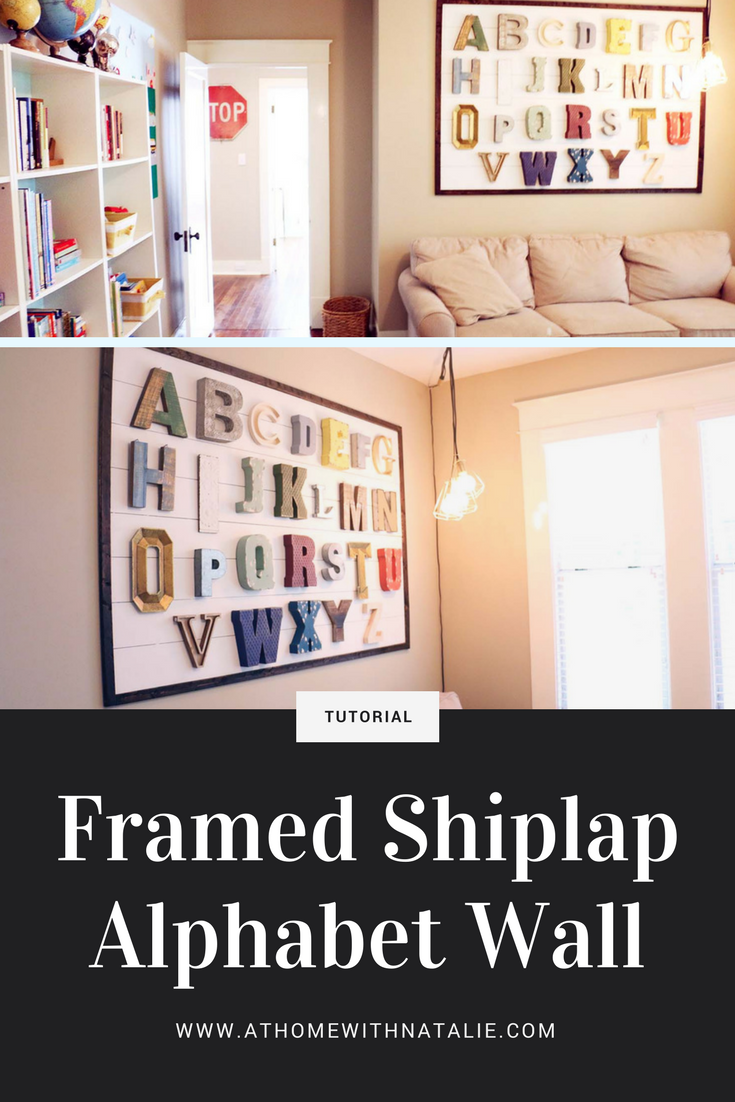
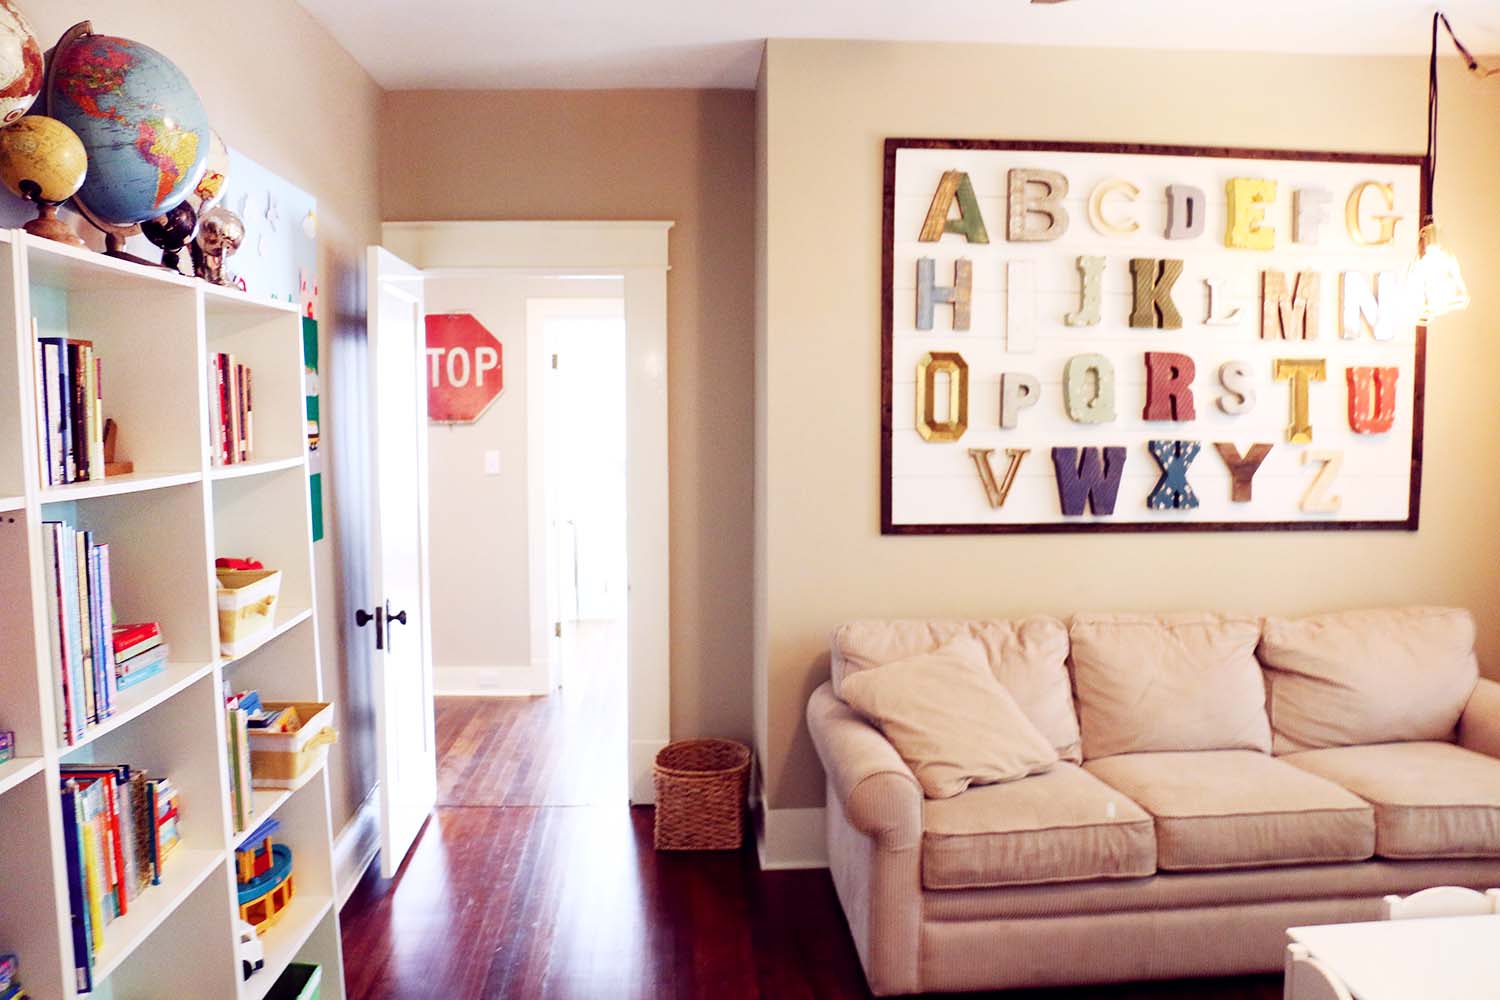
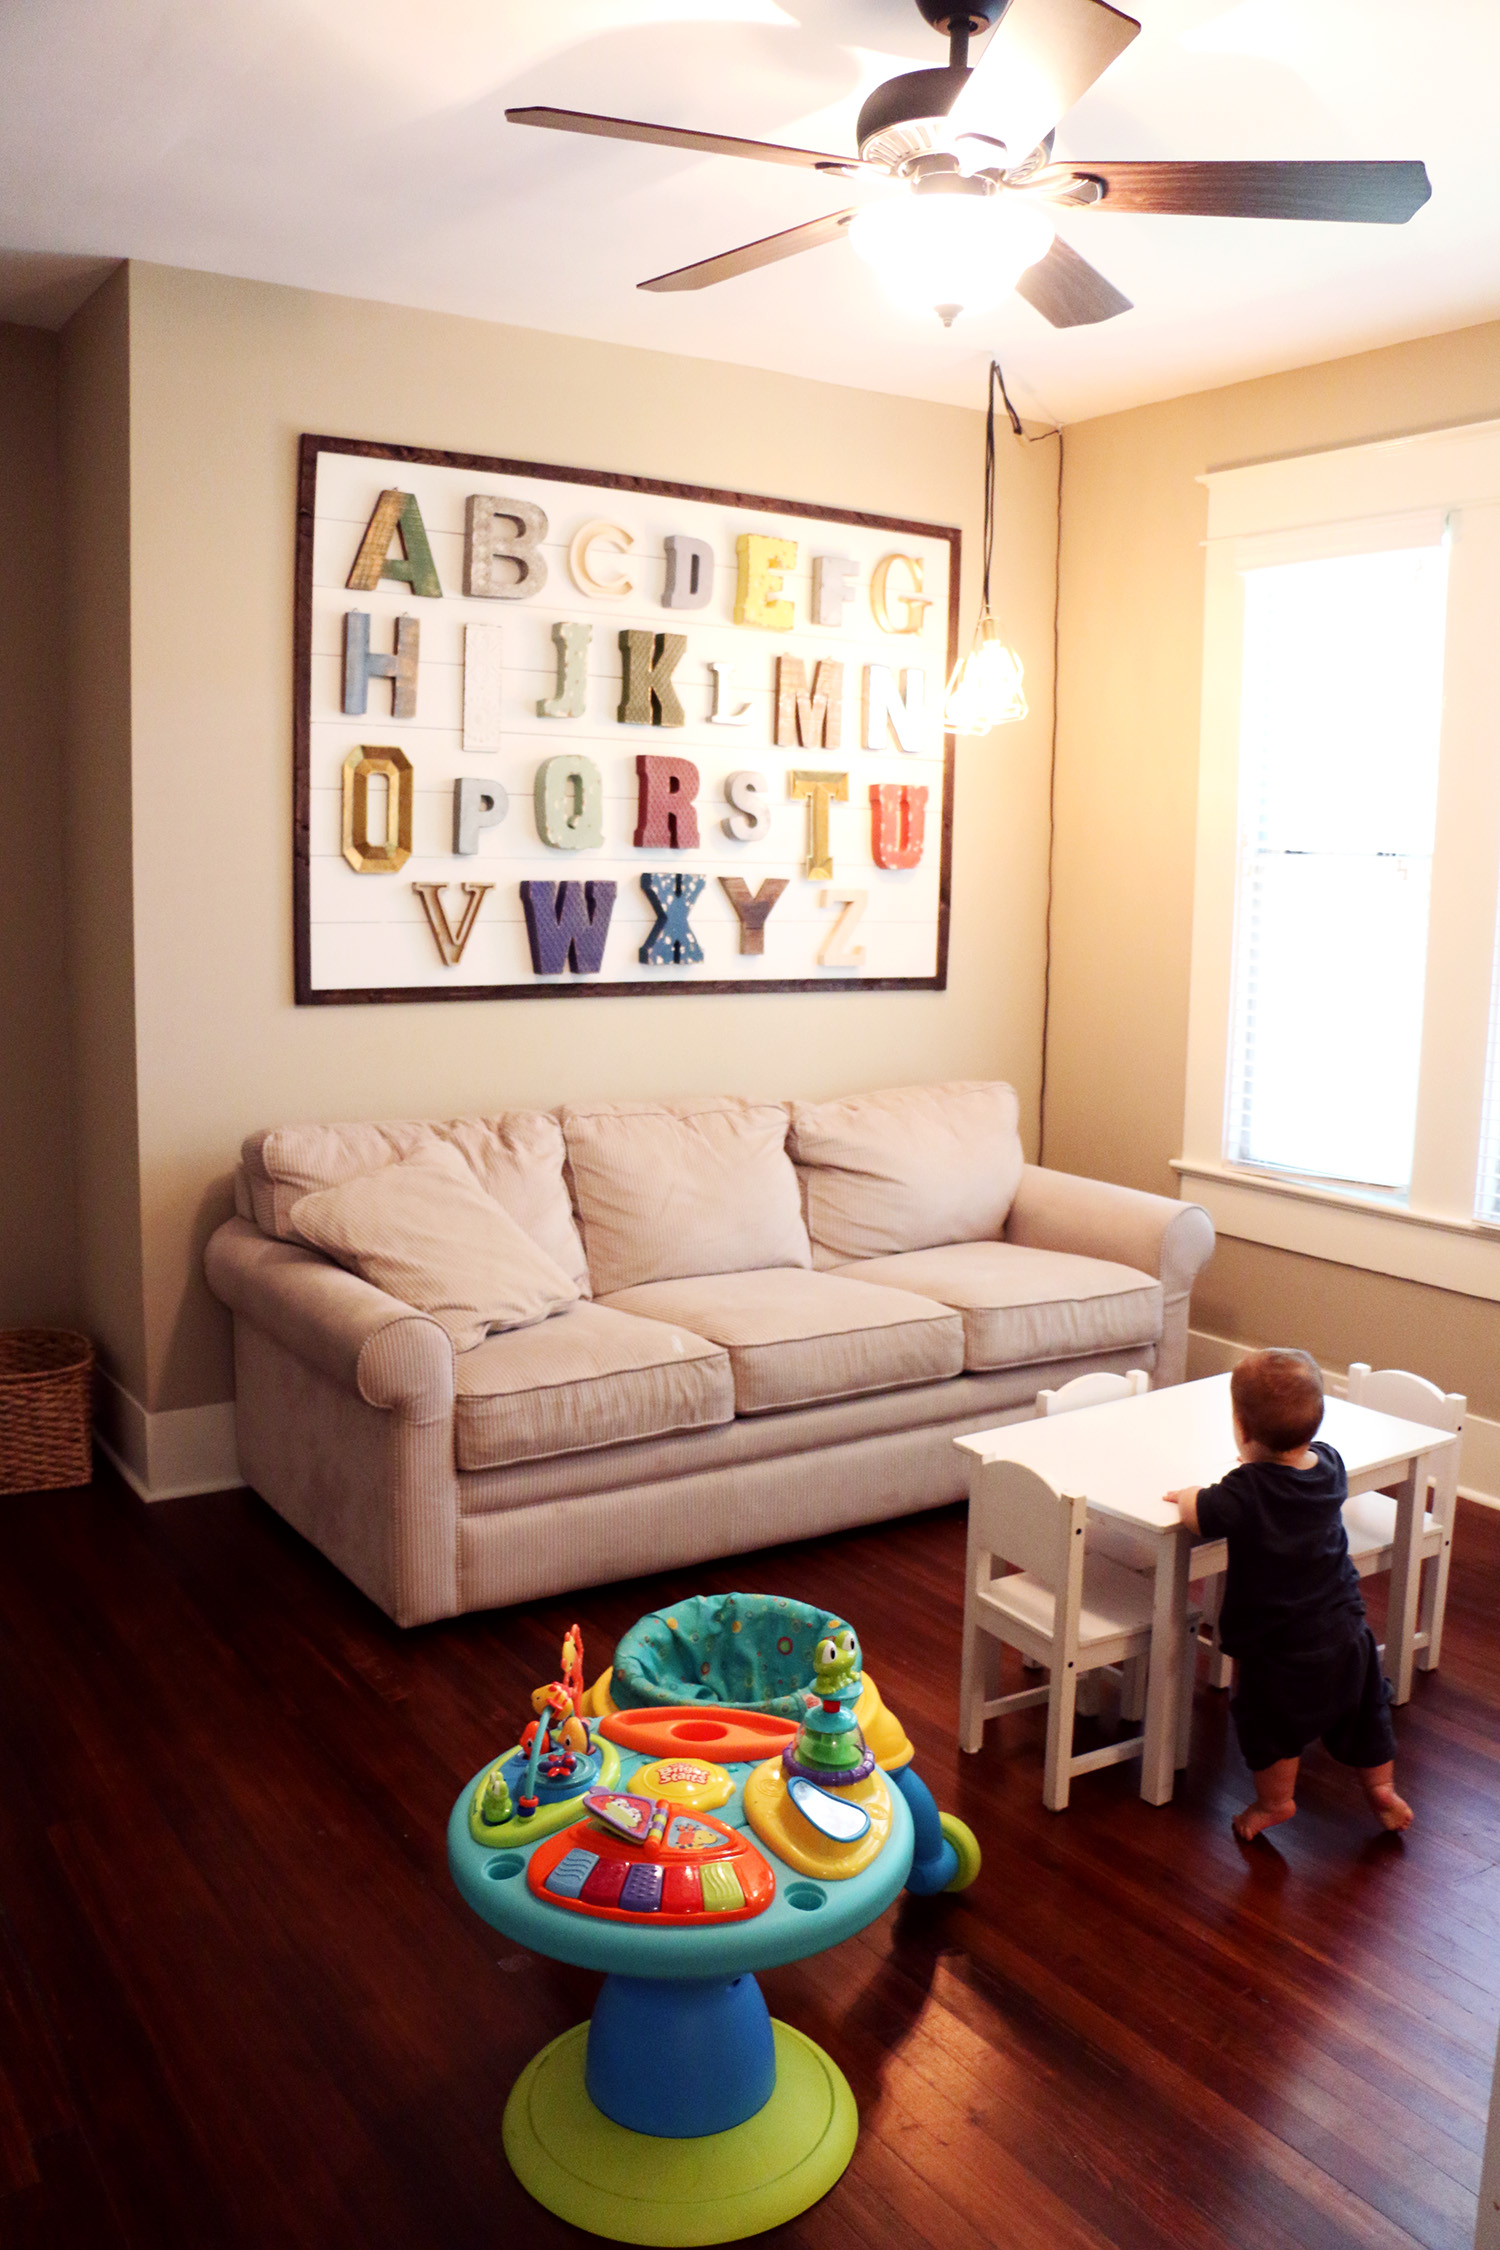
I’ve always wanted to do an Alphabet wall in our home and I
knew that combining it with another favorite thing, shiplap, would make it even better! ;)
I kept my eye out for a good bargain on letters and got a whole haul of them for CHEAP at Michael’s.
I get asked a lot about this project via Instagram so I wanted to put all the info into post for you guys!
It didn’t take that long and has been one of my favorite decor details of the house.
If you are thinking about creating your own alphabet wall, my tip is to start stocking up on your letters.
If you see one you like, on sale, grab it! Let’s dive right into the post with the tips and how-to!
The project was VERY simple if you have a nail gun. You could do it even without one but it made it go up in a snap.
The nail gun was a present to me haha for my birthday or Mother’s Day??
I forget! But best present ever haha.
The framed shiplap part is the same steps as the tutorial I shared here:
Framed Shiplap DIY Tutorial
You are just going to adjust the size to fit the wall you want to fill – and add letters!
HERE’S THE SUPPLIES YOU’LL NEED:
1. Letters. for the alphabet. ;)
2. Plywood- “underlayment” is the type I get for the faux shiplap
7
PROJECT STEPS:
1.Use the basic tutorial to create your shiplap base.
OR..skip this part if you are just putting the alphabet wall straight to the wall.
I like how it anchors it and makes it look like one big piece of artwork.
Framed Shiplap DIY Tutorial
2. I already had some letters (from Hobby Lobby and Michael’s) so I just had to fill in the gaps to finish out my alphabet!
We kind of looked like a hot mess laying all the letters on the store floor but I needed to picture it. ;)
My kids thought it was jut the most fun thing we’ve ever done in a store. haha.
HE KEY TO HANGING THE LETTERS:
OK! So to make this project go smoothly and quickly – you need to do a little prep work.
I sat on my floor and traced all of the letters.. and cut them out.
Then I was able to tape them onto the wall to see EXACTLY where I wanted them!
made it os much easier when I was nailing them up!
Some I hung with the hooks not he letters…
others I just put a nail in and hung the hollow part on the nail.
It really is a favorite part of the house and I love walking by it every day!
Give it a try and tag me on Instagram if you share your alphabet wall!!
*This post contains an affiliate link- Love sharing our favorites! Hope you found this post helpful*
Did you like this post? Check out my original framed Shiplap Tutorial post!