

These lovely Giant Tissue Paper Flowers
are at the top of my favorite party DIY’s!
I made them for the girls’ Fairy Birthday Party and I loved how they turned out!
I’m so excited to share this video tutorial in all of it’s bad hair day glory
because this DIY is SO fun and is a great bang for your buck!
Finally made ‘part one’ happen during a nap time this weekend! :)
I’m going to try and do another video tutorial sharing the
other variety of flowers used as well!
next nap time? ;)
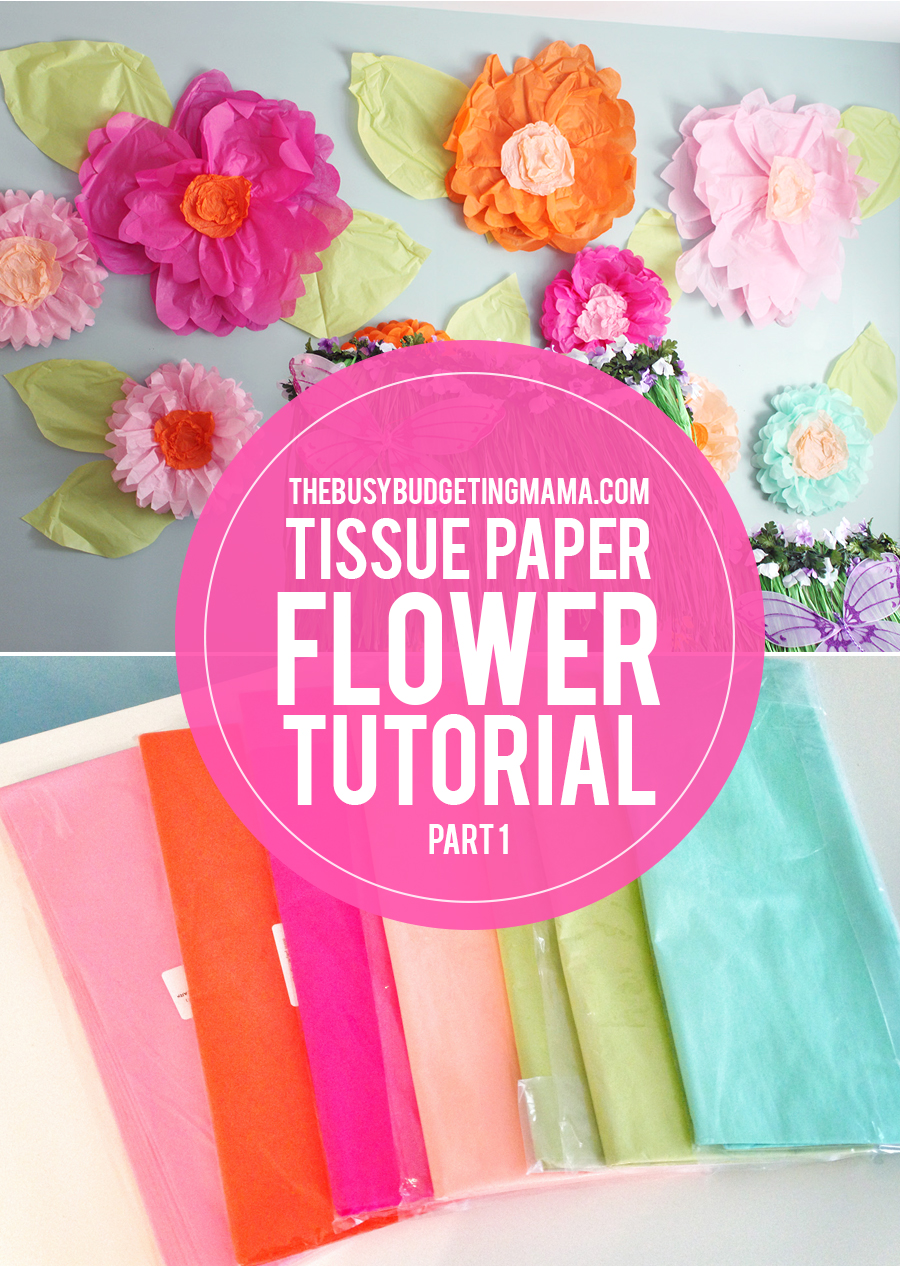
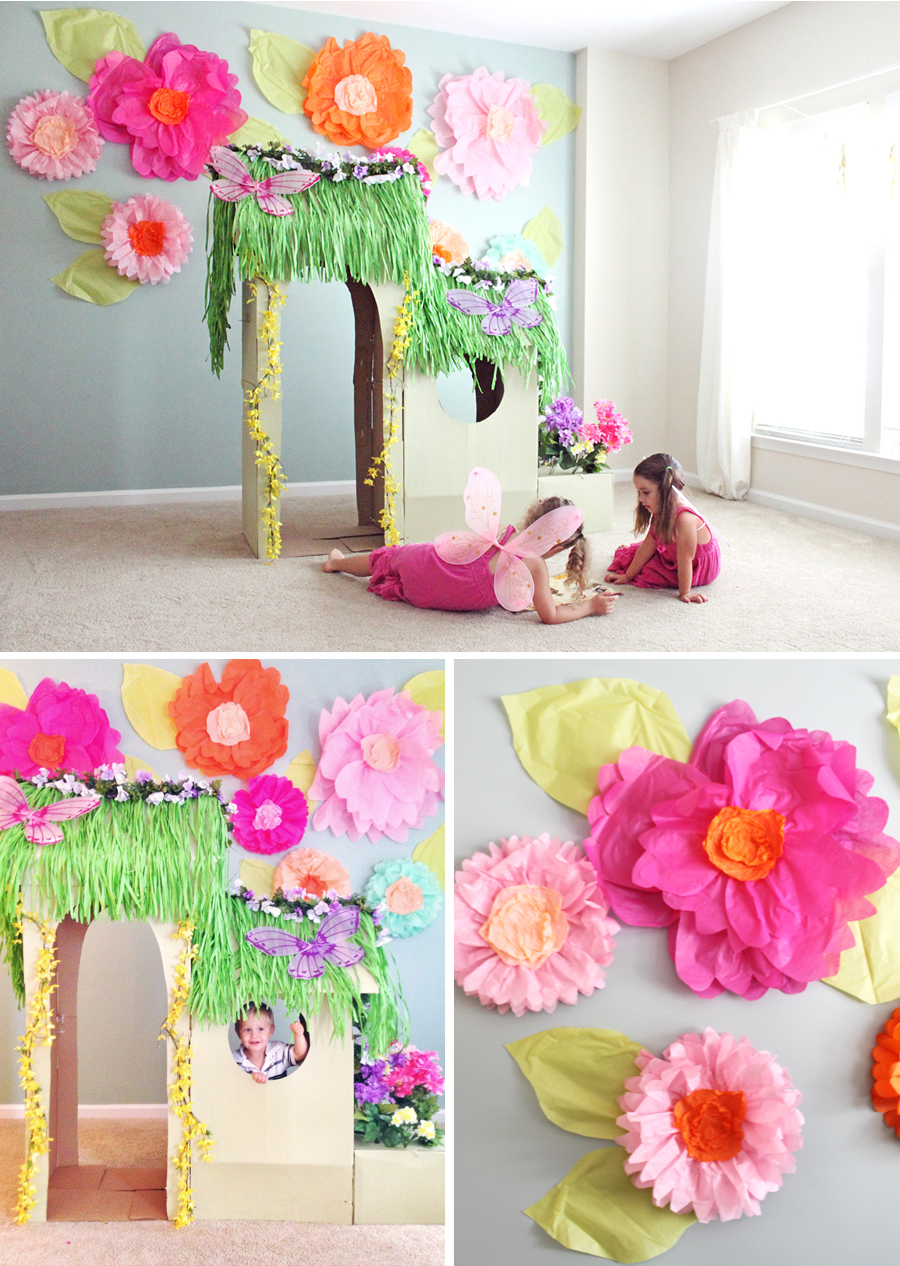
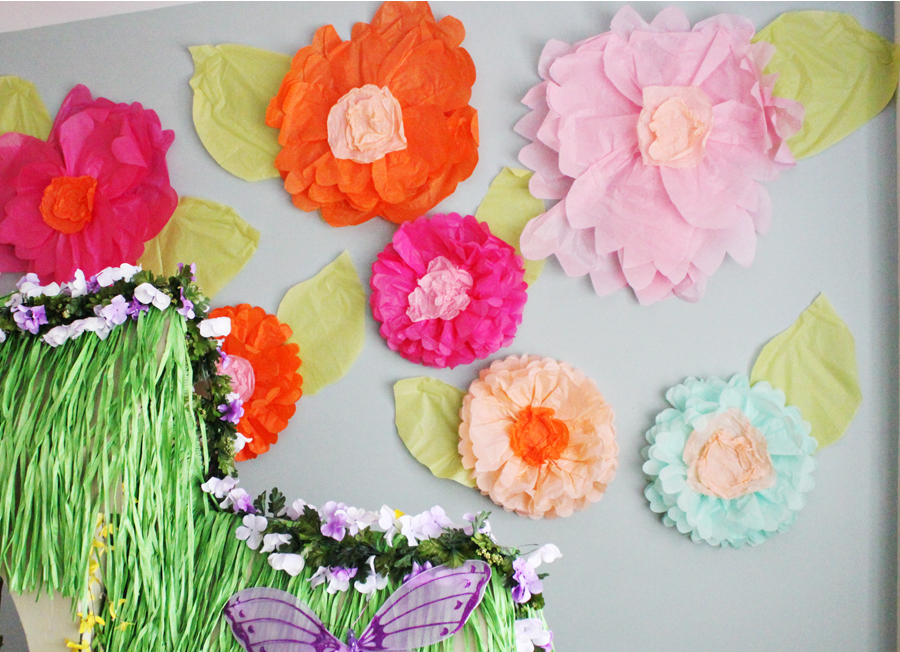
Giant Tissue Paper Flowers could be just the right
detail for a birthday party, shower or nursery decor!
We have them all up in the kids’ room because I can’t part with them just yet. ;)
The video tutorial gives a general idea of how to make these.
I didn’t take photos..blogger fail.. but It really is simple once you get going!
WHAT YOU NEED:
Scissors
Tissue Paper (20 in x 30 in – I get my tissue paper from papermart)
Scotch Heavy Duty Packing Tape. (what I had. worked great.)
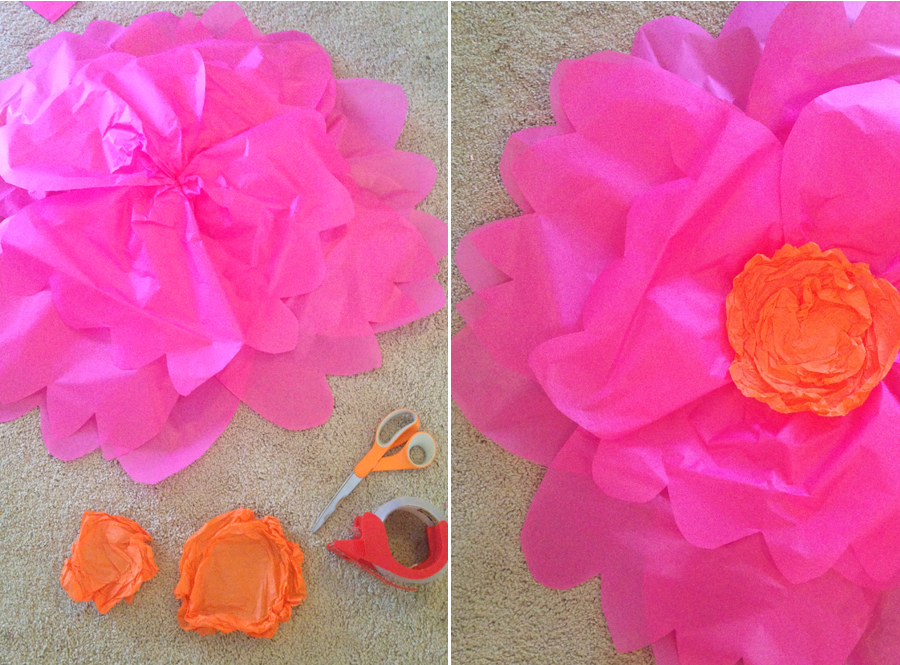
STEP 1- CUT PETALS
+You are going to have 3 levels of “petals”
Making each level of petals smaller/shorter as you go!
—–First round I use 4 sheets of tissue paper and cut
out a petal shape.
—–Second round of tissue I use 3 (4 works too!) and make it a little shorter/smaller
—-Third Round of tissue 3(4 works too!) and make it a little shorter/smaller again.
STEP 2- LAYER AND TAPE PETALS
+Take the smallest level of tissue petals and layer together like a bouquet
+Secure by taping handle (see video for that part.)
+Take the next level of tissue paper (the medium length) and add to the “bouquet” putting them in the open spots as you layer. (again, video might help clarify that part.)
+hold together by taping handle again.
+Then add the final largest tissue paper level.
+Tape handle again and then snip off excess part.
STEP 3- CENTER OF FLOWER
+Cut two circles out: one big one medium.
+crinkle the edges of the circles
+tape them to each other and then tape to middle of flower!
Thanks for watching and tag/email me if you try these out!
Would love to see how you use them.
Heather
October 13, 2014 at 10:07 amLove these and am totally sharing!
~Heather
Marite
August 3, 2016 at 3:49 pmHi Natalie! I recently used your tutorial to make some flowers for my daughter’s bunny birthday party and they turned out awesome! I just wanted to stop by and thank you for taking the time to put this tutorial together :)
You can see some of the pictures of the party here:
http://www.crazyhappycasa.net/2016/08/bunny-birthday-party.html
natalie
August 22, 2016 at 8:46 amOh thank you!! So glad it was helpful and thanks for taking the time to comment and share!! :) What a cute party!!