

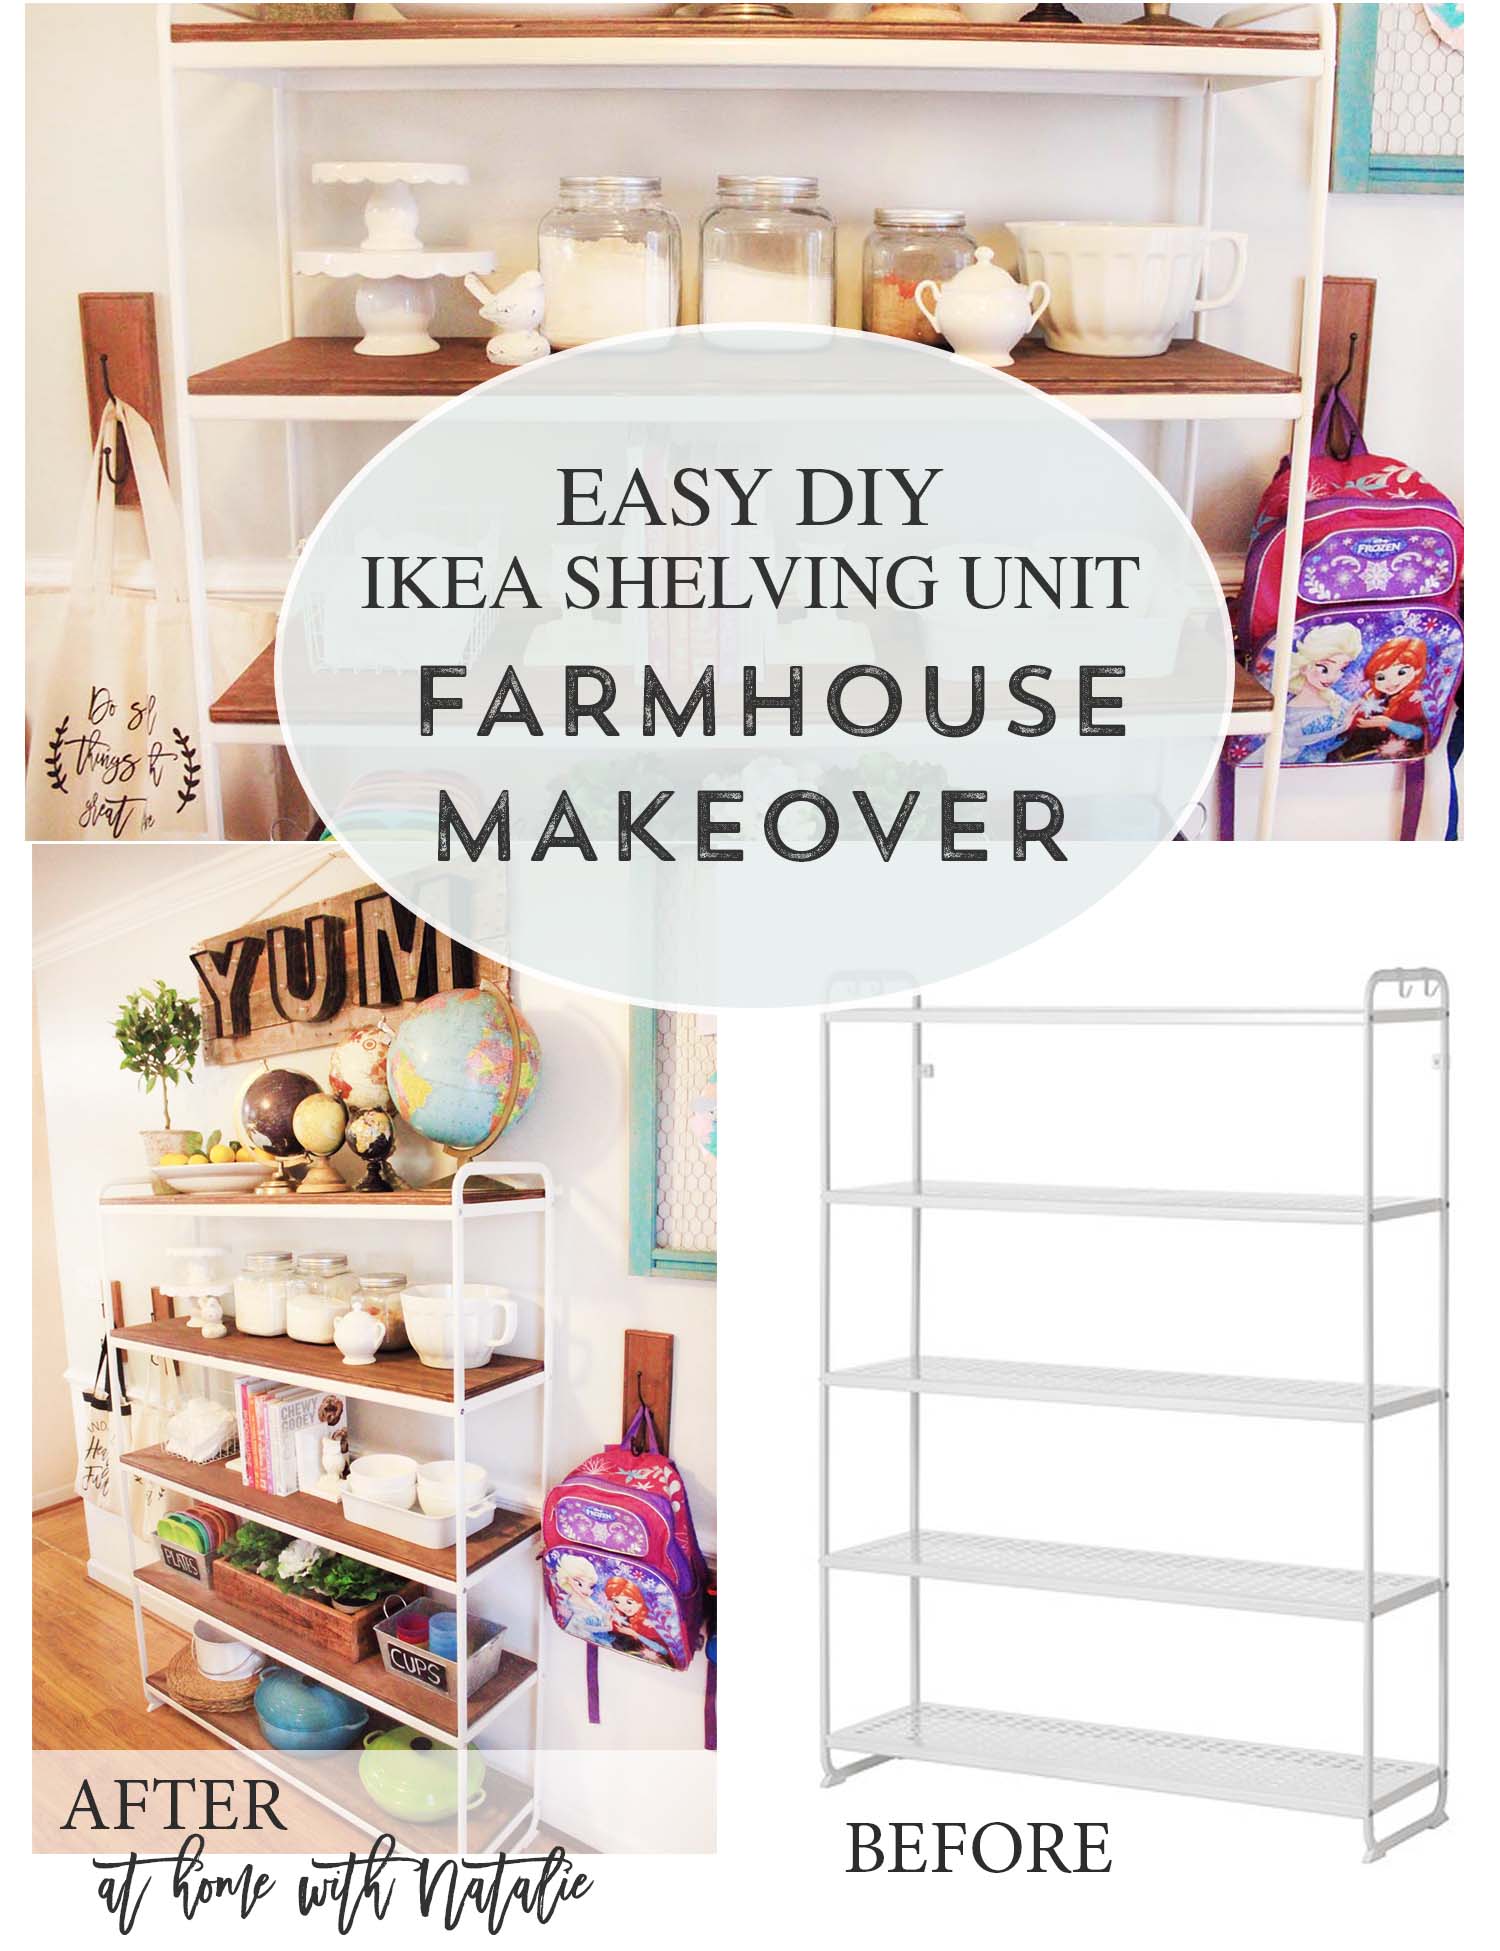
I love the farmhouse style, and have slowly been working it into my home decor.
I had a metal IKEA shelf already, and decided to give it a little
farmhouse makeover and put it to use in my kitchen!
The IKEA MULIG Shelving Unit comes in a few different sizes and prices. I had the biggest one and it’s $59.99
I knew I wanted to warm it up and get some wood into my kitchen!
I considered spray painting the metal dark since I already had the spray paint, but
ended up leaving it because I liked the pop and that it was bright and cheery!
I think that if it was in a different room, I would have gone for the dark metal look.
I have one more shelf, so I’ll probably go that route and put it in the boys’ shared room!
It would look SO CUTE that way too.
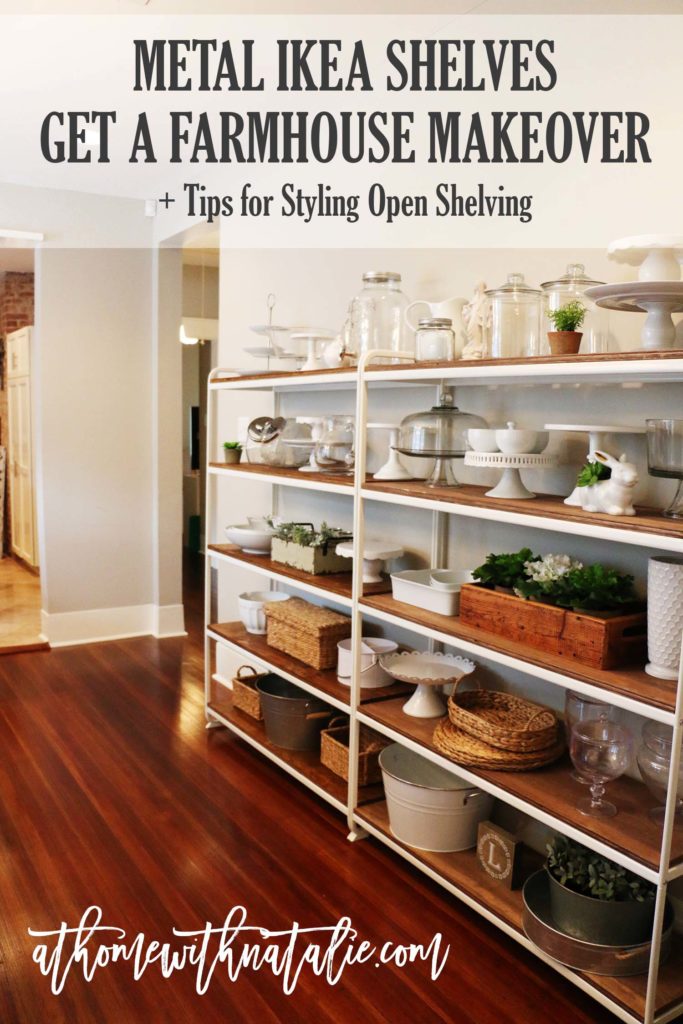
We moved! And this is our current set up!
I made one more so we could have a wall of shelves and we love how it turned out.
Functional and pretty. :) See more photos of our made over Metal IKEA Shelves!
STEPS:
This DIY project was way easier than you might think.
You can really use any metal shelving unit you have, just measure them and head to Home Depot!
I picked out a piece of plywood and they cut my shelves to size for me.
My shelf measurements were—- length: 46 1/4th and depth: 12 7/8th
(I ended up with some wood left over that I plan on using to cover my IKEA buffet table!)
Use Sandpaper and do a quick once over of your shelves.
Just stain the wood with one coat. (I used Special Walnut stain – 1 qt size)
Then use construction adhesive to attach the wood to the metal.
My husband grabbed this brand and it worked SO MUCH easier than past ones I’ve tried.
It’s a little more, price wise, but totally worth it.
I put some bricks on the wood to help it stick down to the metal.
Not all the shelves needed the weight though.
Attach the shelving unit to the wall and you are good to go!

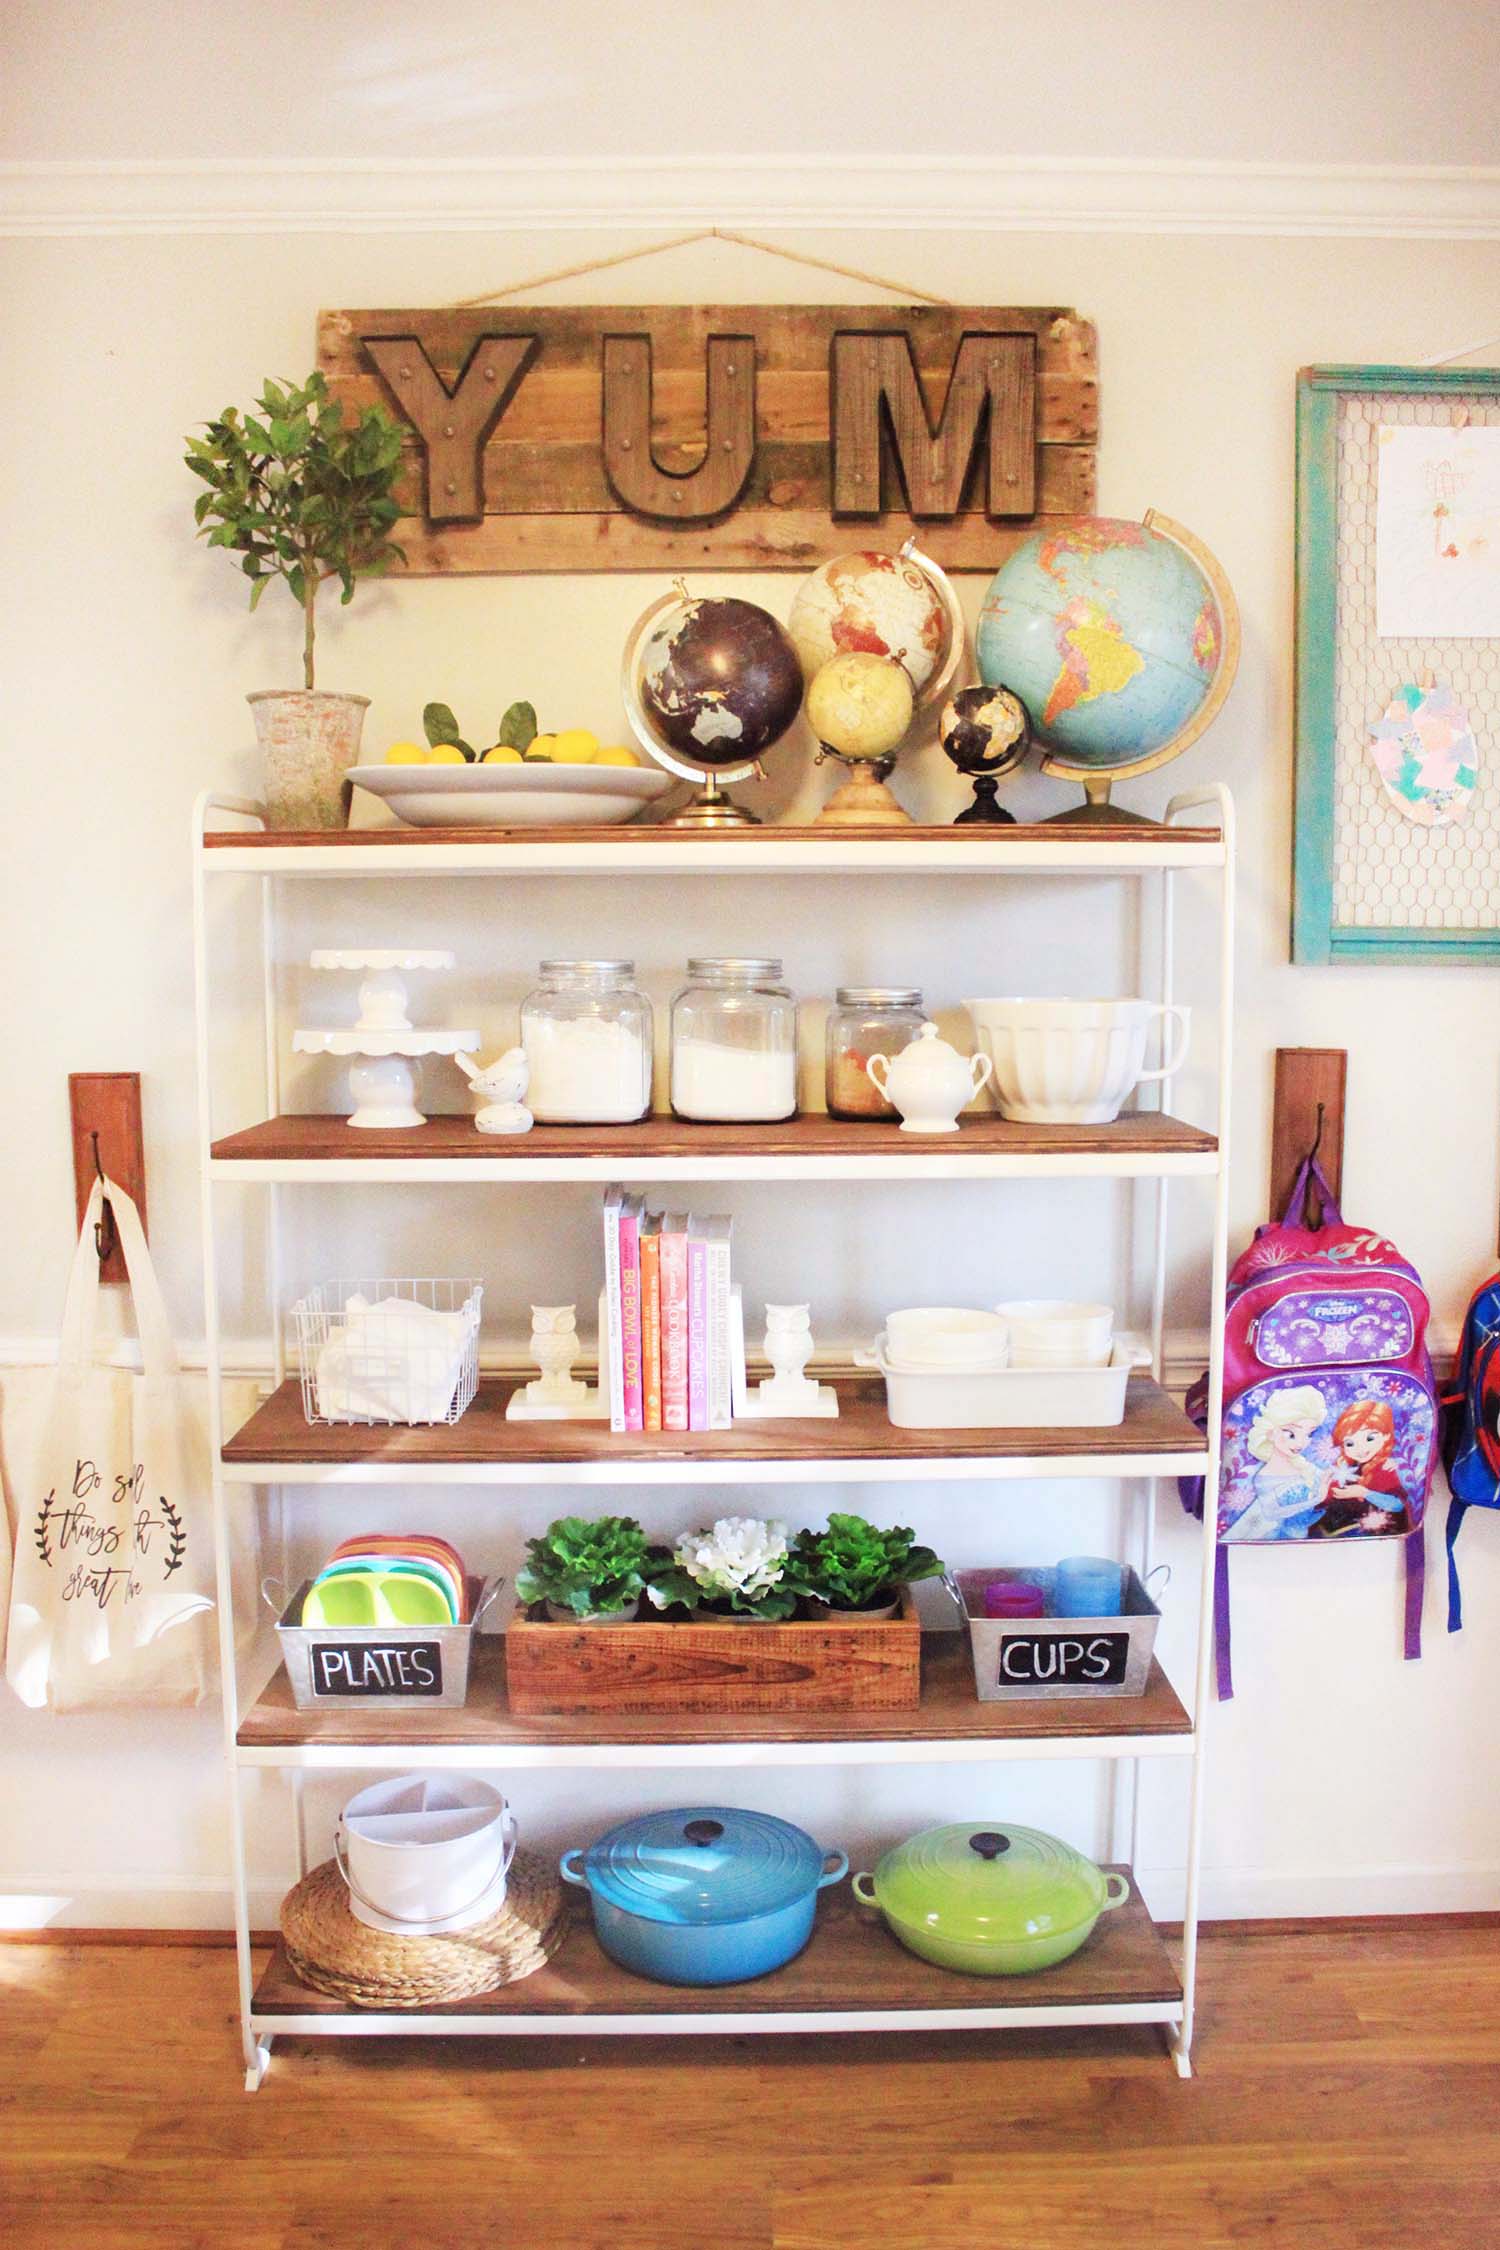
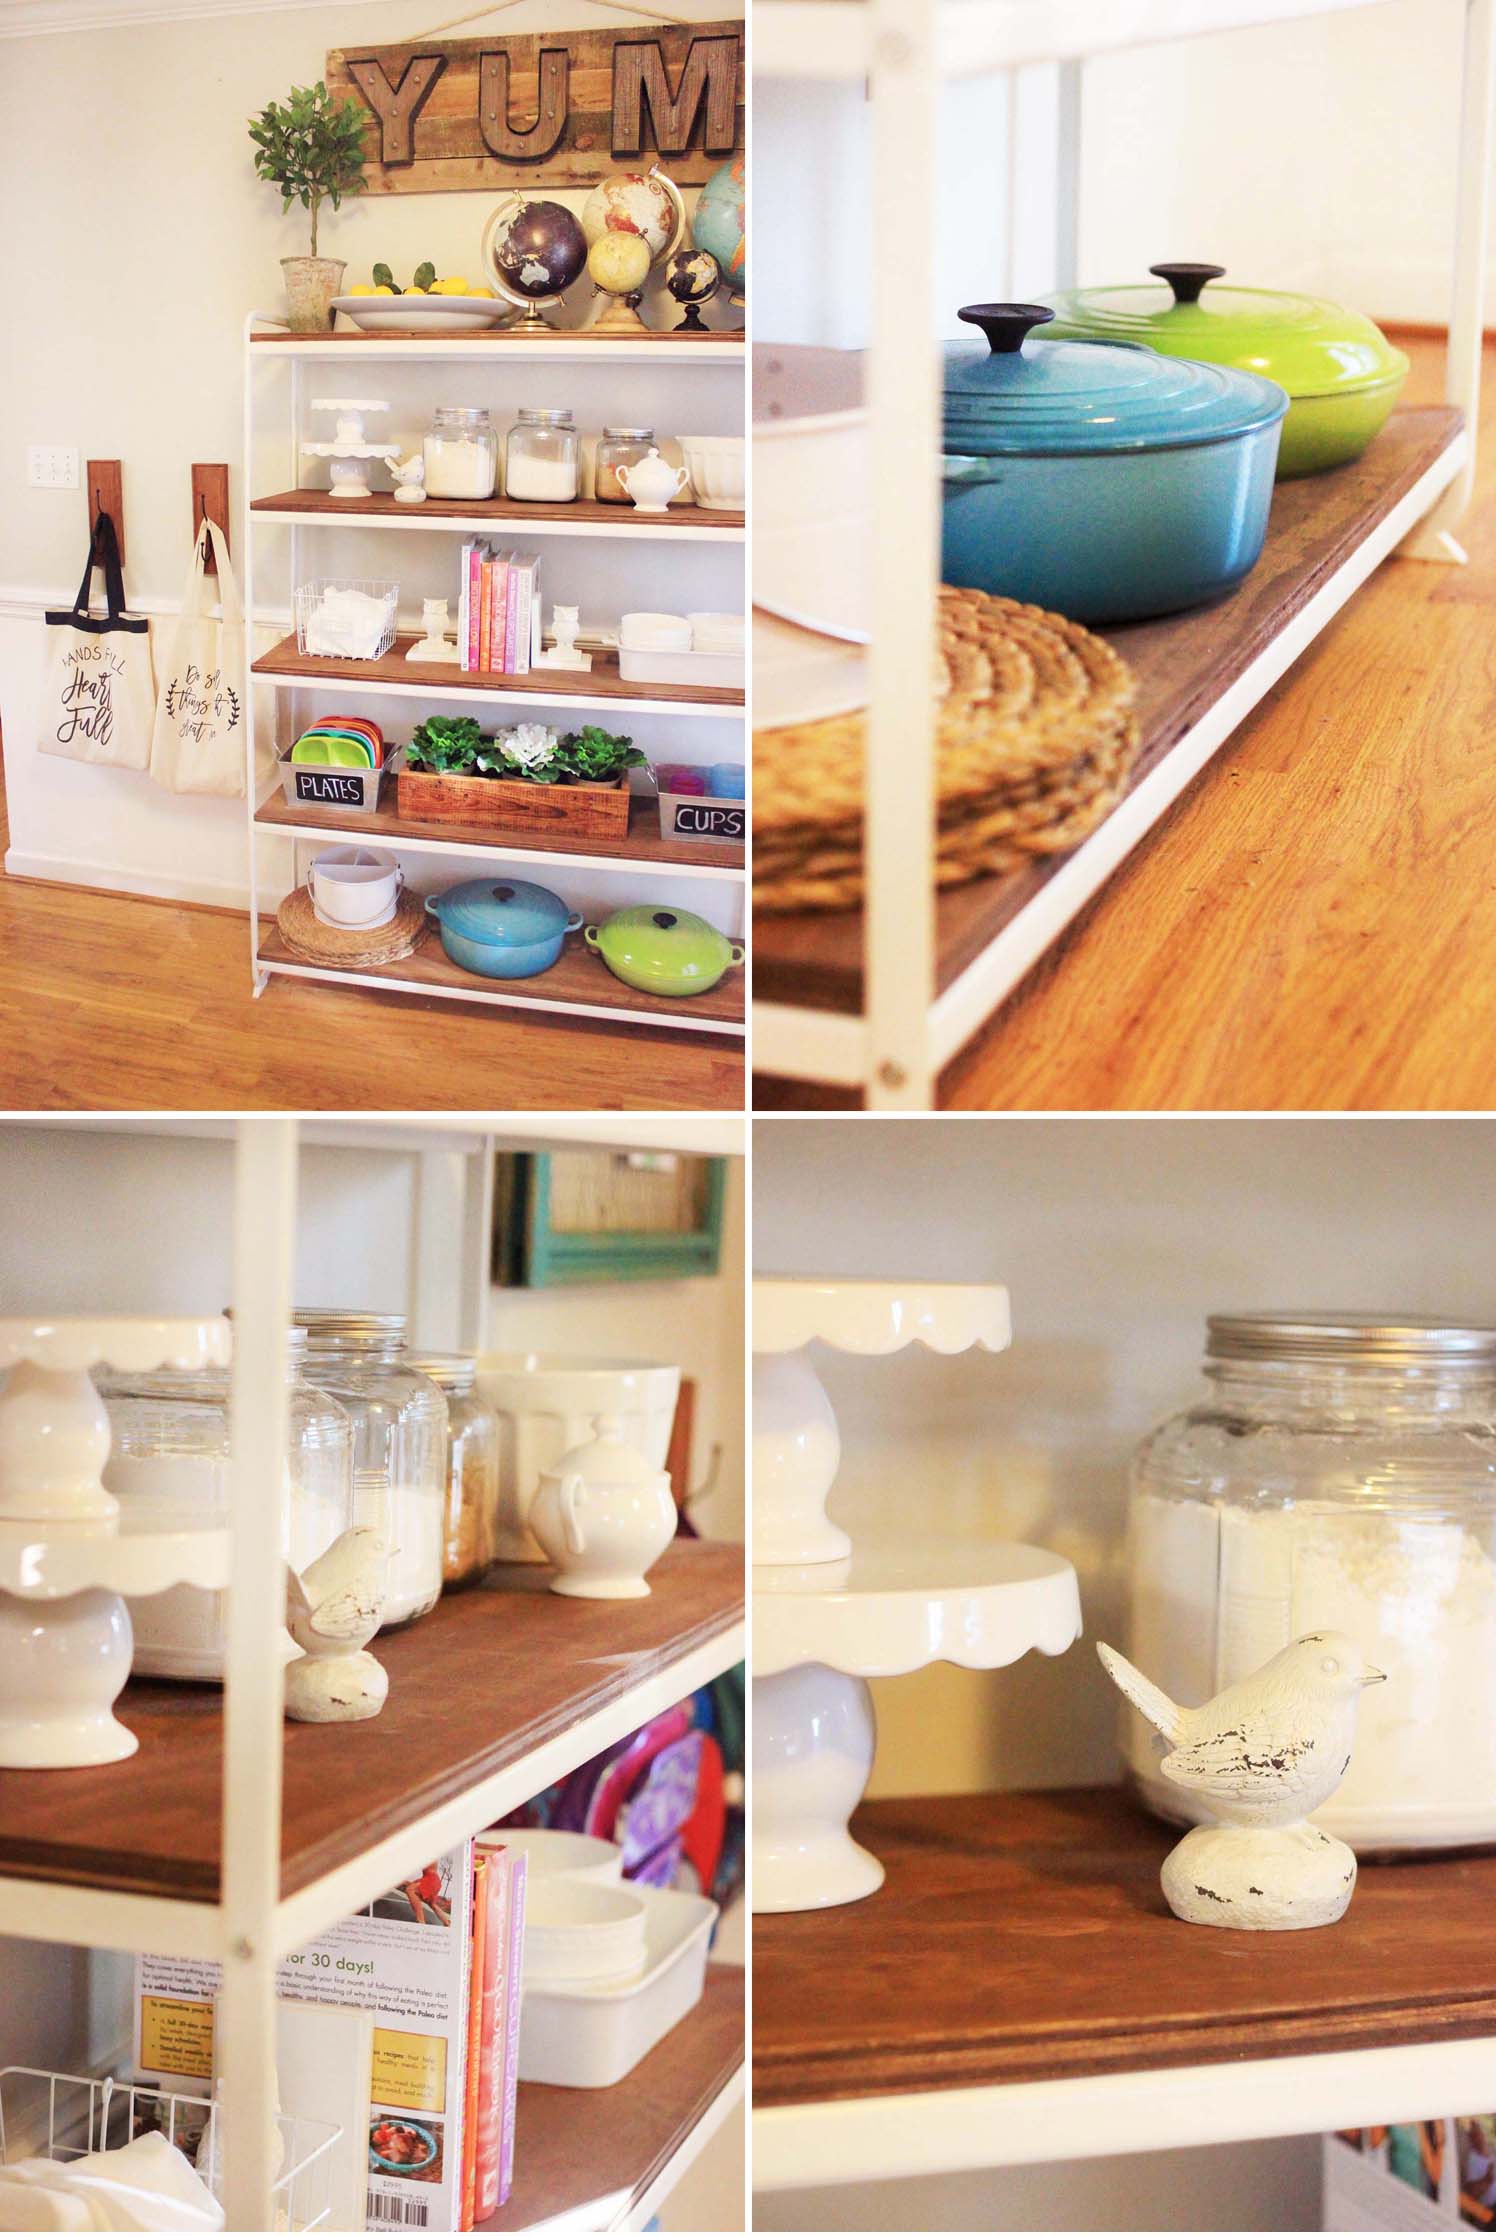
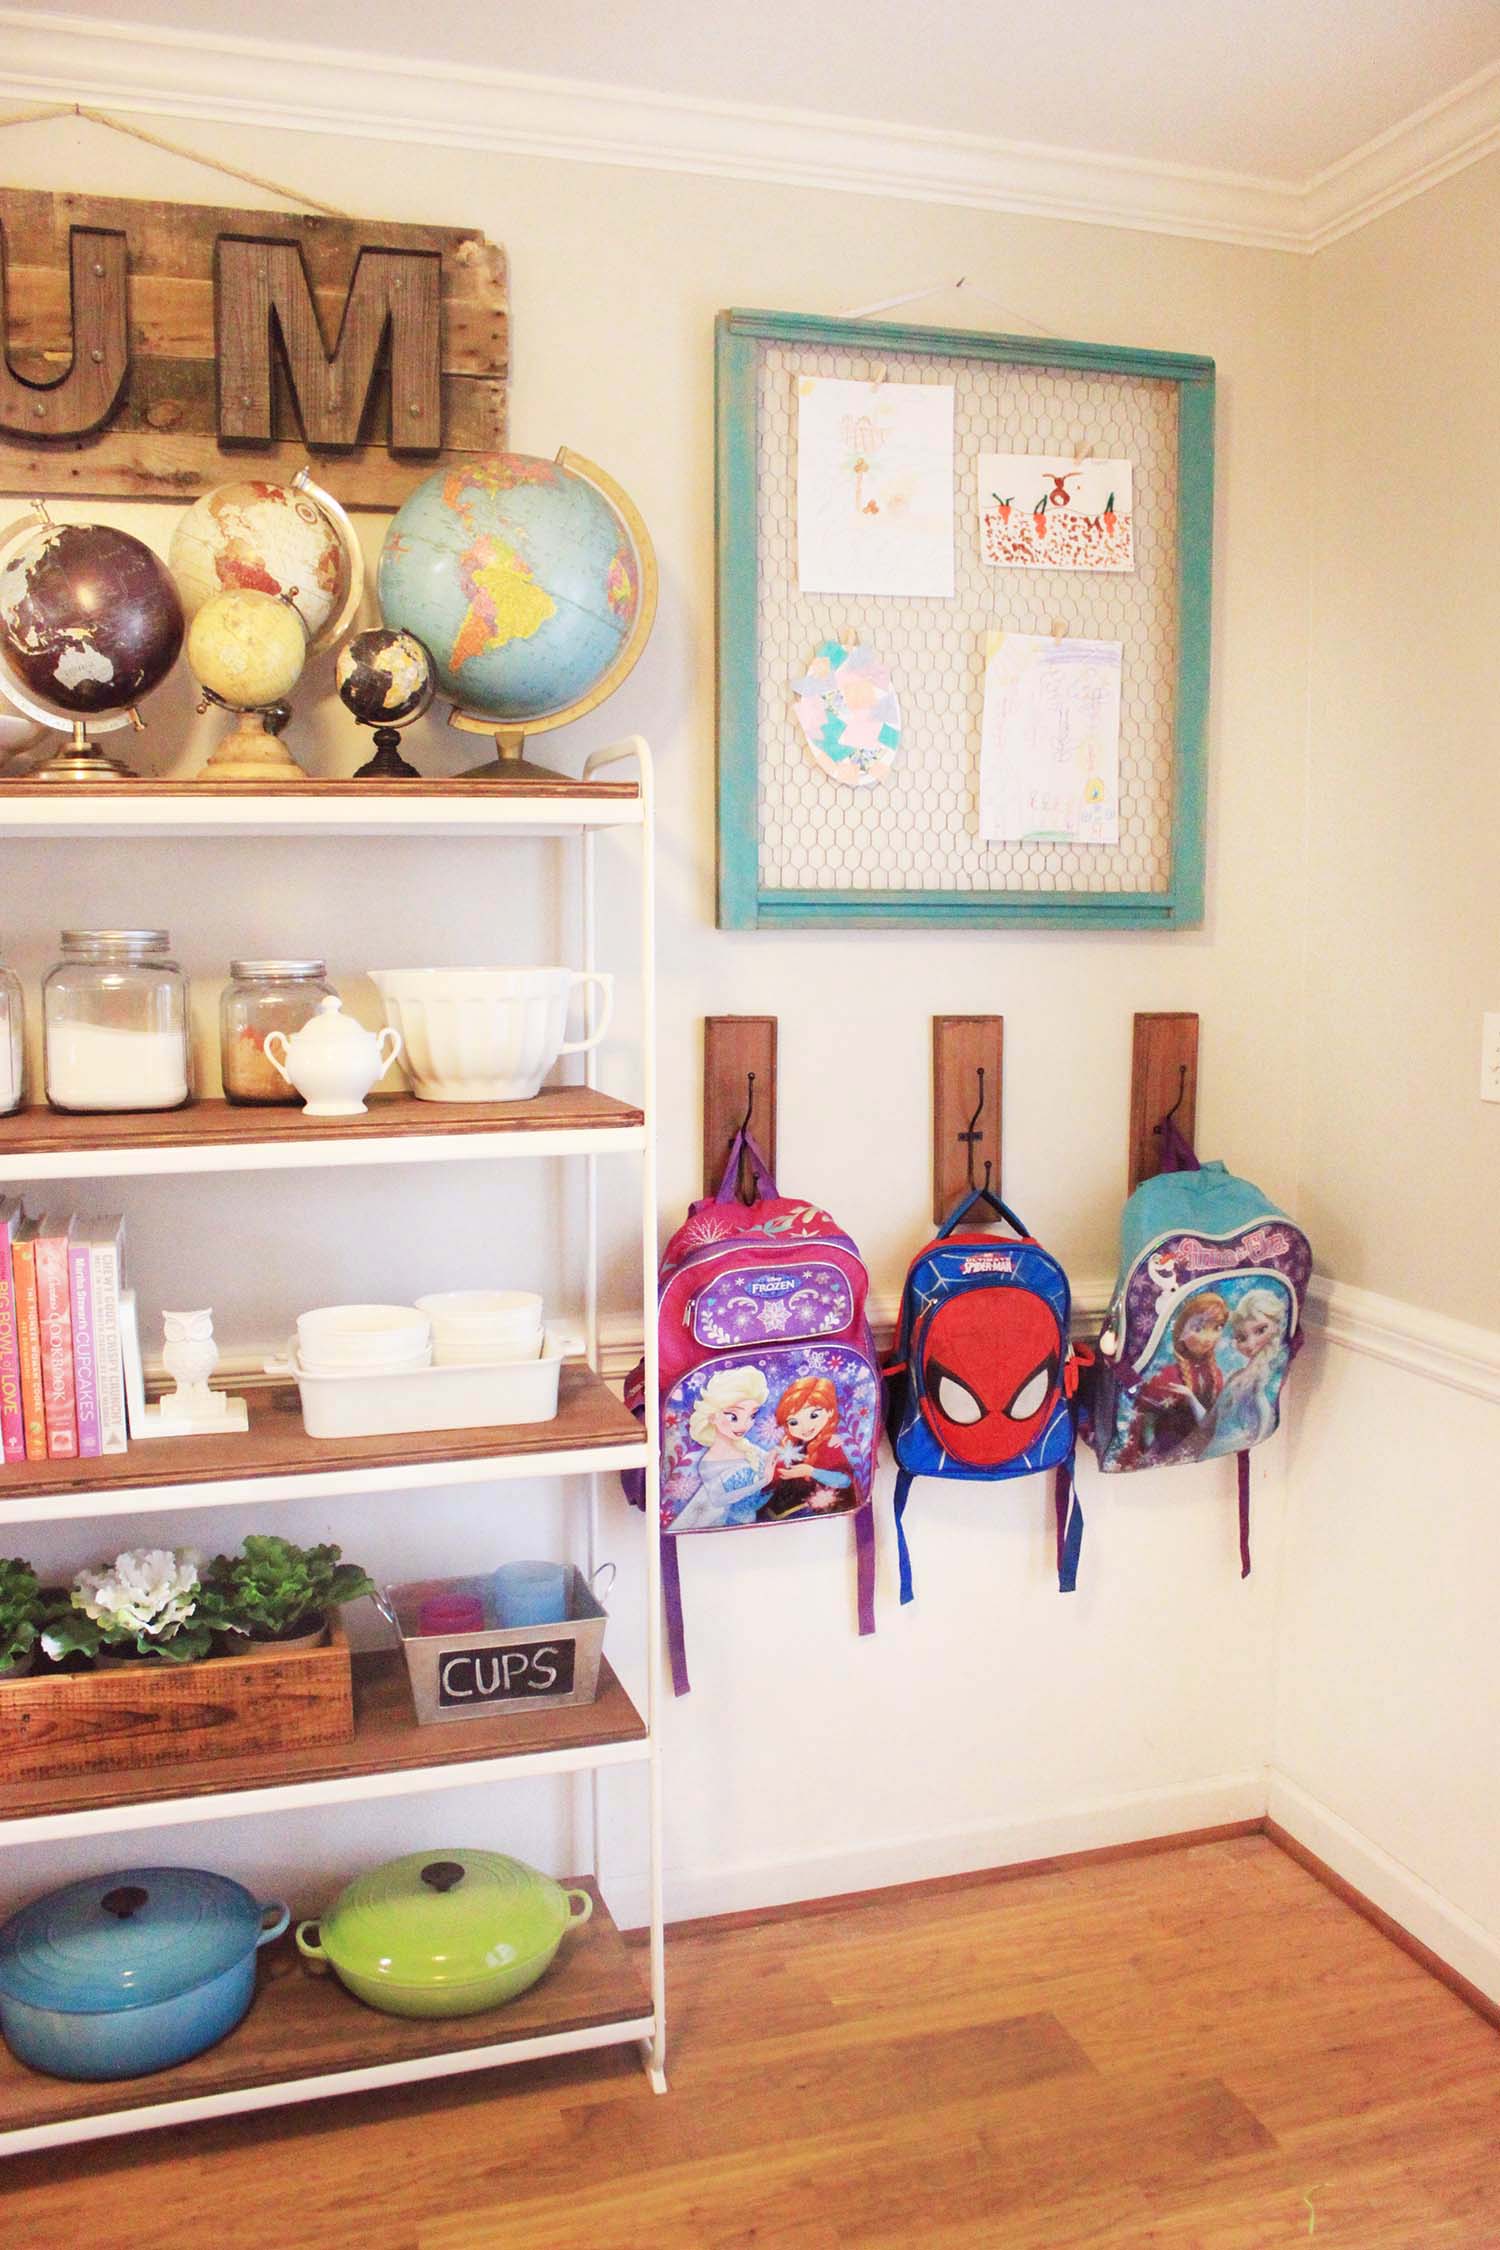
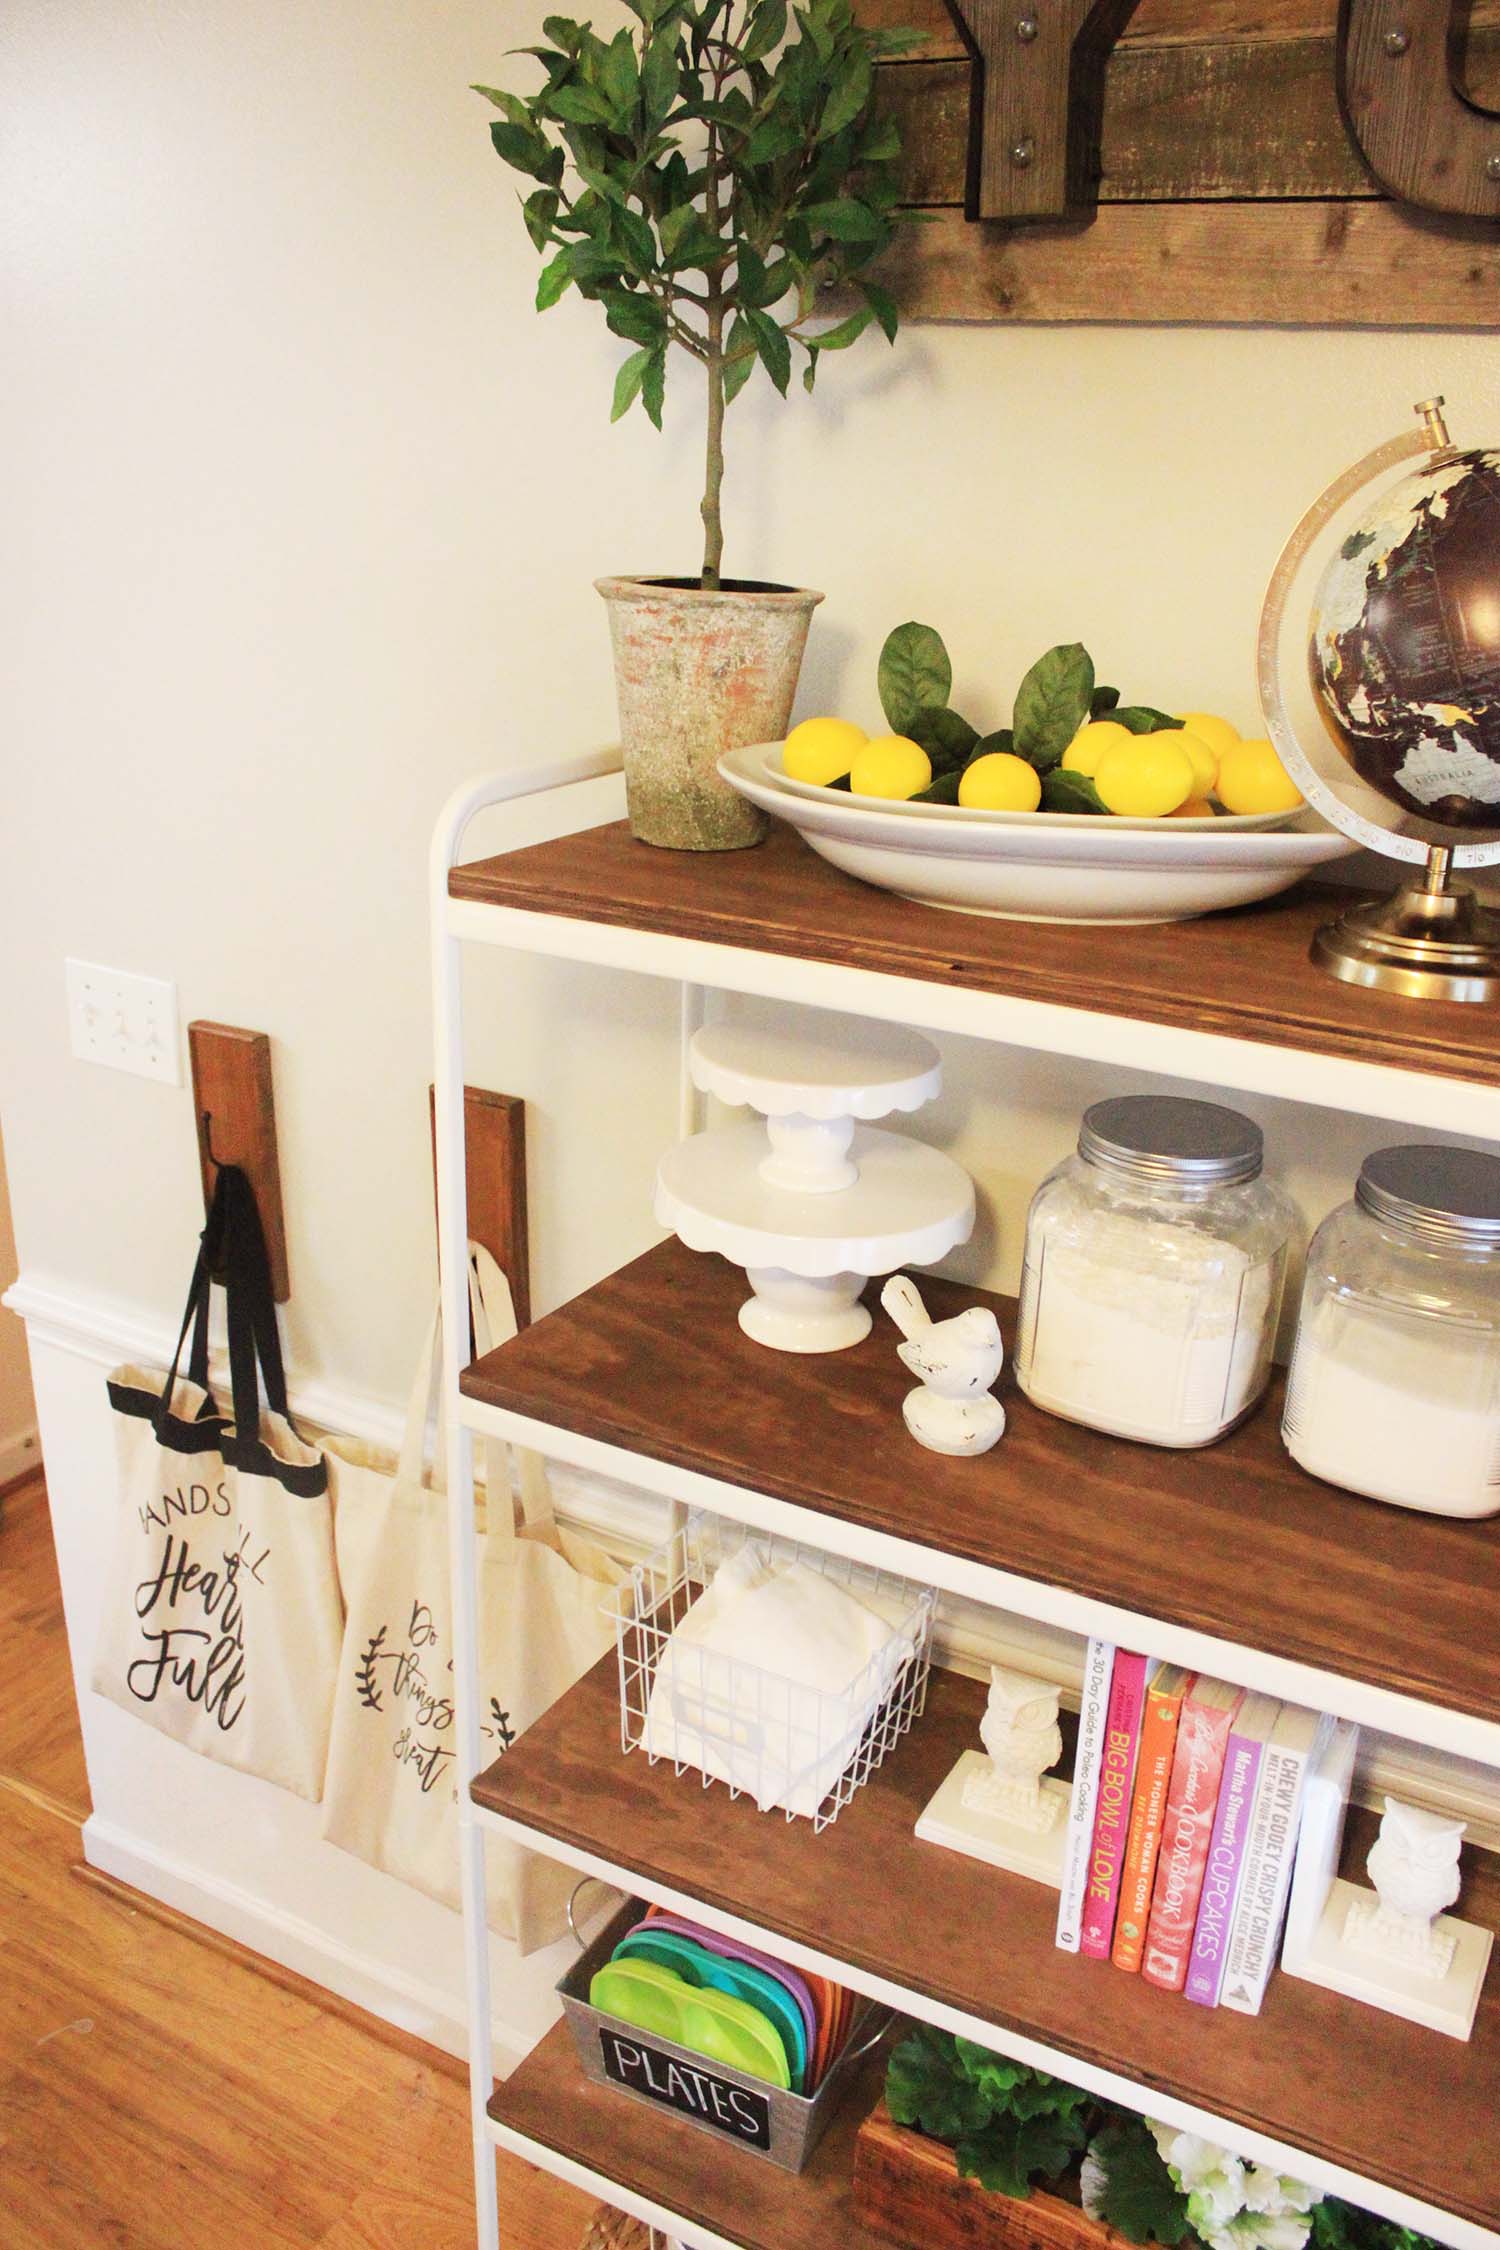
I really needed a place to store my Le Creuset pans.
They kept getting moved around from the top of the fridge to the oven to the counter.
Not functional. But this is the perfect spot for them! Keeping the lids on and wipe the lid before using of course,
But it just makes the shelving unit pop and I love being able to see them throughout the day.
I grabbed these hooks at Target to update our little backpack station.
Added two on the other side for my tote bags.
Love how they ended up matching the shelves perfectly.
I’ll share more about this little area another day!
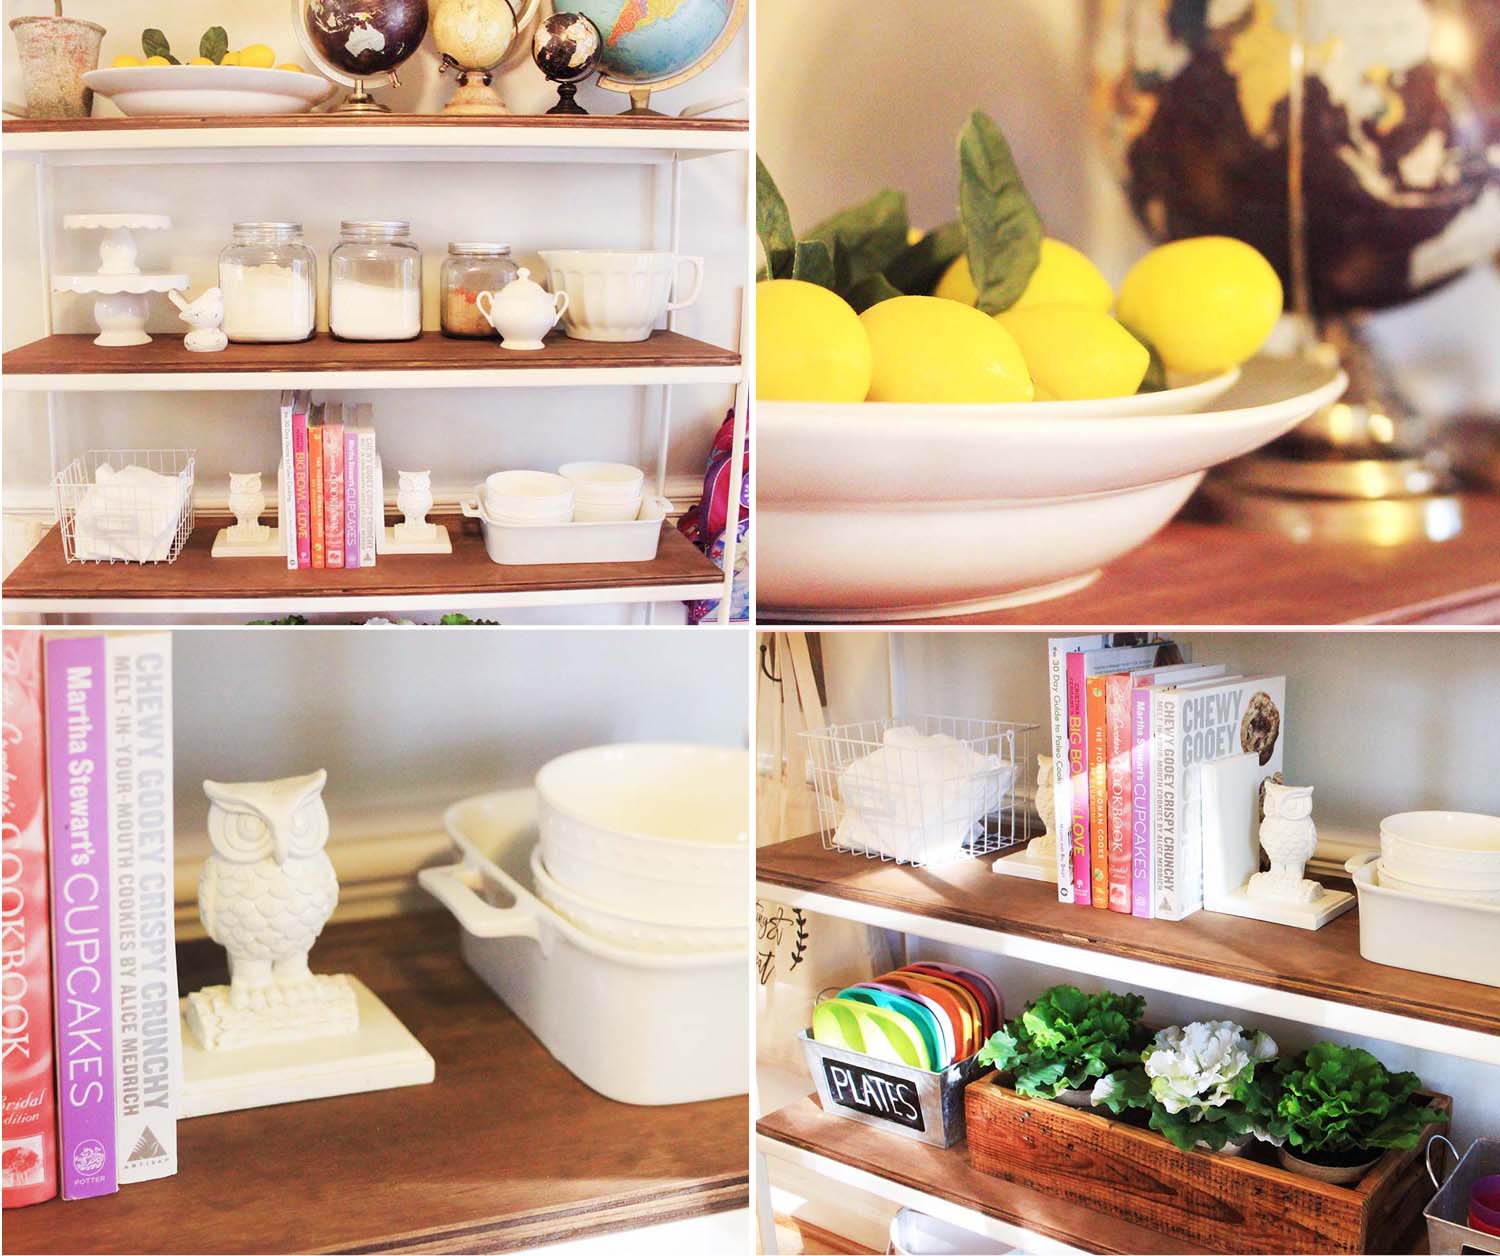
I love the pops of color mixed in with the white dishes and wood.
A part of me really wants to have a house with only neutrals and natural textures…
but that’s not happening these days.
I’m working with a lot of what I already have and life with kids.
They love bright plates. lol. So bright plates it is!
I’m learning to mix the styles and enjoy both at the same time.
As I’m adding pieces to our decor, I’m going more for the neutral farmhouse but classic pieces.
So over time I’m gathering these pieces that I love and can use as I makeover our house!
I love the containers I had found last month at Michaels and used for the kid plates and cups.
Took the plates to the farmhouse style I like!
It’s at their level so they can grab them and help set the table.
It just makes my heart and mind happy when everything has a place. haha.
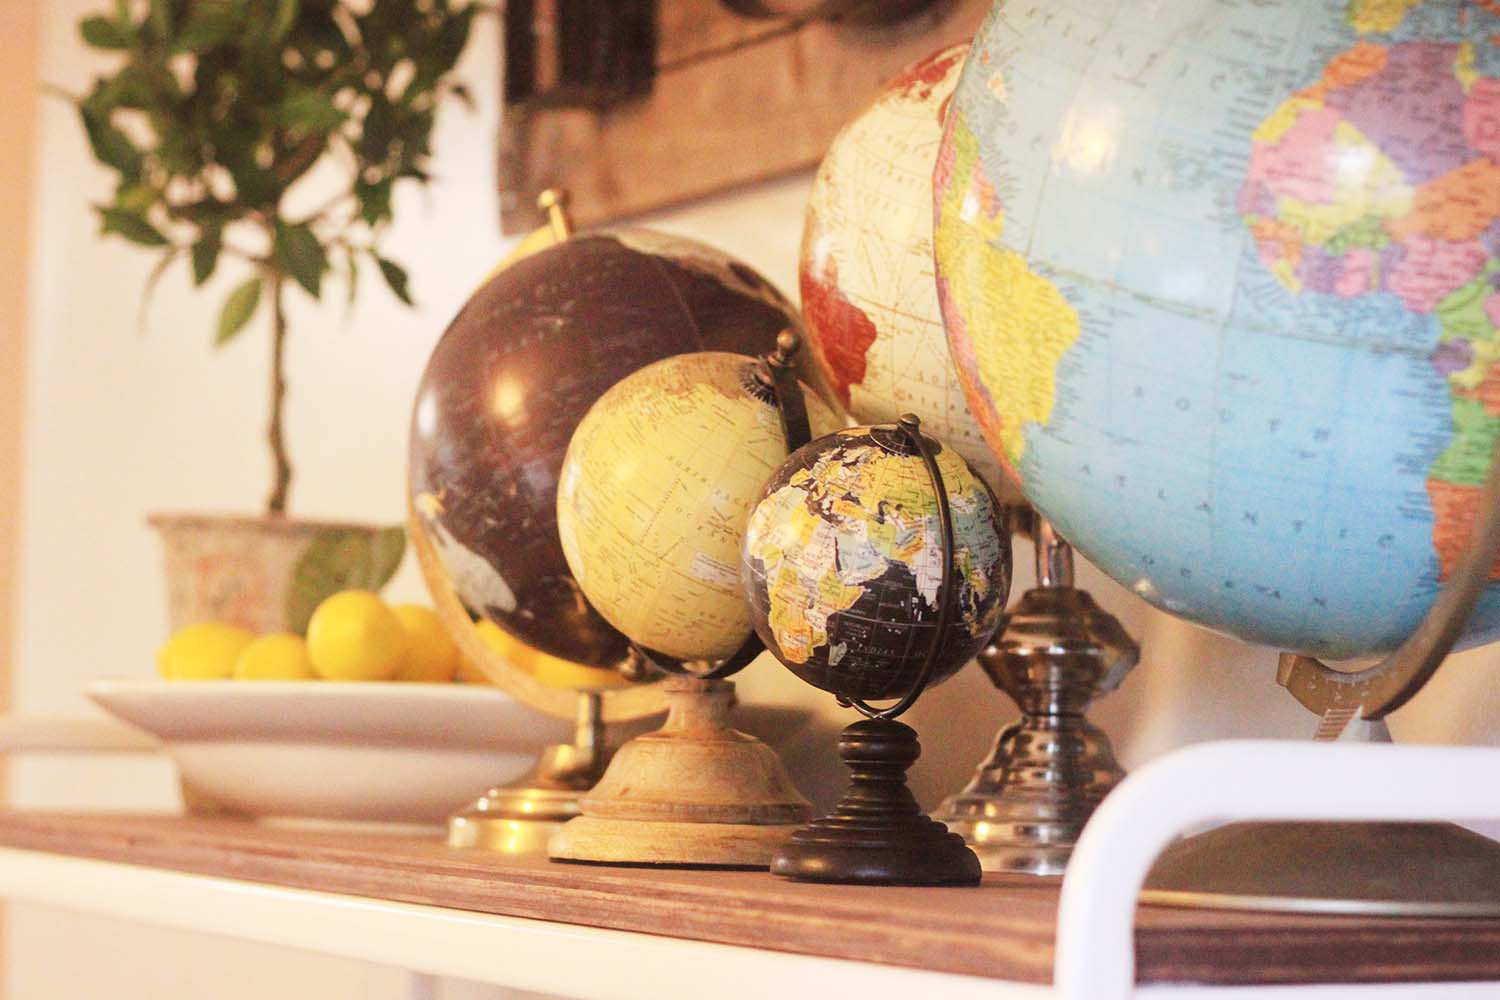
So I kind of have a globe thing.
It’s definitely a thing, ask my hubby.
Whenever he goes to good will I’m like “Look for globes!”…haha.
Which he replies, “always do!” He’s a good man. ;)
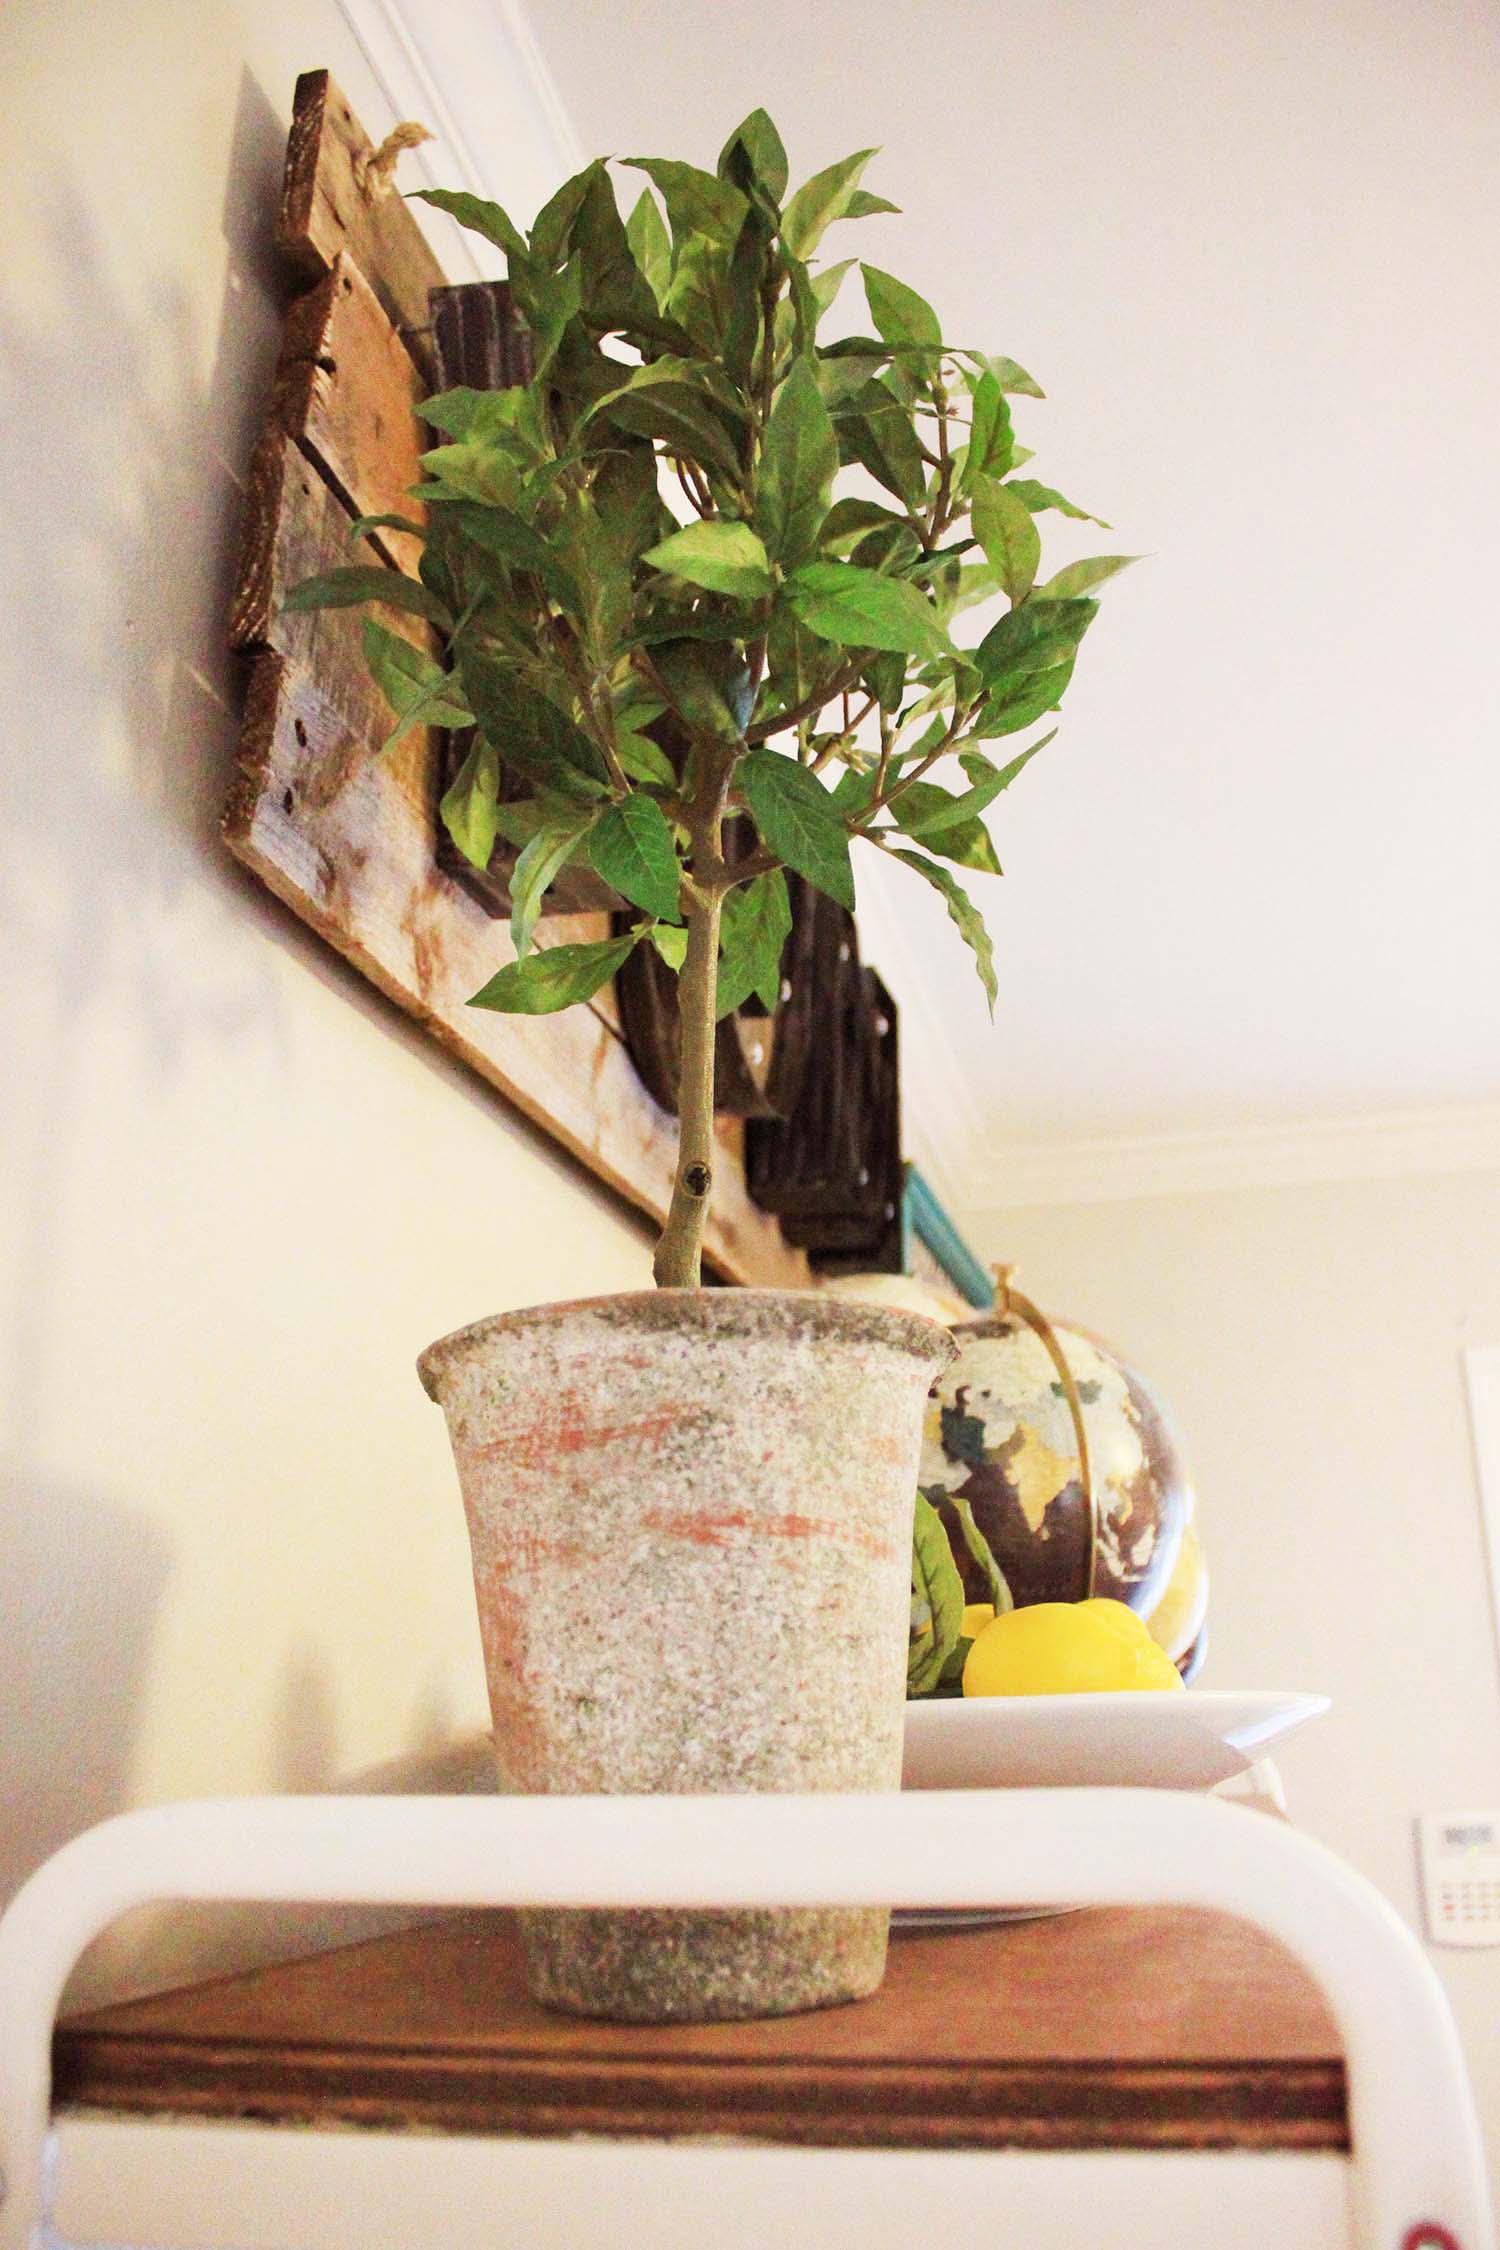
Can we talk about this plant for a quick second.
OK. farmhouse style plants can get PRICEY.
I love joanna and chip gaines like everyone else, but I don’t have the budget for their store…just yet.
I just can’t swing it for most of the items. I’m a world market, target, hobby lobby,
IKEA and michaels kind of girl in this season of life!
I found this plant at IKEA. $9.99 and then found this pot which I LOVE at Hobby Lobby for a couple bucks!
Not on sale it’s $4. which is insane to begin with. It looks so cool. They had a bunch of fun sizes.
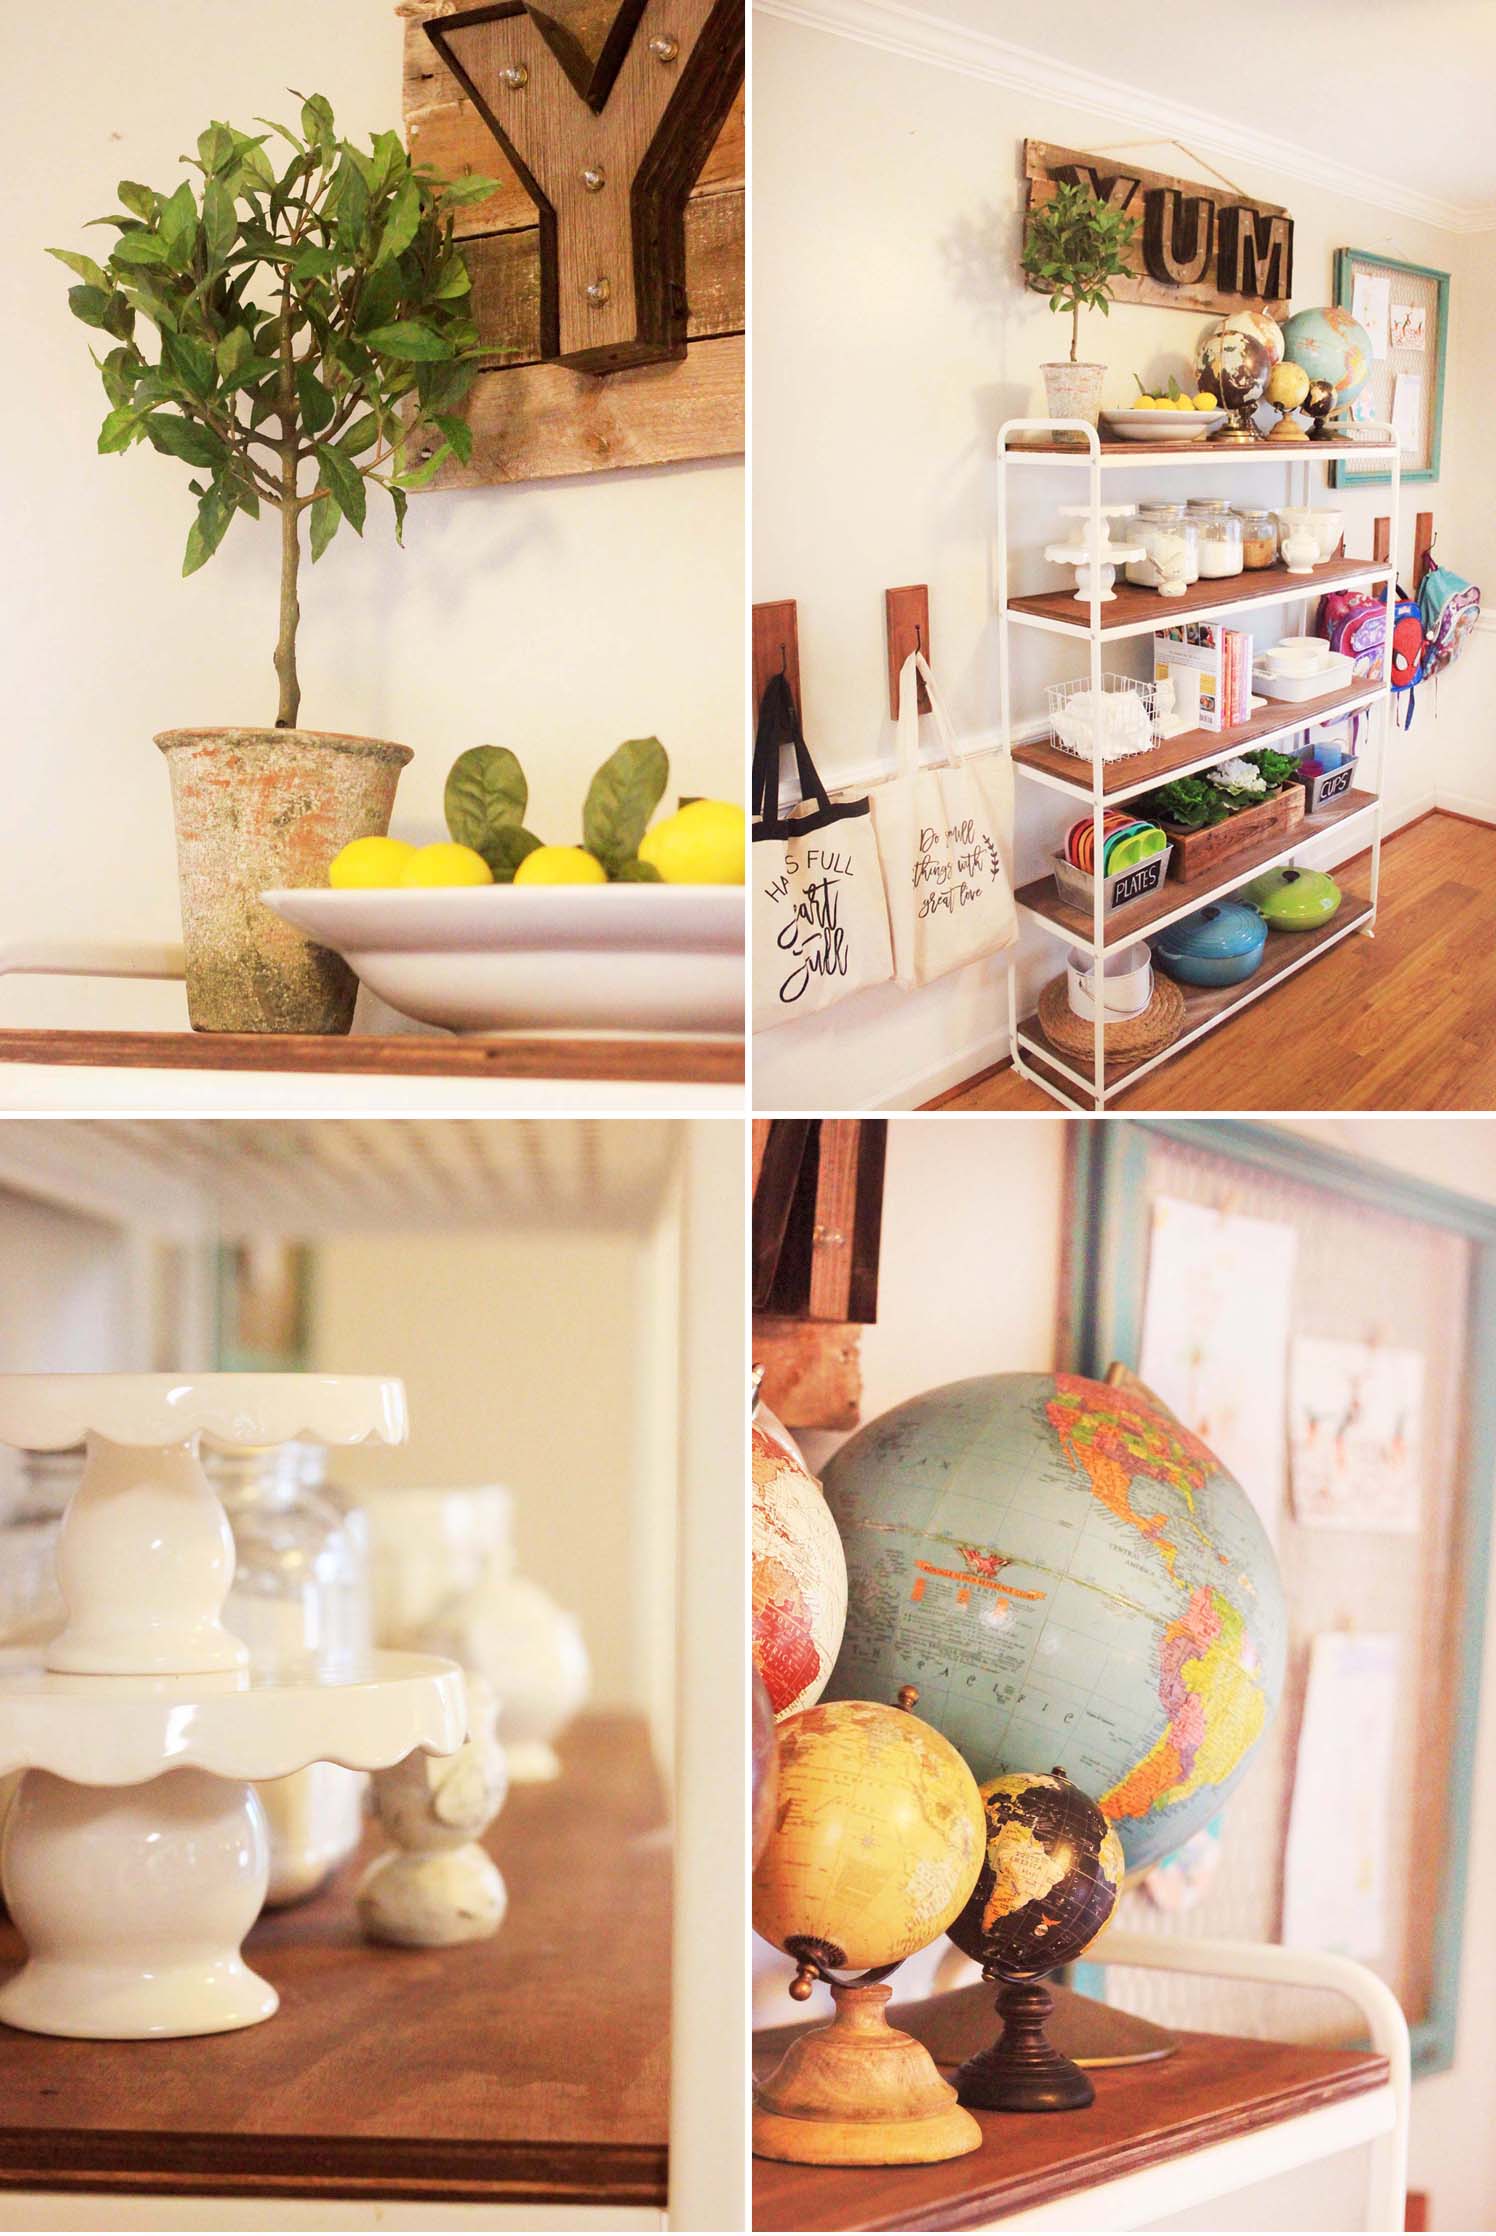
The YUM sign was a project I made with things we already had around the house!
I had gotten the letters for 70 percent off at Michaels and used a
pallet board that was left in our backyard when we moved in!
I’ll share a full tutorial on that later this week.
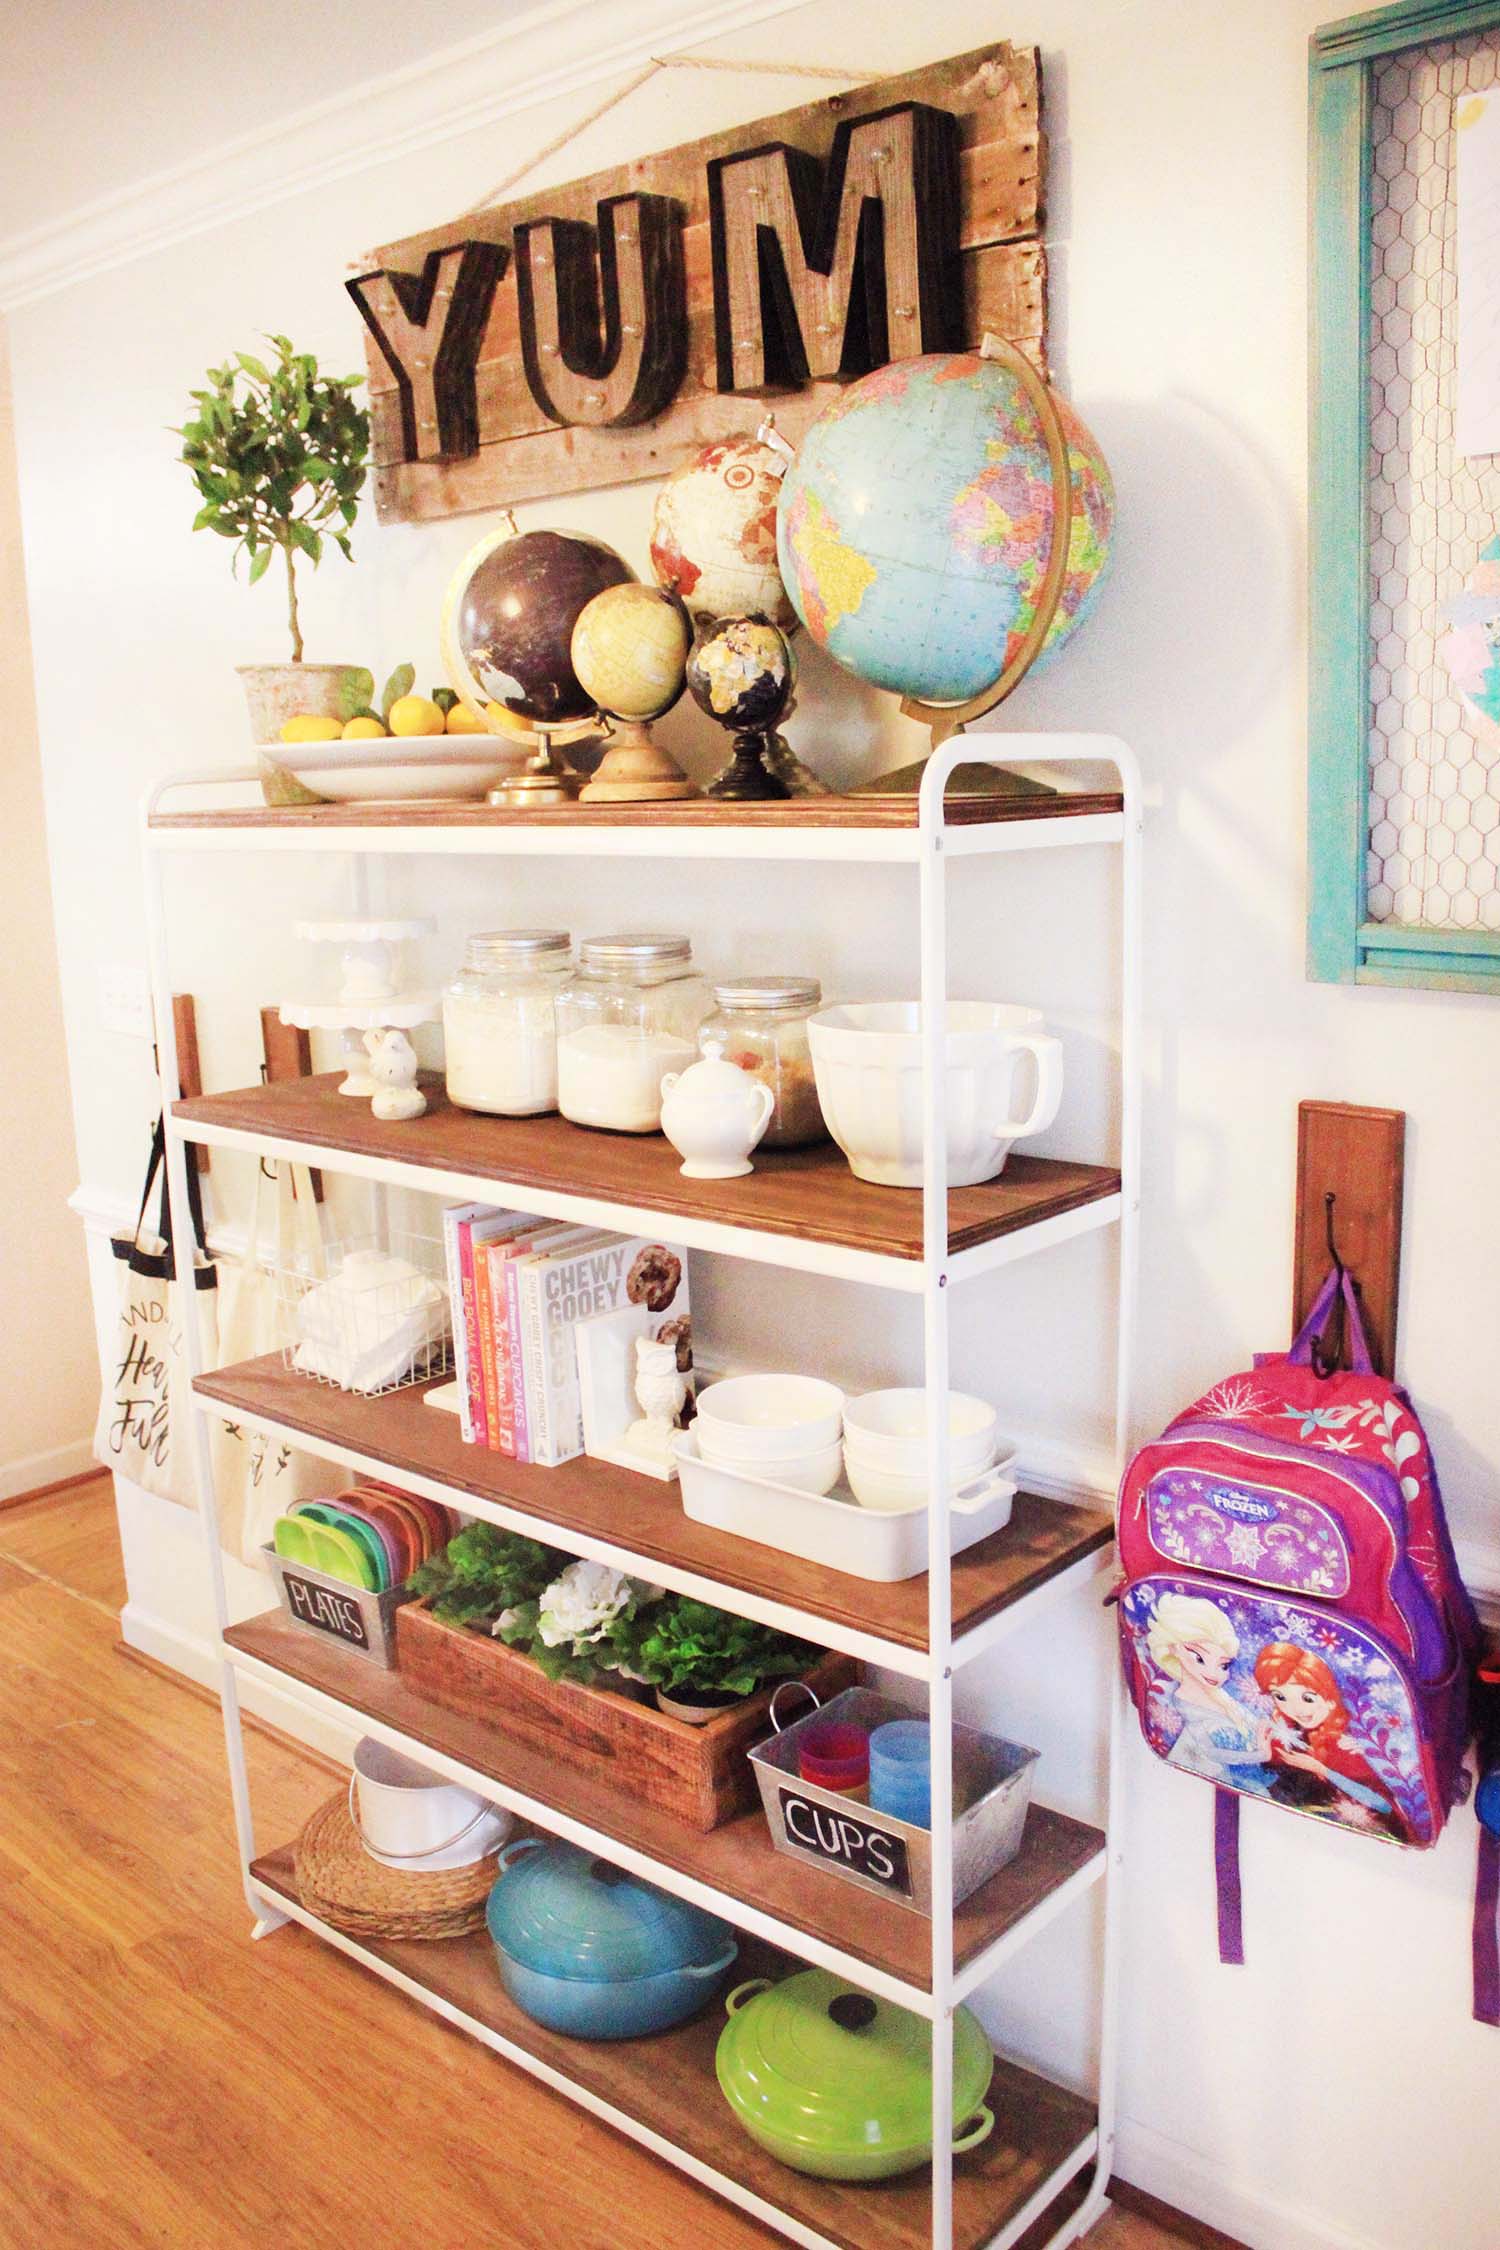
I’m so happy with how it turned out! It really brings that farmhouse style into the kitchen in a big way.
I love that with shelving units you have the freedom and fun of changing things around over time.
Decorating for different seasons, and enjoying items that might otherwise be hidden away in a pantry or cabinet!
Follow me on Instagram too where I share our family life each day, project updates
and when I find fun items to make our house a home!
(If I find a good deal when I’m out, I share the details with my people!)
kathleen
April 8, 2016 at 4:00 pmI love this farmhouse look! Like.. classy country lol! Great job! I love your blog and am in the process of starting my own, I feel like I have so much to say/write about and between you and Mandy Rose yall are giving me the courage! Lol
Krista
April 8, 2016 at 8:59 pmI love how this turned out! It has so much more charm than just the the plain metal!
Bethany
April 8, 2016 at 9:29 pmSo cute Natalie! We have the same re play kids plates and while looking at their website the other day I noticed they sell the plates in white. How badly do I want to replace the rainbow stack of plates in the cabinet with pretty white ones?! So bad, but I’m too darn frugal.
Meg Mountain
April 11, 2016 at 7:10 pmThis is awesome! I saw an IG post about the brainstorming part of this project the other day and it turned out GREAT! Some parts of our lives are *so very* similar — I am a mom of 4 as well, 2 girls then 2 boys (in 6 years) and our first boy’s name? Micah! I also have a thing for globes and have filled our adventure/map themed boys’ room with them. Aaah! May need to make this shelf, too! :) Thanks for sharing. Wish I could sit down to coffee with you!
Emily
April 14, 2016 at 2:16 amWow, this is such a fantastic idea! I love it! It’s simple, easy, and won’t break the bank. Gives me ideas to make things easier in my home! Thanks for sharing! I’m new to blogging. I actually found your blog from another blogger. Check out my blog sometime and let me know what you think!
Melanie
August 24, 2016 at 1:39 pmHow did you glue the wood with the shelves having holes in them?
natalie
August 25, 2016 at 9:16 amthe space between the holes is big enough where I would just put a thin strip.. this stuff is super powerful and thick so it doesn’t need much! :)