

We all have events going on in our lives.. whether it’s friends getting married…having babies.. anniversaries..birthdays!!..there are so many reasons to throw a party to celebrate..big or small.
all weekend i’ve been posting about parties…some adorable baby shower themes…..
some great gift giving ideas…. up next…
DIY details that you can incorporate
into your party!
into your party!
I’m always looking for new things to try out at my parties because it’s no fun to have a party that breaks the bank. everyone knows the husband loves you more when you actually have money left in the account after an event. :)


This would be sooo fun. And you could do a variety of looks with the same basic idea!
What you’ll need:
– Plywood (all wood and tools from Home Depot)
– (2) 2’x3’ Wood beams
– Sawhorse
– Ruler/Measuring tape
– Hammer and nails
– Wood screws
– Handheld jigsaw
– Handheld drill
– Mod Podge
– Paintbrush
– Waterproof sealant
– Vintage picture frame (I got mine at a thrift store)
– Vintage wallpaper (eBay)
– Floor molding (optional)

this would be adorable at a baby shower if you were doing a “cute as a button” theme. I’m all about banners right now. i don’t think i’ve had a party lately without one somewhere!! haha.
Materials Needed:
Circle Cards (blossom, strawberry & poppy)
2 1/2″ Round Label Sheets (blossom & strawberry)
Instructions:
1. Create buttons for banner by sticking eco-white 4″ round labels to the centers of blossom, strawberry, and poppy circle cards. With the 1/4″ hole punch, punch four “button holes” into the centers of blossom and strawberry 2 1/2″ round labels. Layer on top of the 4″ round labels.
2. Print your message (baby) or a child’s name onto eco-white 4″ round label sheets using ourprint template.
3. Finish by punching two holes at the tops of all circle cards with a 1/8″ hole punch and threading with poppy 1/4″ satin ribbon.
To create a baby boy banner try using circle cards and labels in pool, chocolate, bluebell and eco-white.

I’ve always wanted to try this… you could really make a statement with this one. Making your own invitations for your party?? go all the way and tie in your theme with the envelope liner.
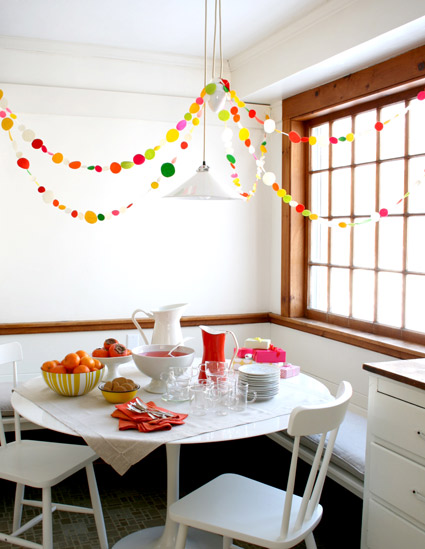

For those of you who sew out there this will be right up your alley! i love the colors she chose for her space! so cheery!
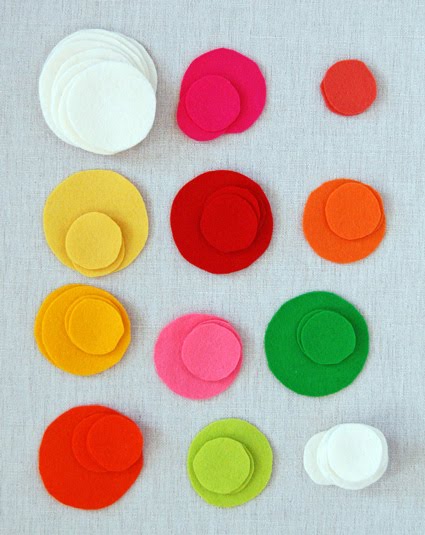
Materials Needed:
Nine pieces of colored wool felt. I used: Bright Orange, Lime, Melon, Grass, Magenta, Yellow, Light Yellow, Tomato, and Pink
One piece of Ecru Wool Felt
One New Year’s Garland circle template, available for free download here, printed and cut out
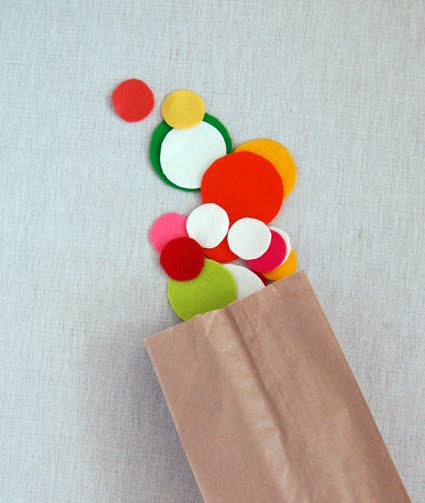
Small or medium sized paper bag


I also love putting lemons or limes around the bottom of the vase.. such a fresh and lovely special touch!

hope you are having a lovely sunday!
here’s a party that i linked up to today!
here’s a party that i linked up to today!


PaperCourt
April 25, 2010 at 10:29 amThe photo booth idea is awesome! I made the felt garland for little kid’s birthday party (photos at the link below) and it was so easy and cute.
http://papercourtponderings.blogspot.com/2010/03/guitar-party.html
Kristin
April 25, 2010 at 3:16 pmLOVE the photo booth idea. Saw something similar at a wedding. So much fun!
Rachel L Riley
April 25, 2010 at 3:42 pmThese are fabulous ideas! I have tons of baby showers to throw coming up here soon and I will definitely be using these! Thanks!
Lane
April 25, 2010 at 5:27 pmI was JUST thinking that I needed to find a DYI for a cupcake stand! Thanks for finding one for me! :)
the vintage wren
April 25, 2010 at 9:28 pmWhat great ideas, and a super cute blog. I’m loving all of your diy projects, especially the asparagus and artichoke arrangement…I really want to give that one a try soon. Thanks for visiting my blog, I’m now a follower of yours too. Take Care, Carrie
Anna Liesemeyer
April 26, 2010 at 9:54 amI love each of these!!! …. thanks for the round up!!! working on a bunch of DIY’s for gabriel’s bday this weekend:)
<3