

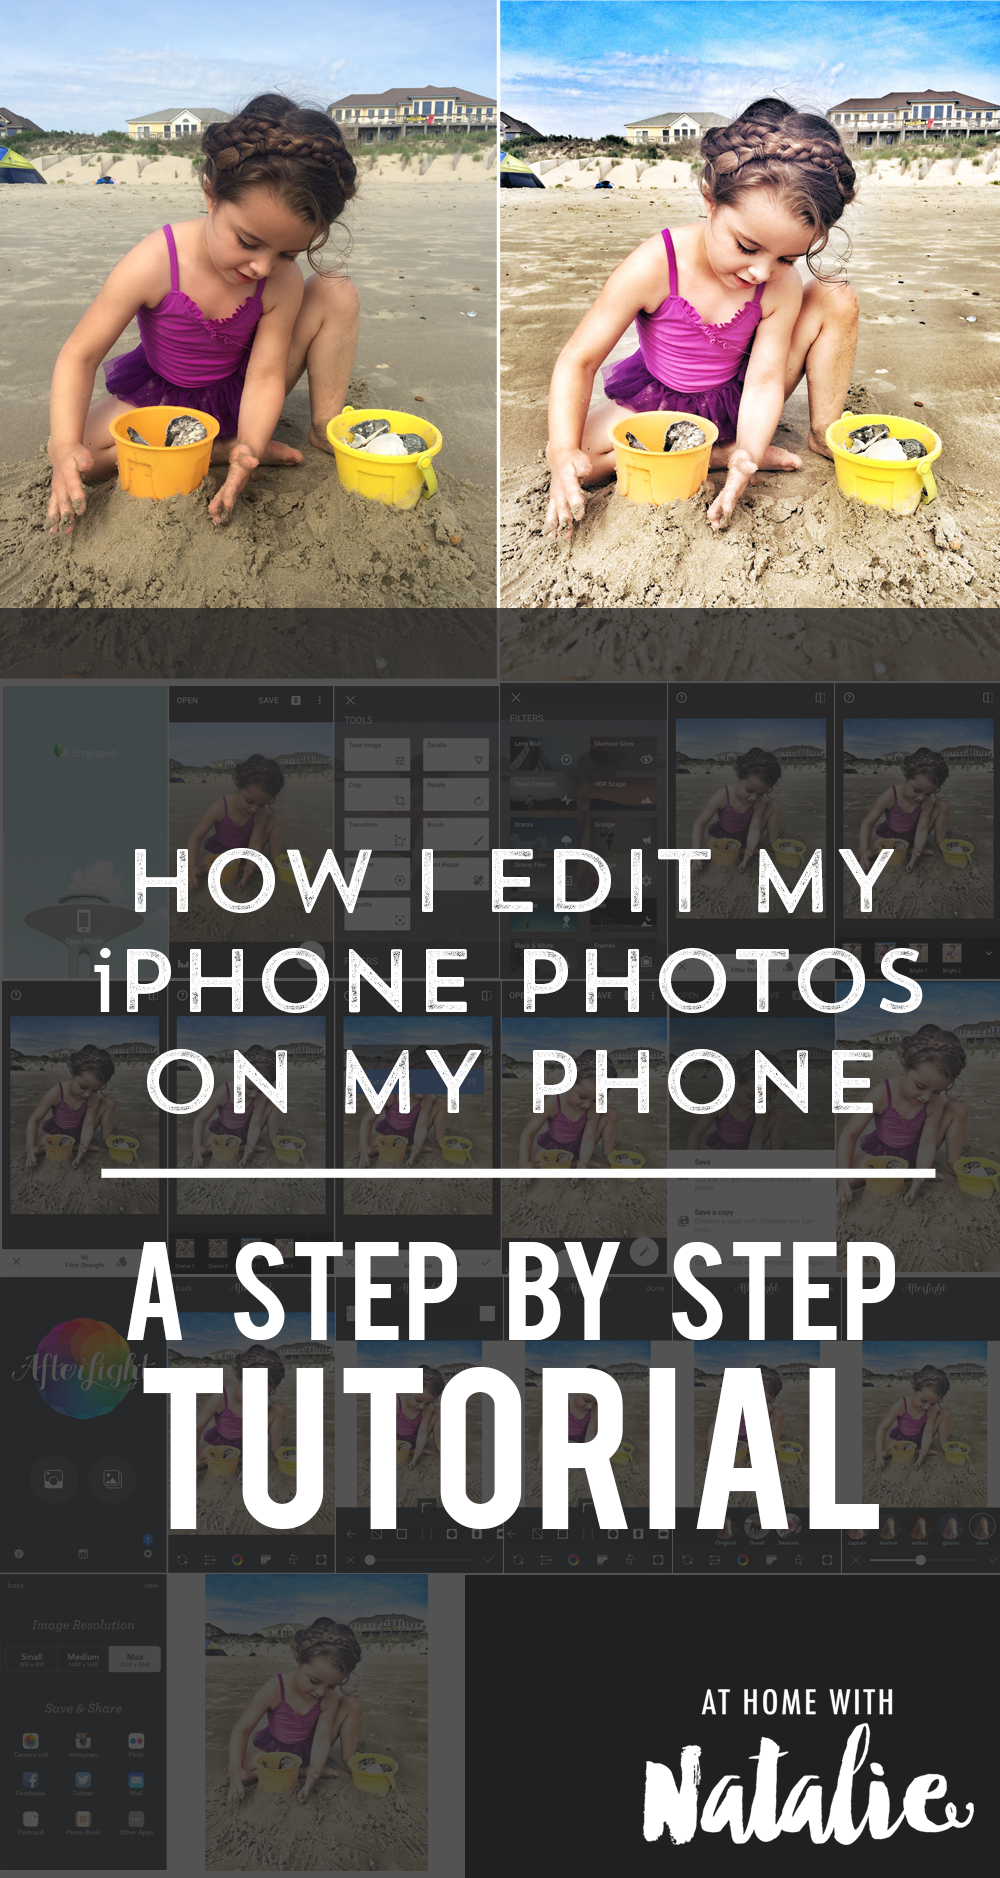
I love taking photos with my iphone! But sometimes the photos need to be brightened up a bit.
I’ve been editing my phone photos with two apps for years and “how do you edit your photos?!” is probably
one of the most asked questions on my Instagram. besides, “what paint color is that???
Took some work but I pulled together this step by step tutorial to show you exactly how I edit my photos.
There are other things I do to some photos for fun, but these are the basic steps I do on almost all of them.
If you check out my Instagram, you’ll see that most of my photos have a bright pop to them.
You can get that too! And you’ll be able to enjoy your photos that much quicker because
editing on your phone is super easy and quick. We just got home from vacation and
I just edited all the photos and am ordering a photo book today!
(I use PRINTASTIC for my photo books! You can use code NATALIE20 and get 20% OFF yours!!)
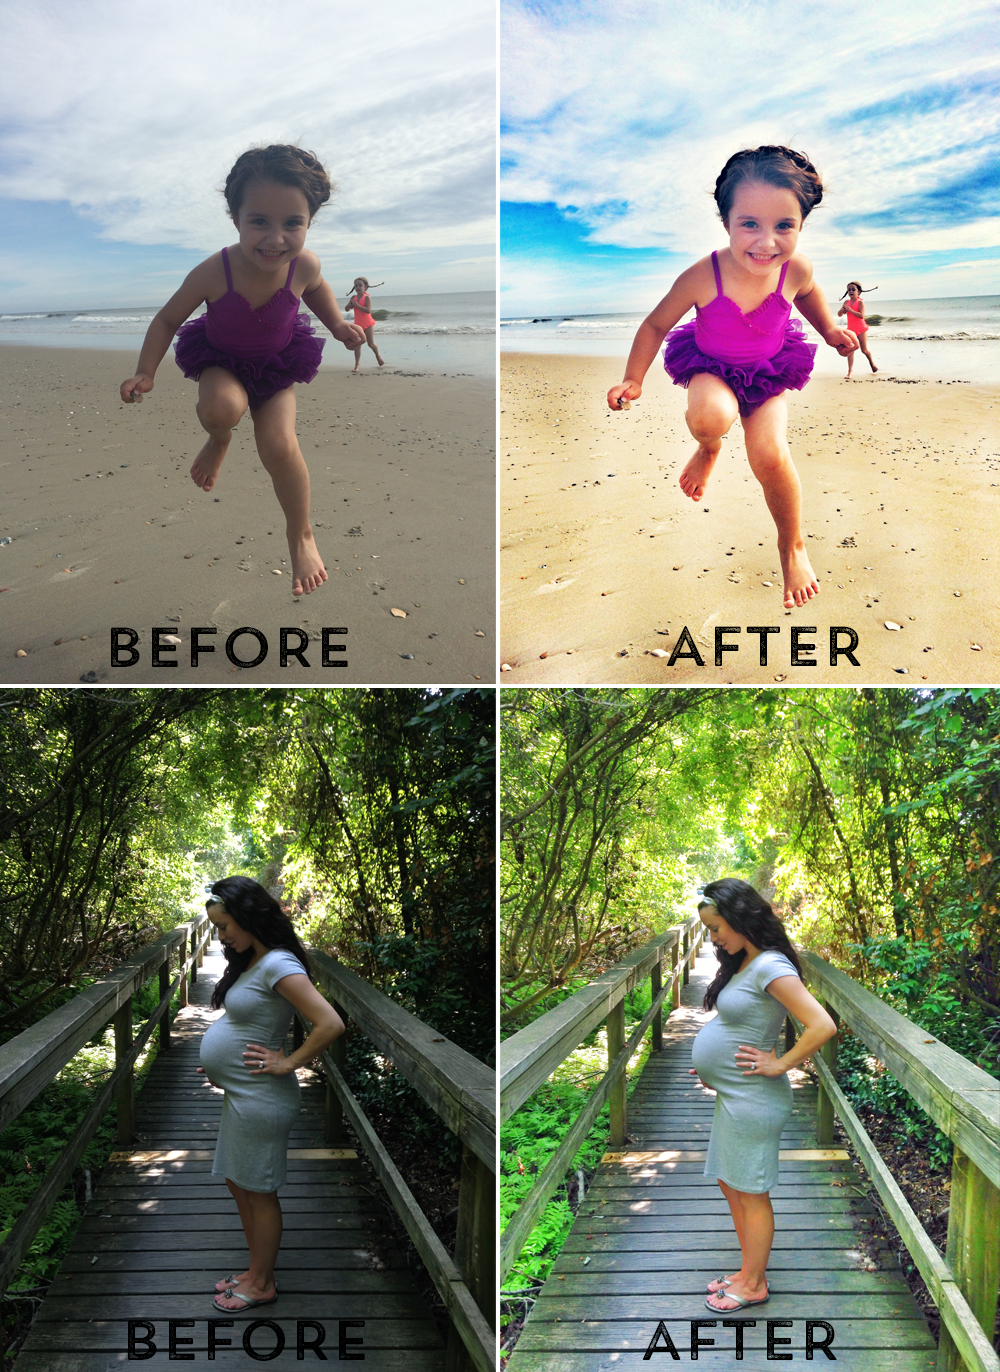
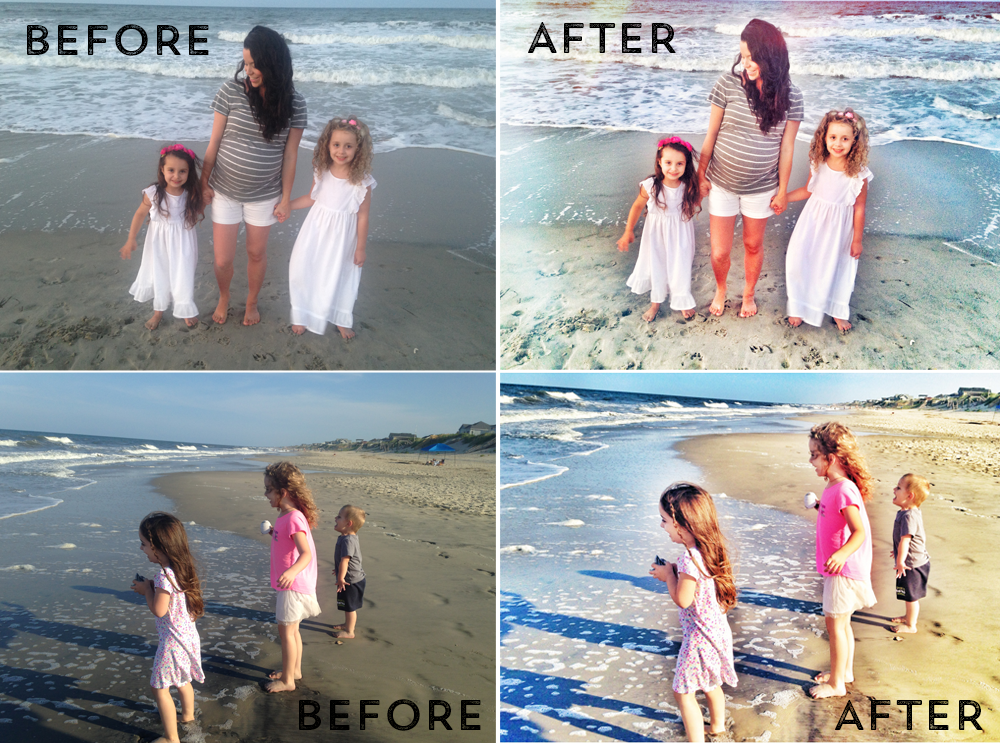
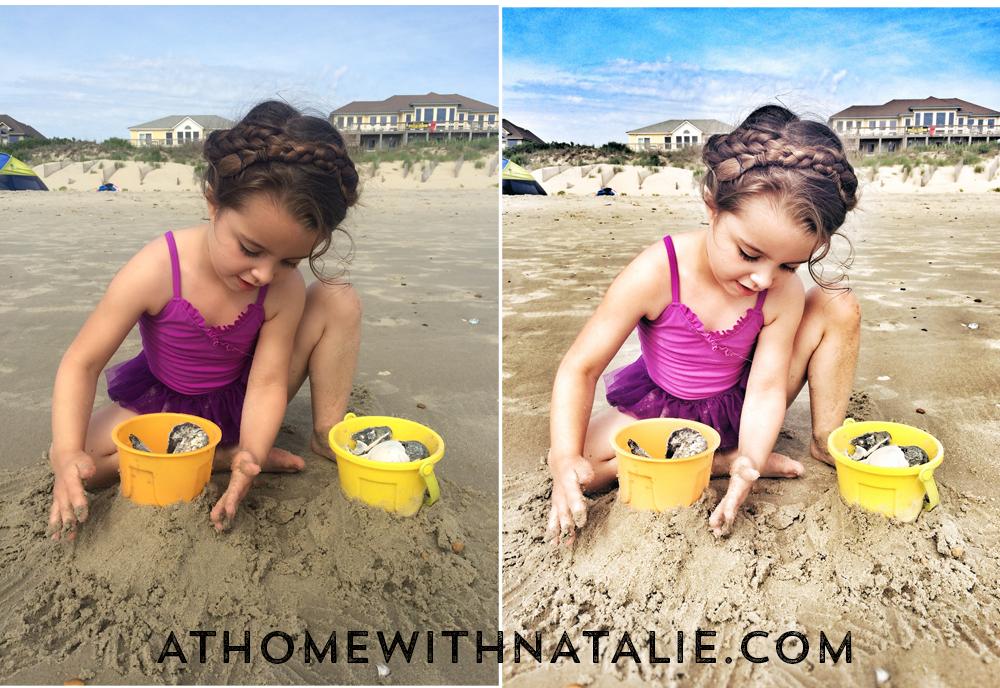
Here’s some before and afters to show you how with a few steps below, you can transform your photos!
Anyone can do it! Once you try it a few times, you’ll soon be doing it without even thinking!

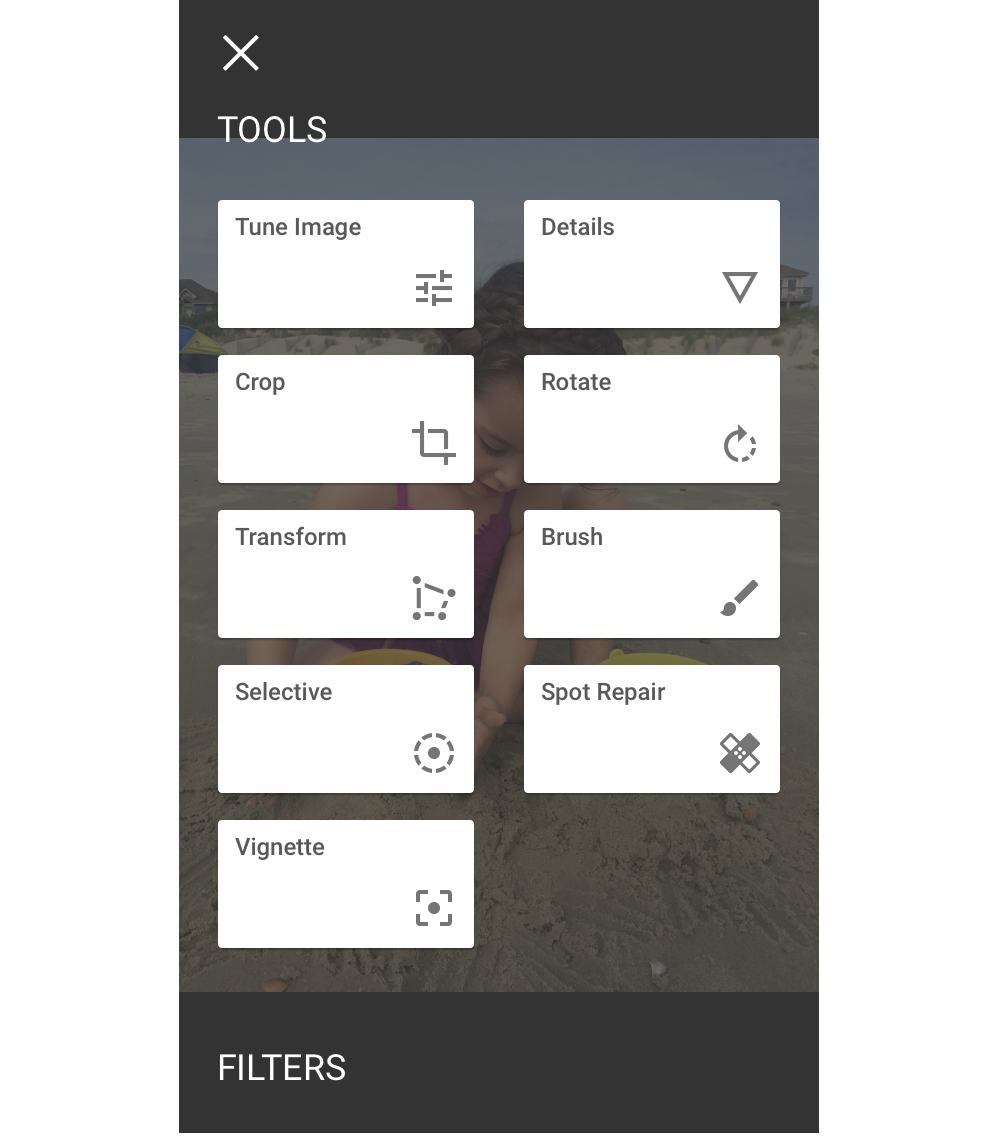
Ok first things first, You’ll need two apps!
Snapseed and After light.
I start in Snapseed. open it up and choose the photo you want to edit.
Click the edit button in the bottom right of your screen.

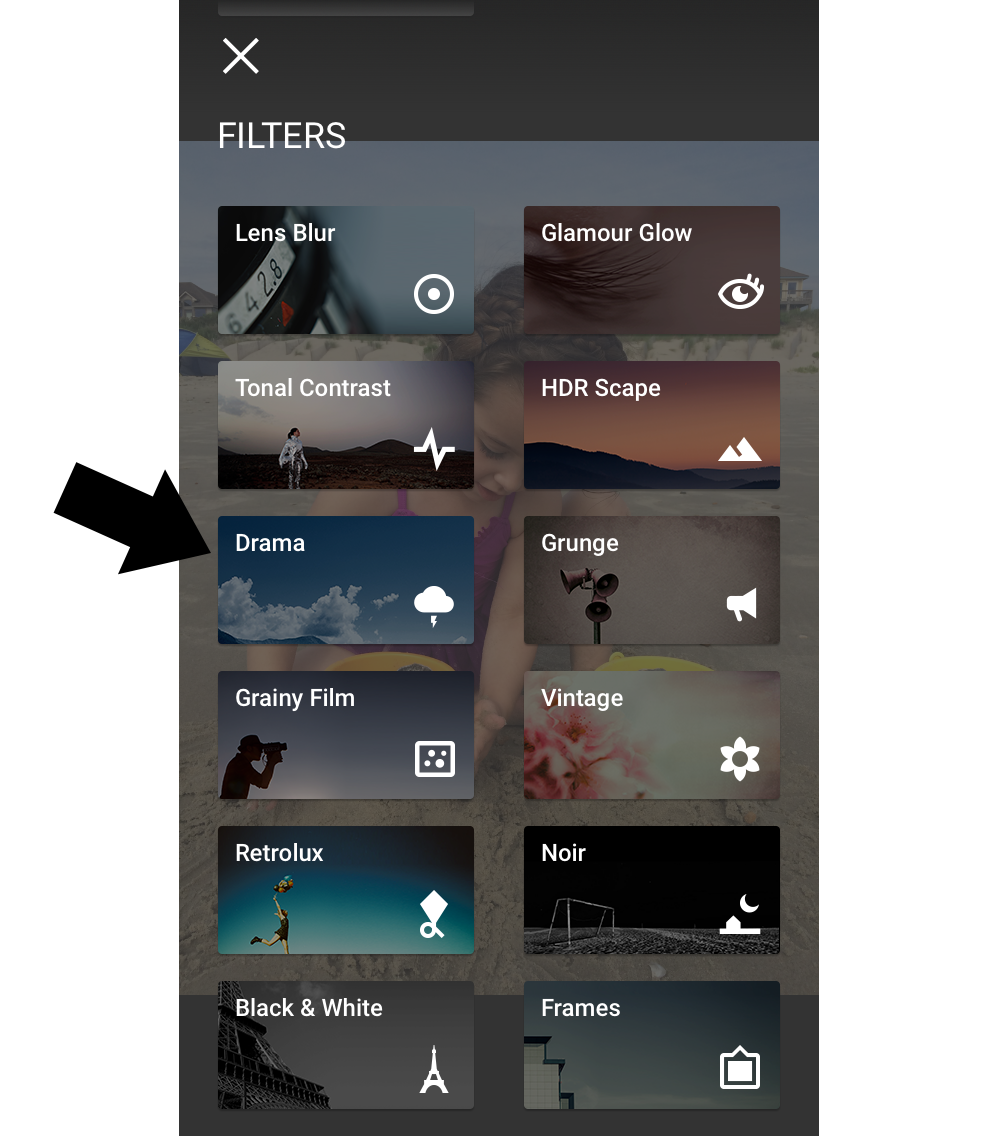
You’ll see a bunch of options pop up..just scroll down to the next section.
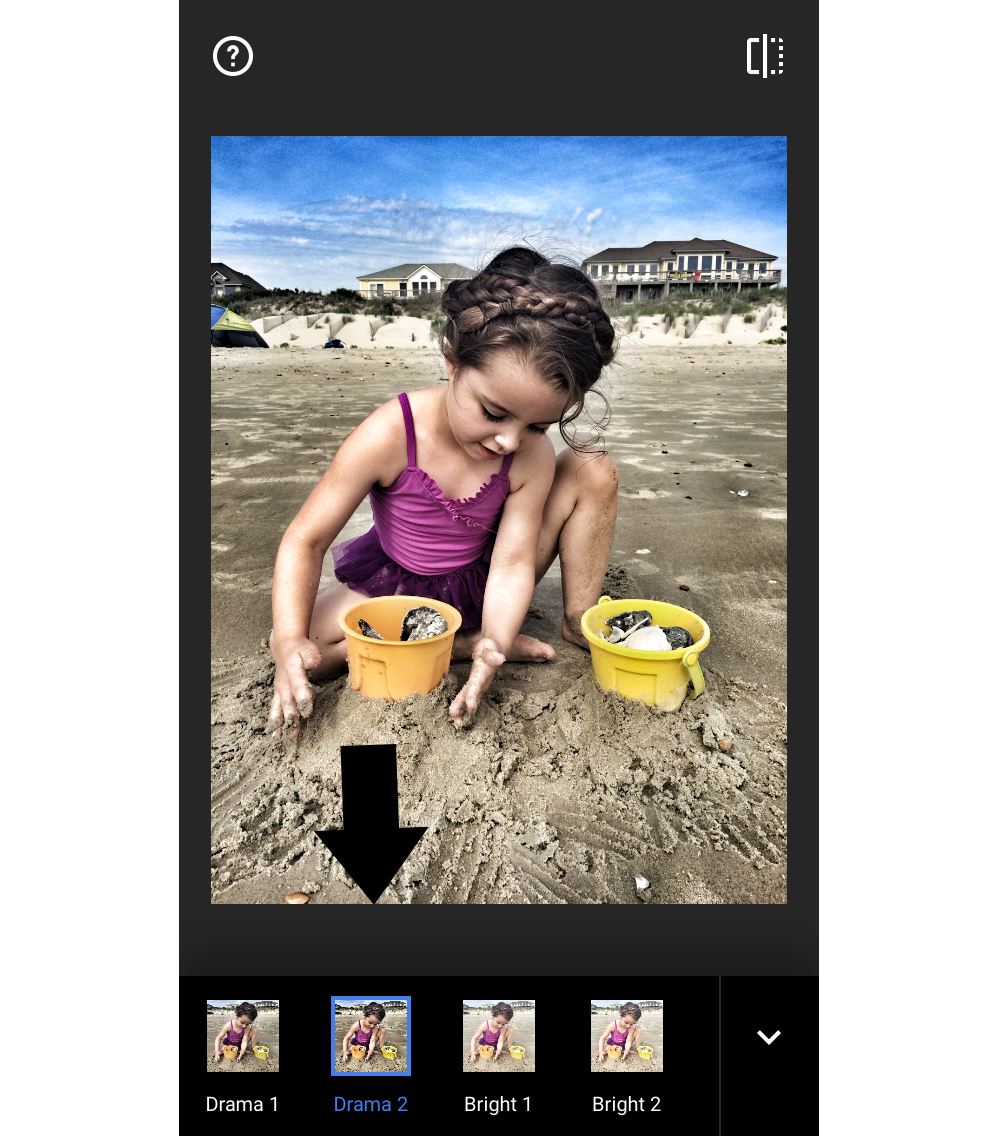
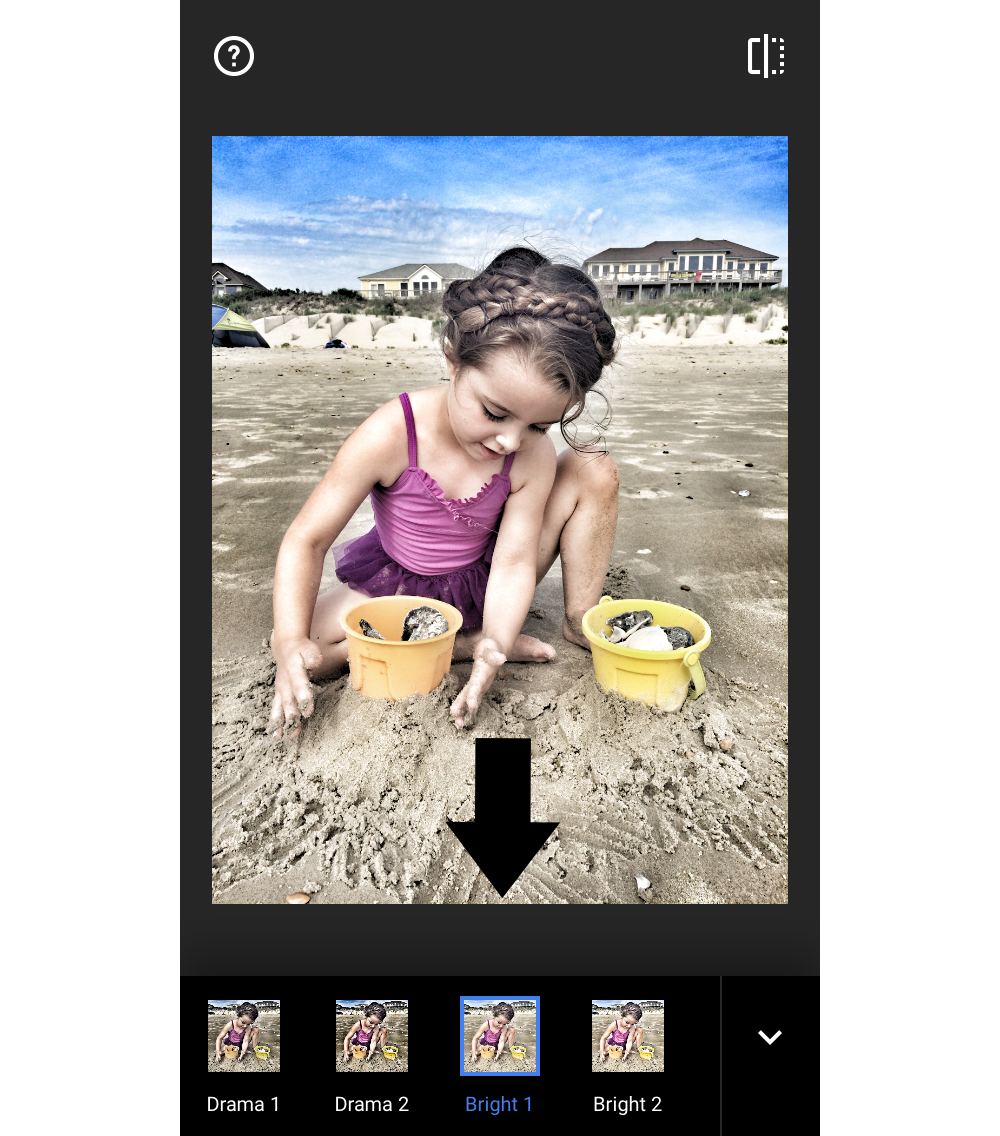
Click on DRAMA!

It will automatically have it set to the first setting…but you want to change that.
Click on the bottom icon of paint cards.

Click Drama 2!
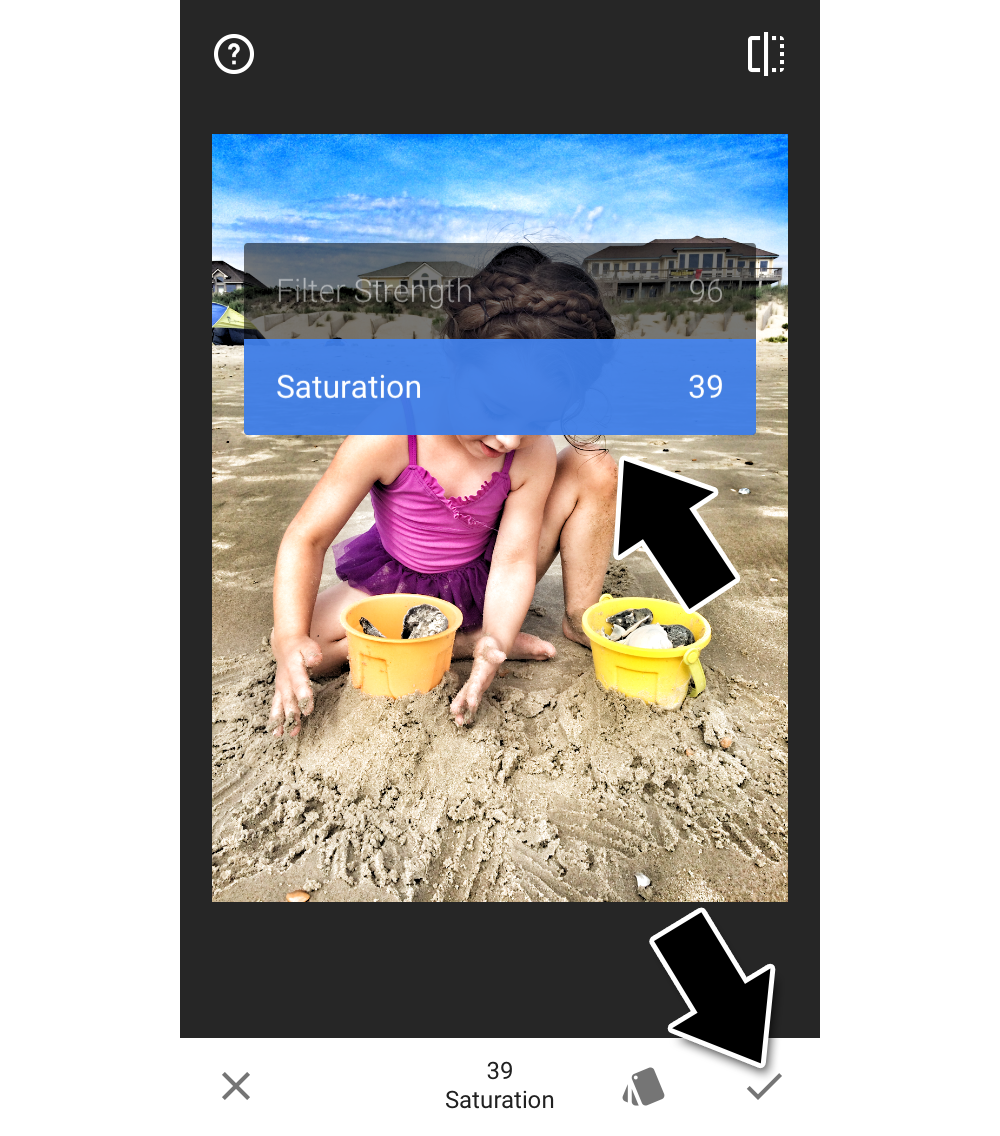
by holding down your finger on the screen you can change the
strength of the filter and saturation.
I usually don’t mess with this one that much.
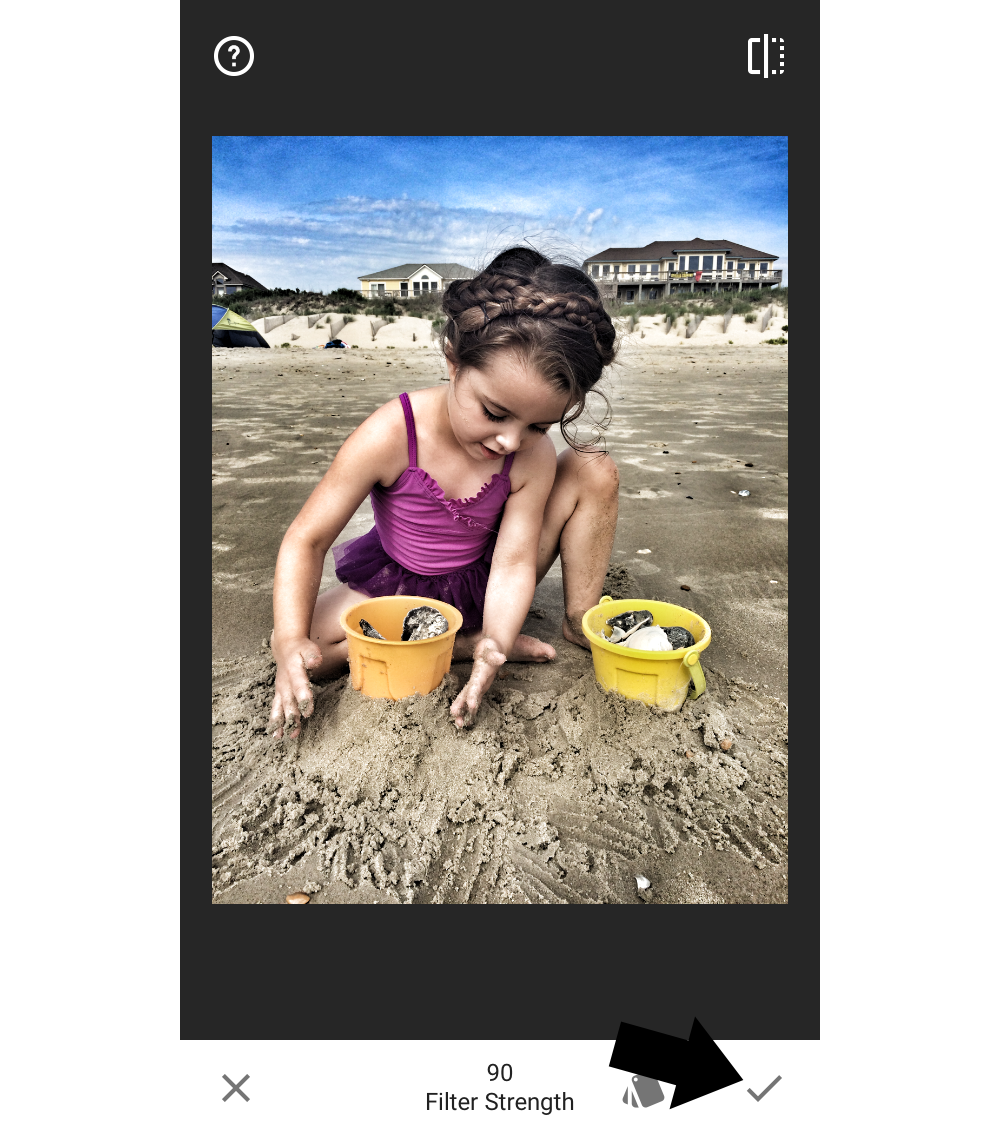
Click the check mark in the bottom right!
This part is important because you want it to save this filter before you do it again.
Head back to Drama! yup. back we go.
Now we go back to that same paint card and click on Bright 1.
Now this is where I hold my finger down on the image and up the saturation!
Sometimes I lower the filter depending on the brightness of the photo.
Click the check mark in the bottom right.
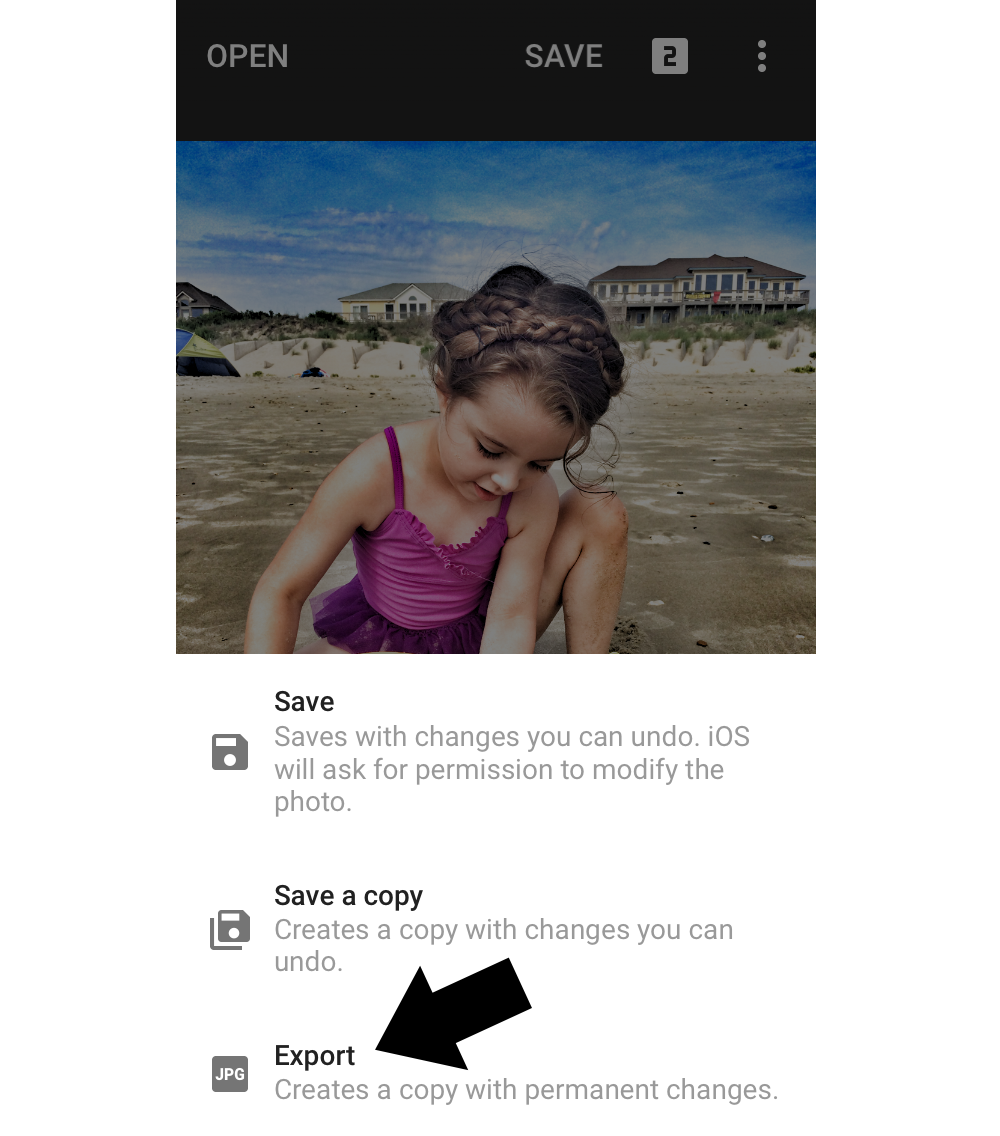
Now click SAVE at the top of your screen.
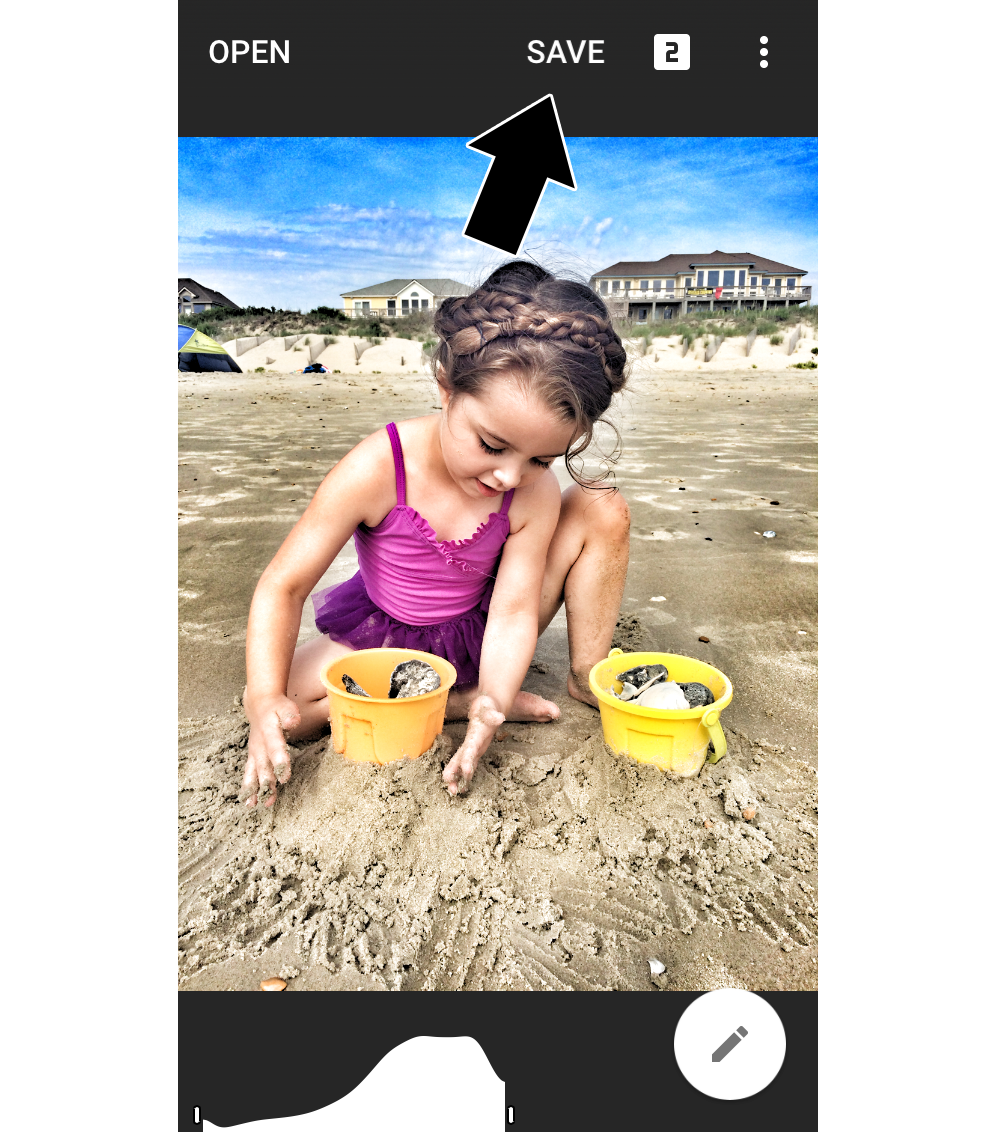
You’re going to want to click Export and it will save a copy to your camera roll!
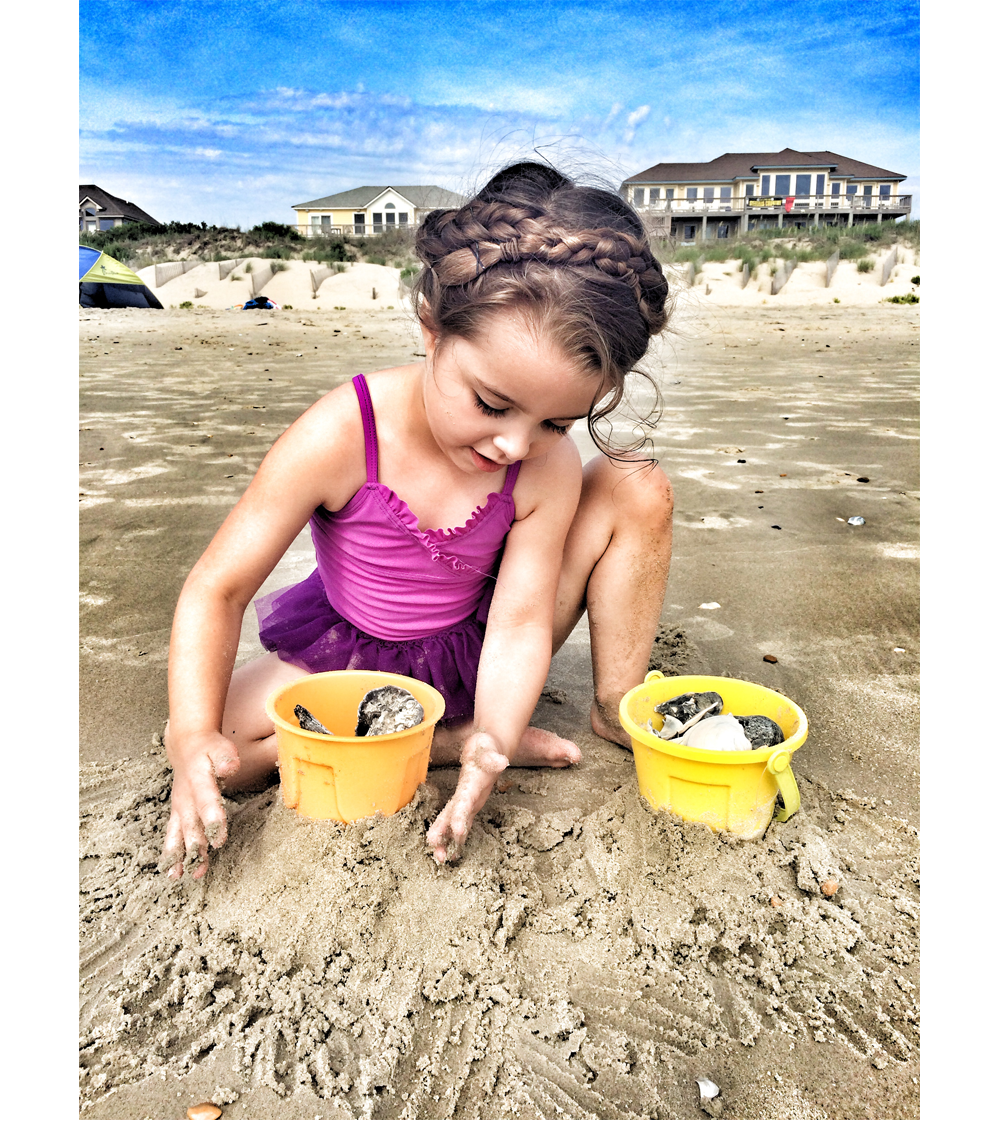
And here’s your final photo from Snapseed!
You could stop here… or keep on going with the next app I like to use.
(It makes my images square for instagram and sometimes softens the photos with one more filter.)
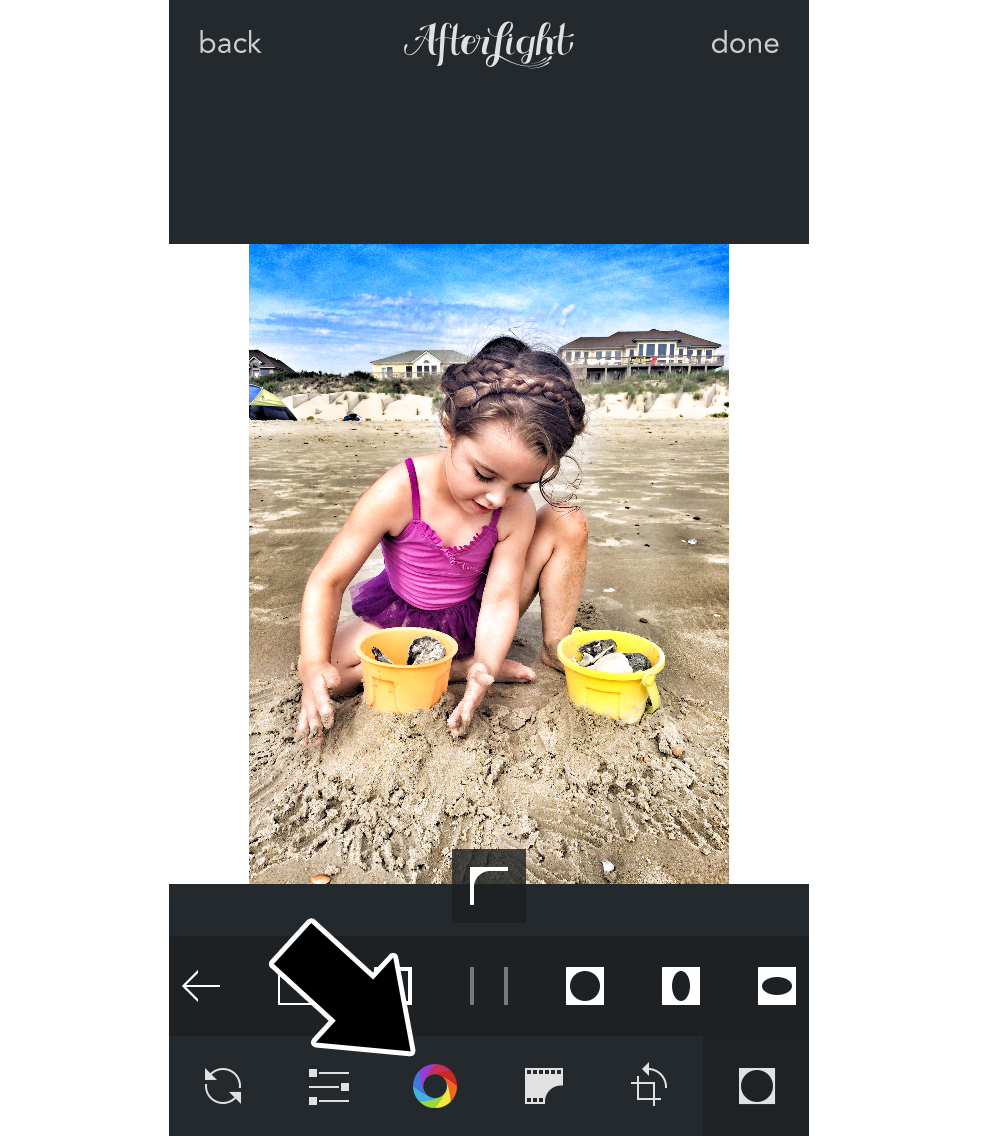
Next up is After Light! Open up the photo you just edited.
(click the right button below with photos…not the camera.)
I first frame the photo so it’s square. Click the bottom right button.
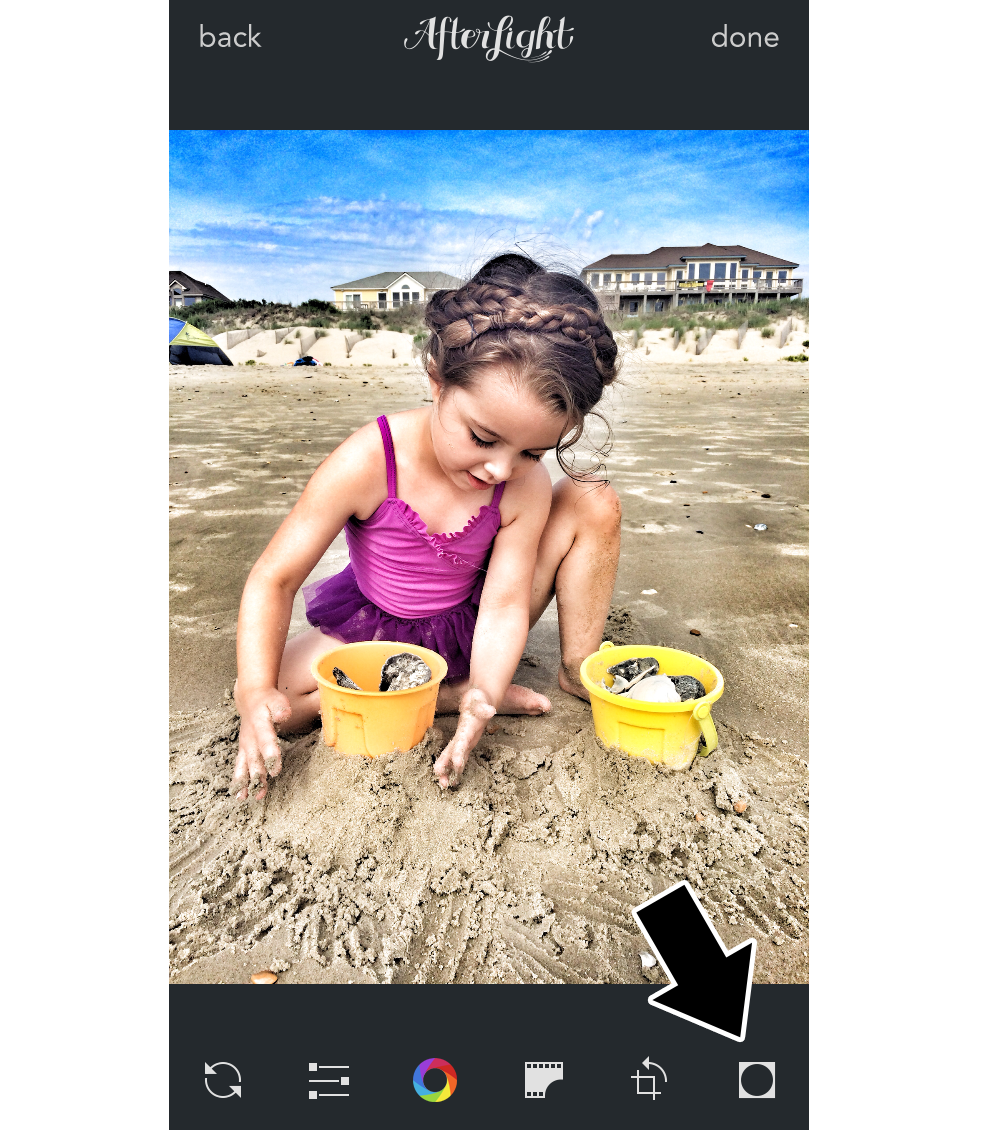
There are different frame choices. I do the one shown below.
Click the check mark to save!
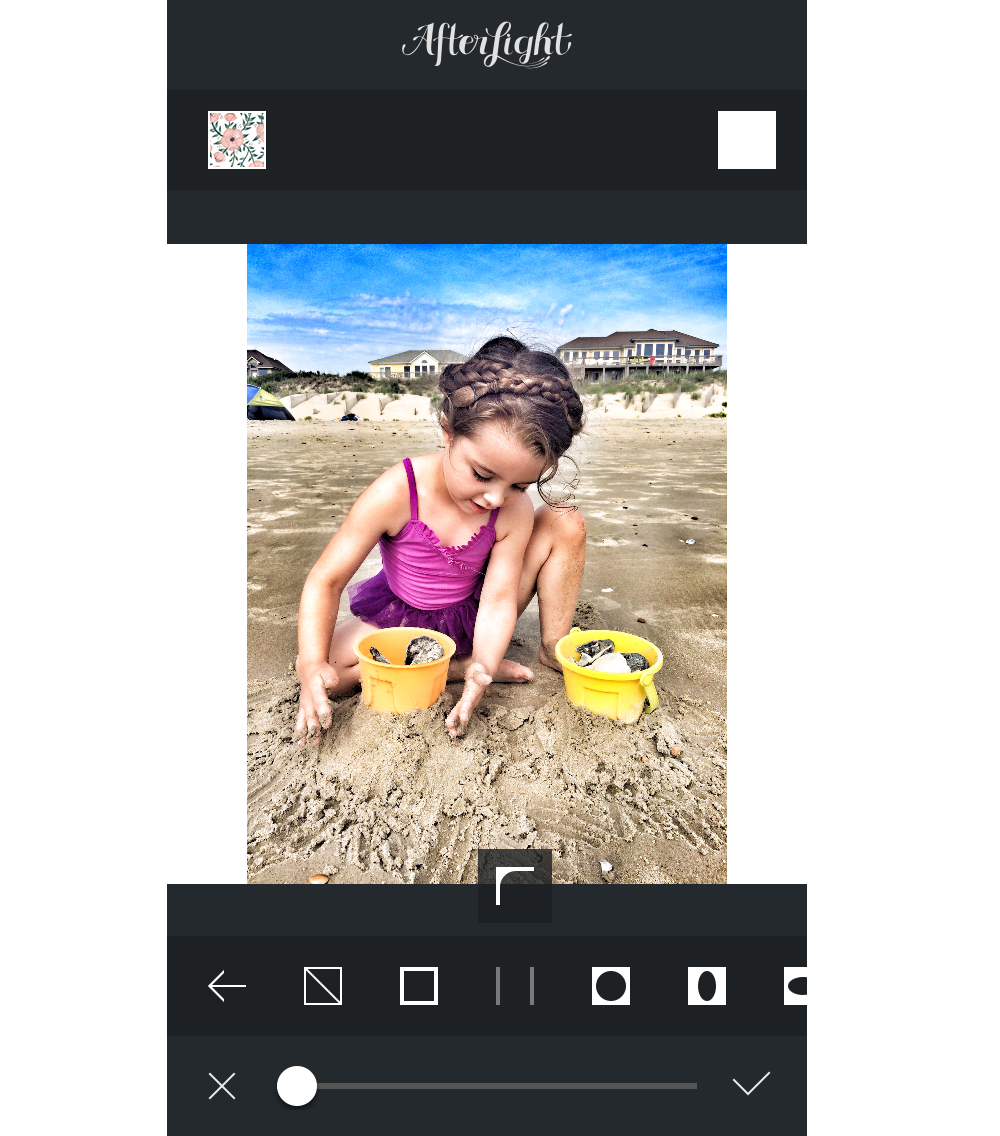
Next up is the filter. Click the circle rainbow button.
Click Original. (I sometimes use some filters in the other sections,
but for today I’m keeping the filters simple.)
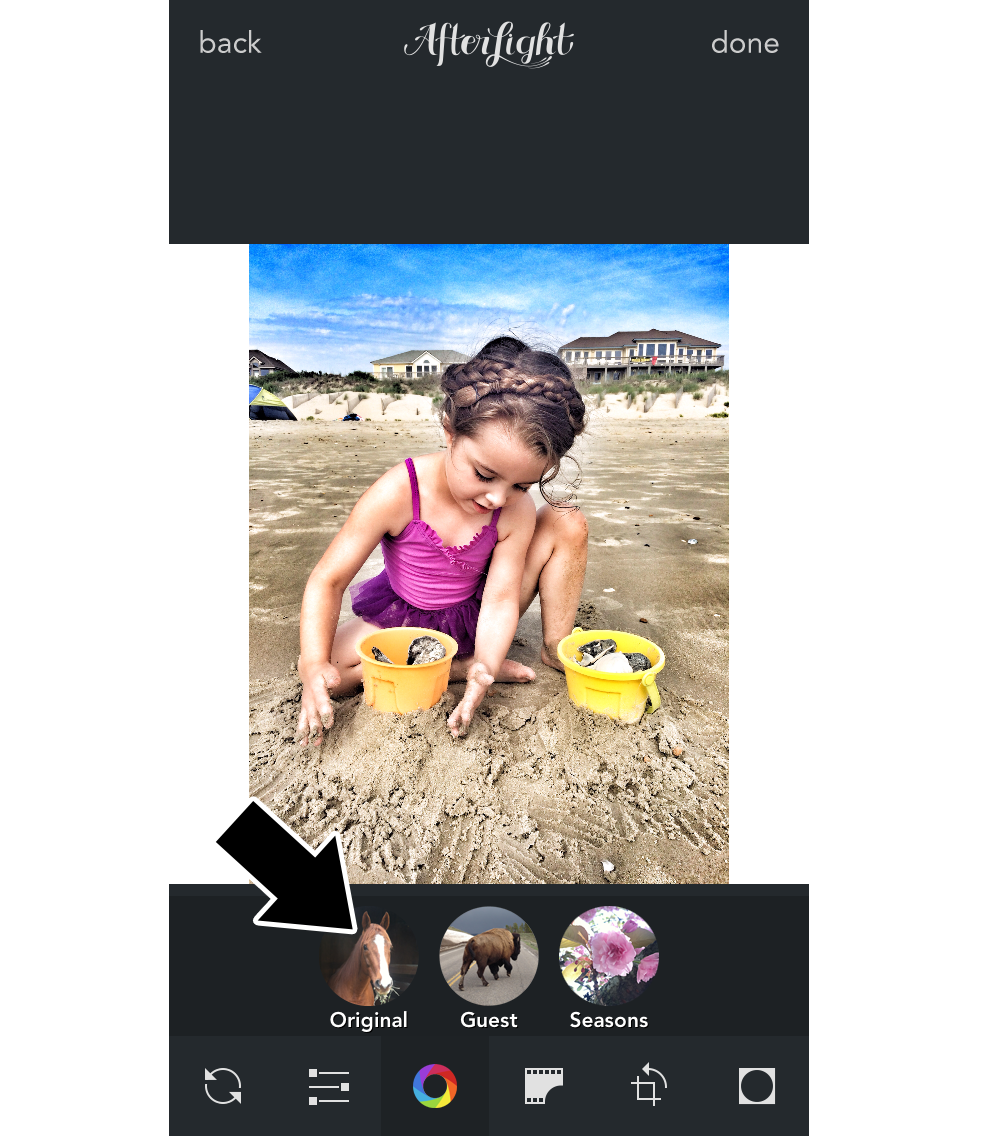
I use Captain a lot. But for photos that are already really bright
and I want the blues and greens to pop I use Olive!
Click the check mark to save the filter.
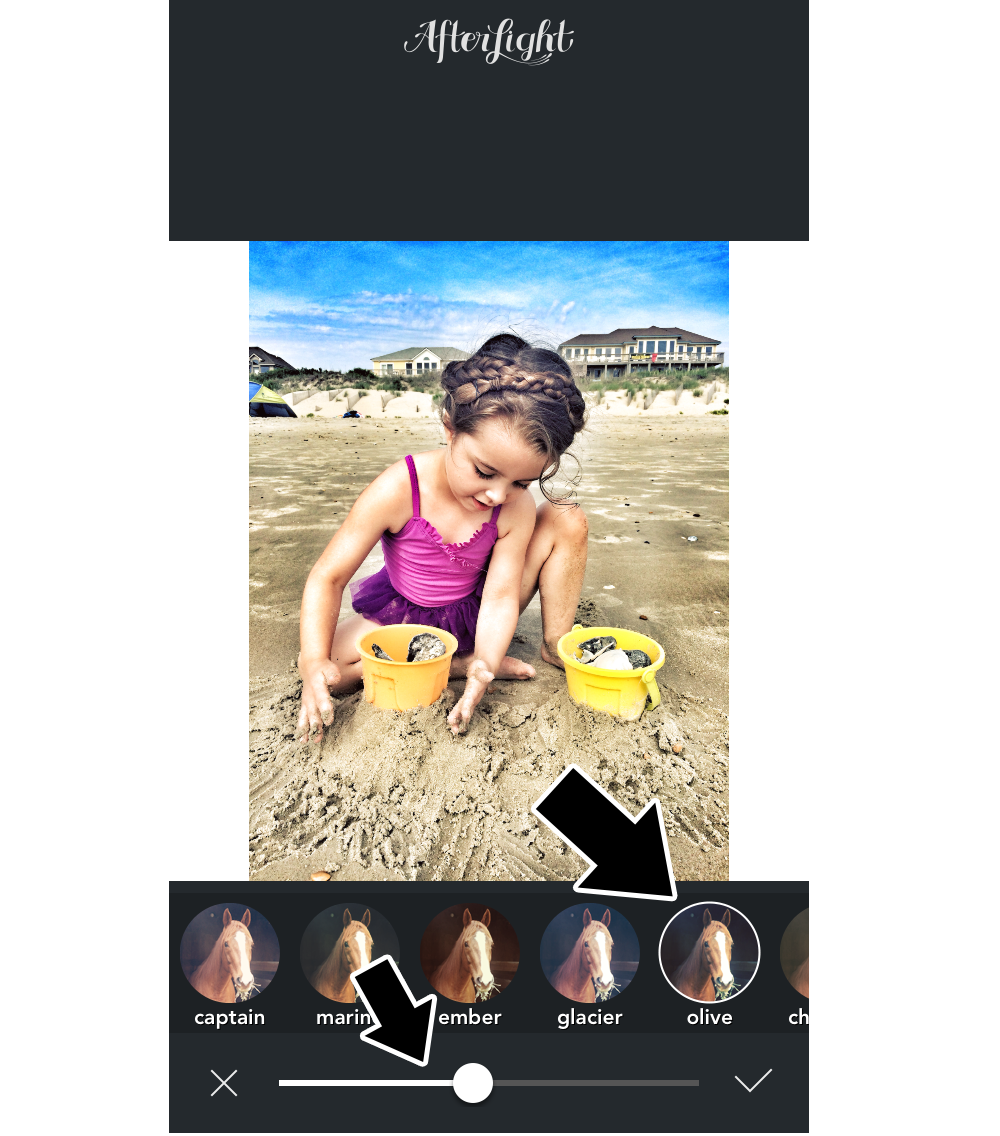
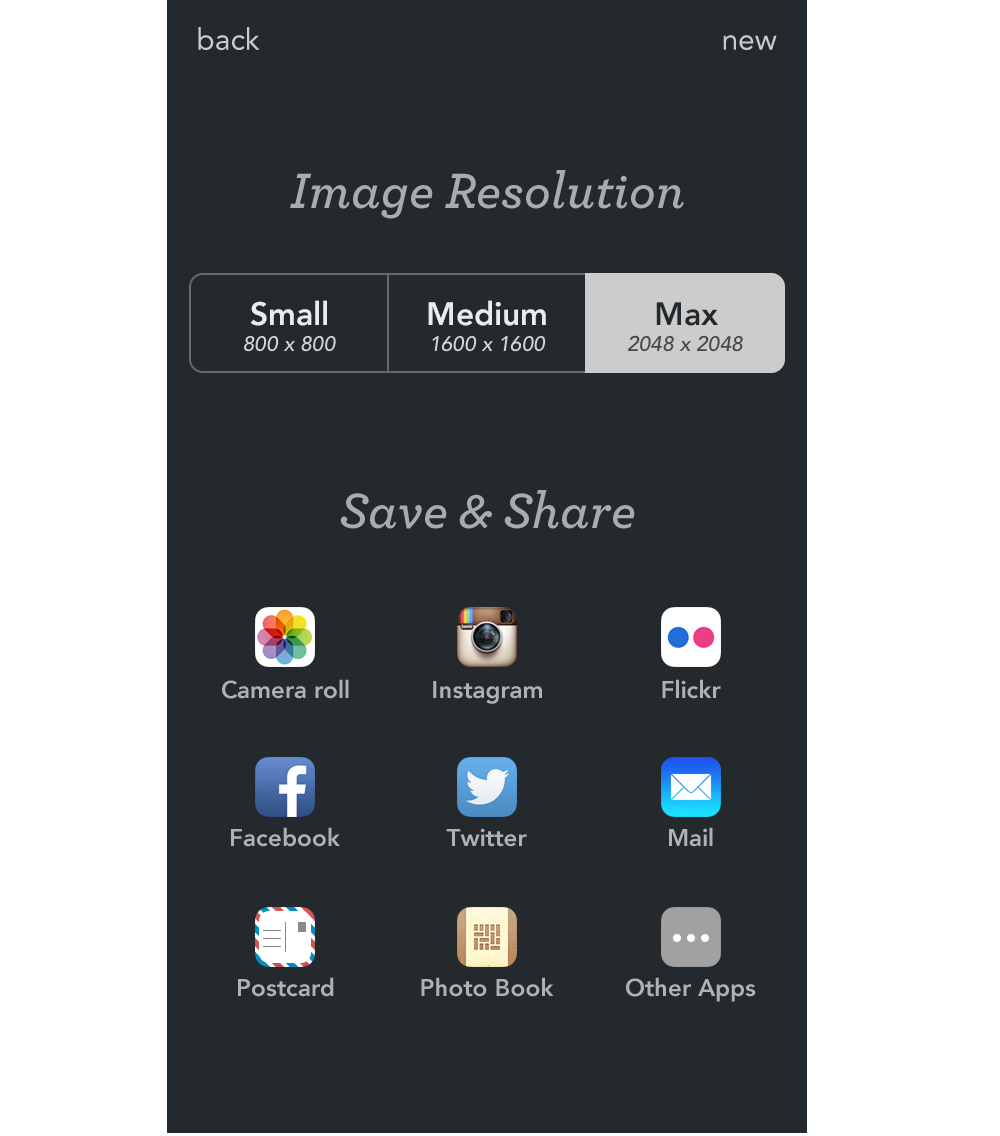
It’ll take you back to the home screen.. click done in the top right corner.
It will give you saving options. I usually do Max and save to Camera Roll.
And here’s the before and after of the photo!
A few little edits can make a huge difference!
I adore Sienna in both photos but I can’t wait to frame the one on the right.
If you’ve taken a beach vacation this summer… download the apps and edit them.
You’ll love the results. The sunshine makes for great photos!
Hope this tutorial was helpful!
I’ll be sharing more easy photo editing tips for your phone!
Caroline @ chocolate & carrots
July 22, 2015 at 3:37 pmLove this Natalie!!! Thank you for the awesome tutorial!
Amanda
July 22, 2015 at 6:33 pmI love the new look of the blog! It is so easy to read and very clean. And congrats on the new little one. :)
natalie
July 22, 2015 at 11:27 pmthank you!! :)
Krista
July 22, 2015 at 9:02 pmMy phone takes cruddy pictures… I’m going to try this! It looks like it will help a ton!
Laura
July 22, 2015 at 9:35 pmHaving a hard time figuring out how to raise the saturation. How do I move it from filter strength to saturation?!
natalie
July 22, 2015 at 11:27 pmWhen you press down on the photo… you’ll see it pop up..don’t lift your finger up..just slide down to saturation. then you can let go and press left or right depending on how much saturation you want! :)
Kristin from This Inspired Life
July 23, 2015 at 2:31 amNatalie this is awesome!!!! Thank you so much for the tutorial and saving all of my beach photos from being completely lackluster to looking beautiful! I was using afterlight but snapseed is blowing me away. Thanks!!
natalie
July 23, 2015 at 7:53 amso glad it was helpful!! :)
Renee
July 23, 2015 at 7:49 amholy cow this is AMAZING!!!!! I am super pumped to start using these. I have an old iphone 4s so the quality of pics is terrible. But I so often don’t drag my DSLR around with me.yay yay and yay!
p.s. i love the new site too!! :)
natalie
July 23, 2015 at 7:53 amyeah you’ll see an amazing difference! I used this app with my iphone 4s too and it helped so much to brighten the photos!
Nicole
July 23, 2015 at 5:58 pmWhat do you use for indoor pics? I live in AZ and it is too hot to venture out so we do lots of indoor activities. Any tips on what settings work best for artificial light?
natalie
July 24, 2015 at 10:49 amFor almost all my indoor photos I do drama, but only the brighten1.. not the first one. (snapseed) And then I use captain filter (in afterlight)
Afton
July 27, 2015 at 12:45 amLOVE this post!! Uhh-mazing! Thanks so much for sharing your great tips!
Claudia
July 31, 2015 at 2:47 pmThanks so much! I have tons of apps and use Snapseed too. I have played with Drama filter before and loved it. Will have to download Afterlight because I keep hearing its a good app.
Jana
June 1, 2016 at 8:21 amAmazing tips and useful, also a very comprehensive step by step tutorial, thank you! I have used neither snapspeed nor afterlight, instead I do my edits with PicsArt mobile editing appr. There is also a drama effect which I love very much and use pretty often. What I like most about PicsArt is that it is full featured and you don’t need to use other apps to get the result you want. a bonus point-the app is FREE!
Simply CrysB
June 9, 2016 at 12:03 pmThis is AMAZING!!! Thank you so much for sharing this info! I’m so glad I found your blog!!
Diana
June 20, 2016 at 6:37 pmThank you!!!! Do you know of any filter apps that can blur the background in IPhone pictures?
natalie
November 7, 2016 at 11:27 amface tune!!
Richa
June 27, 2016 at 2:31 pmI reached your blog through Abby, and i am so happy i did. this is such great info!!! My iphone takes grained pictures but these apps made a dramatic effect. I would put the photos which i edited on my blog (www.allthatsmom.co.in) soon. Do check them and let me know
@allthatsmom
Katrina
July 4, 2016 at 3:16 pmThank you so much for posting this! I like how easy-to-follow you made it!
Naomi
August 31, 2016 at 5:02 pmThank you thank you thank you!! You have saved my horrible photos, thank you for sharing this! I could finally delete all other photo editors on my phone and just have snapseed! It has all features I use in one and more.
Meli
October 11, 2016 at 3:16 pmThank you for sharing! This quick how to honestly helped me out a lot. Being a beginner blogger and a Instagram lover things like this sure help!